
When it comes to eating, I'm all about eating fresh. I love wandering through farmer's markets on the weekends to find the best and most unusual produce. Creating an edible garden in my own backyard has been a dream of mine ever since I can remember! To create this dream project, we teamed up with Lowe's to make the ultimate edible garden. Follow along to see how we created this amazing veggie-filled space, from building an entire outdoor structure to making the most modern plant markers you've ever seen.

Now, let's get to how we brought this thing to life!
Creating the garden was definitely a team effort! We worked closely with Lowe's as well as a gardener to make sure we planted everything in the optimal place.
Creating the Garden
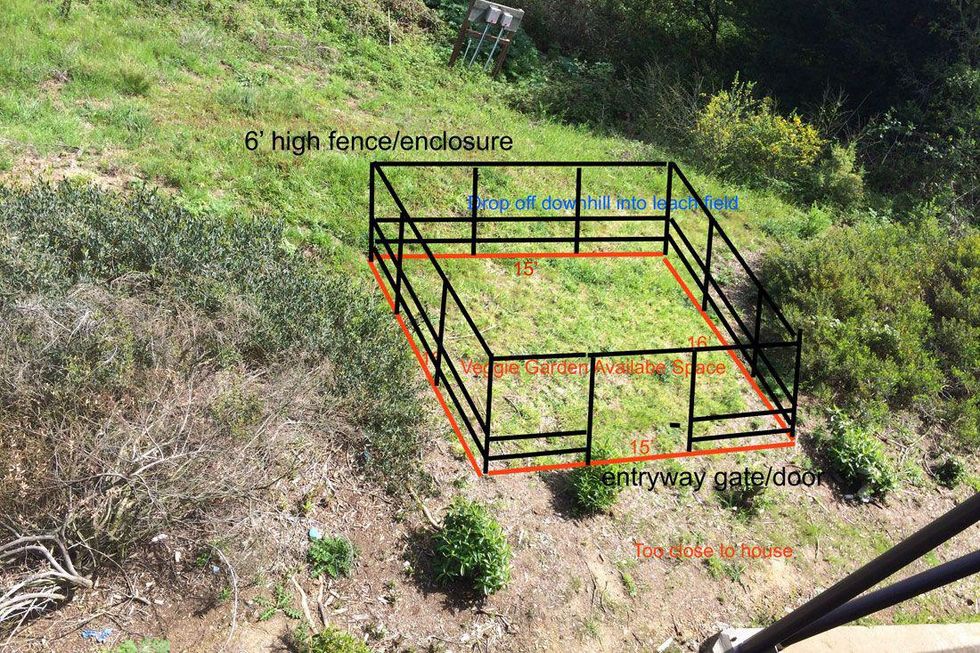
First, we drew mocks to plan out where the garden might go. It needed to be far enough from the house to prevent shade, but close enough to easily walk to.

Then, we used a site called The Old Farmer’s Almanac Garden Planner to plan out the entire garden. Don’t laugh at how old fashioned it sounds — it’s actually a really amazing website that does all of the research for your plant selection and layout. It’s also a great way to be able to share plans in a visual way with lots of people.
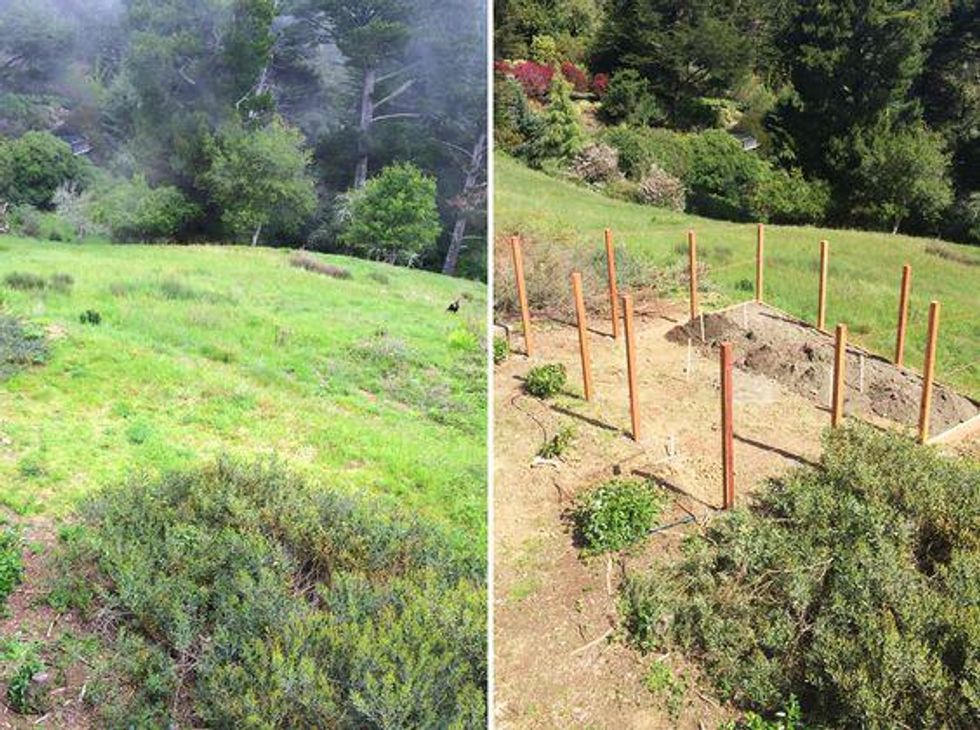
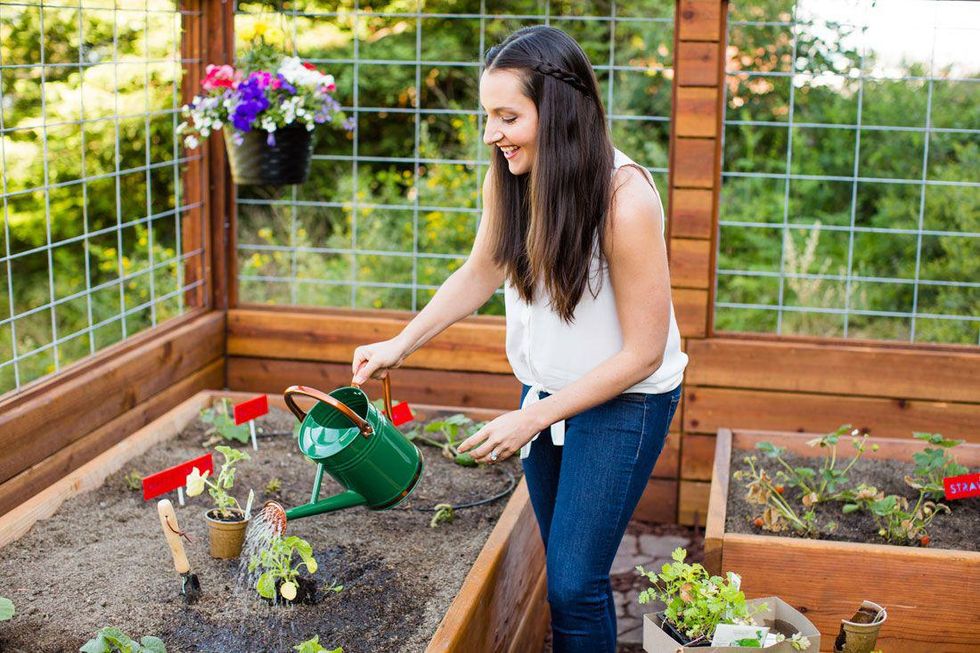
Time to build! In our backyard, we didn’t have a flat space so the first thing to do was level the ground. We built the exterior and then water proofed the interior wall to protect the wood.

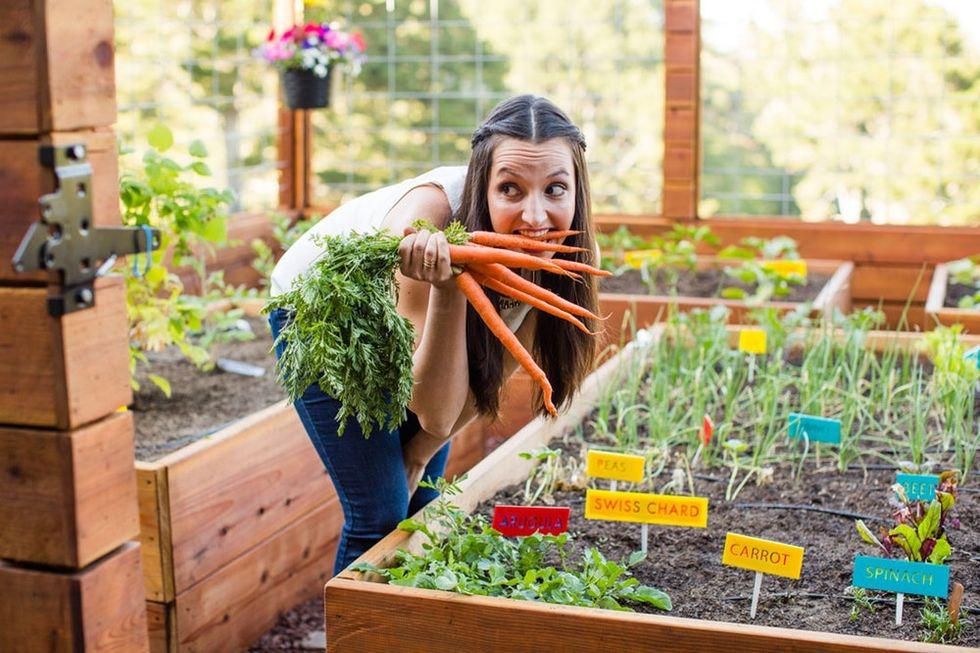
We created a water irrigation system plus direct water access with a faucet and everything! After installing planter boxes, we stained the structure to match the color of our home. Then we planted the fruits and veggies!
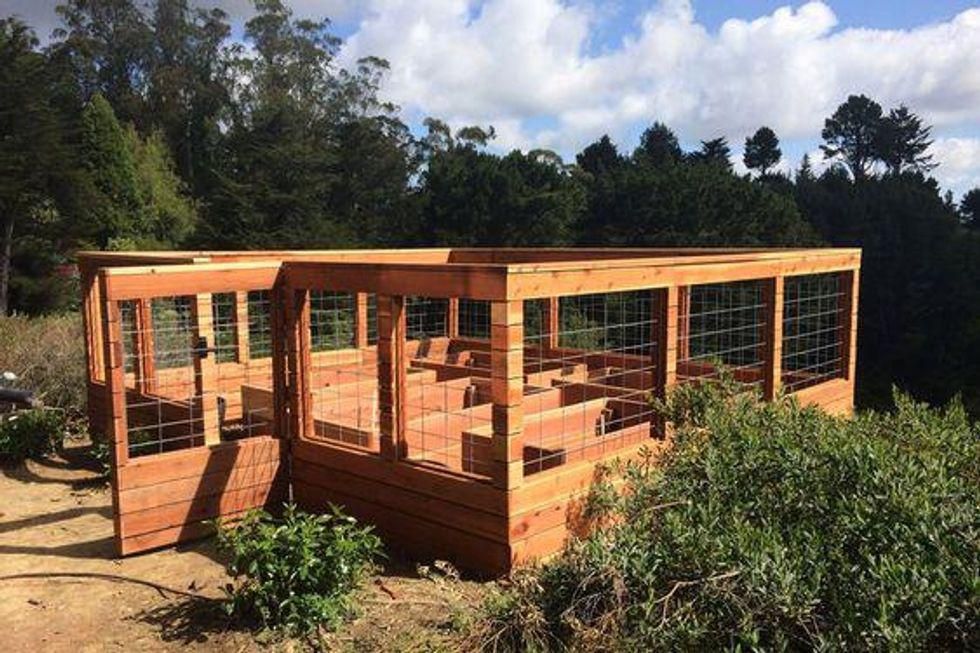
Ta-dah!
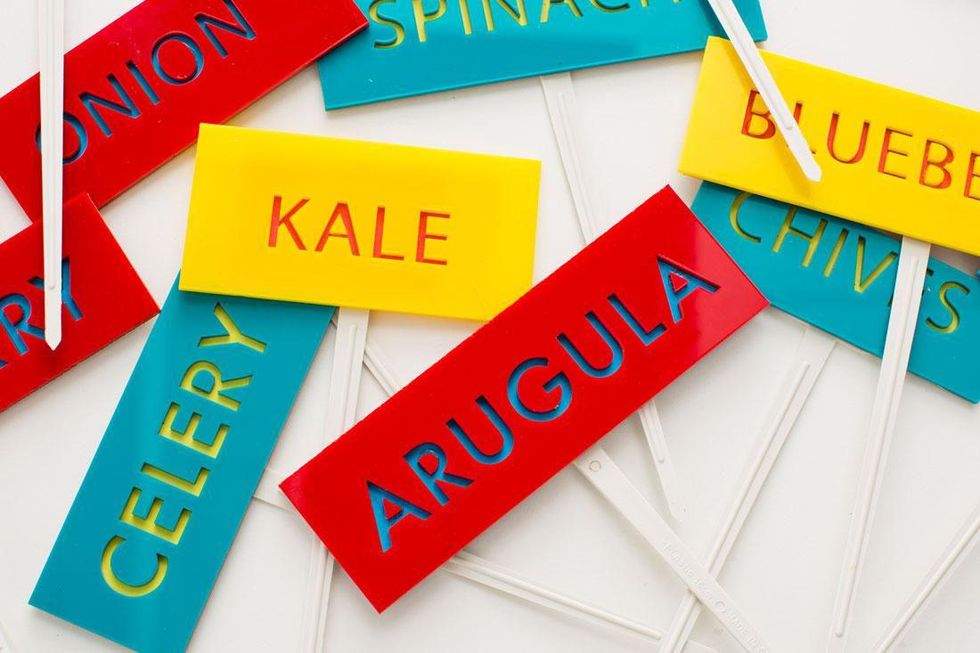
Laser Cut Plant Markers
Materials:
– laser cut acrylic signs
– colorful paper
– tape
Tools:
– scissors
– pen
Instructions:
1. Use a laser cutter to print out signs on acrylic or wood.
2. Cut a piece of colored paper to attach to the back.
3. Using Goop Glue, add the inserts of the letters that have fallen out.
4. Attach the garden stick on the sign using hot glue.
5. Stick that sign in your garden!
Let's get you on your way to a perfectly organized garden :)
We used a laser cutter to print out our signs, but if you don’t have access to one, you can print on card-stock and back with cardboard. To fill in the negative space of our letters, we measured out a rectangle slightly smaller than our sign and attached it to the back with tape. Glue in the small pieces to fill in the letters. We find that Goop does a great job for this task, but other glues will also work! Then, attach the garden labeling stick to the back of your sign using hot glue.

Now it's time to replace those boring plant markers your plants and seedlings came with ;)
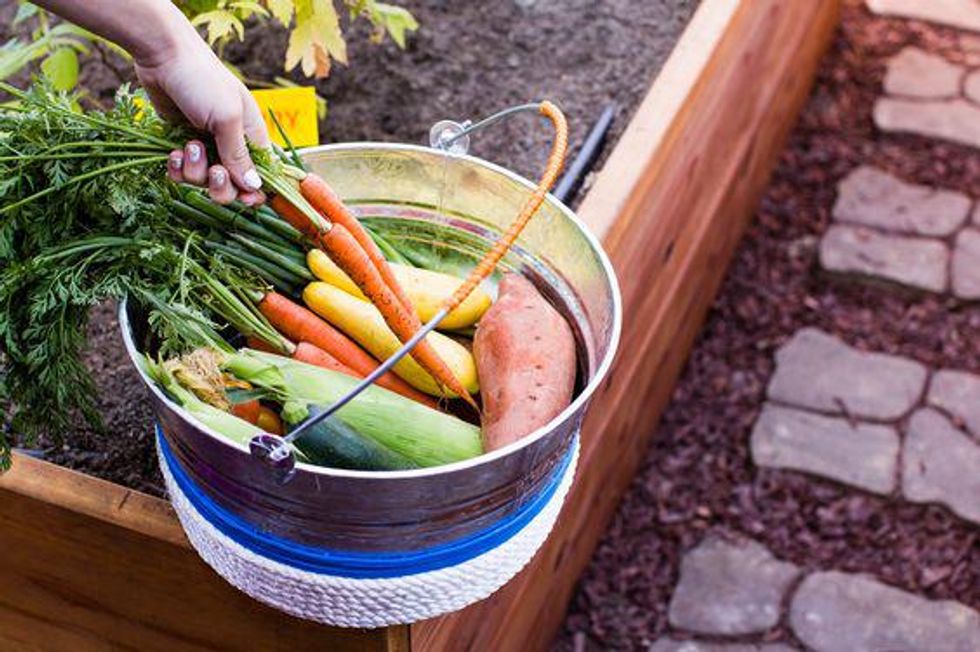
Oooh, now isn't that better? :) Now, onto making a more durable take on a basket to collect all your goodies as they grow!
Color Blocked Produce Bin
Materials:
– rope (various colors and thicknesses)
Tools:
– scissors
Instructions:
1. Using the thickest rope wrap the bottom portion of your bucket adhering it with hot glue.
2. After wrapping about 2 inches, change to the second thickest rope. Wrap and glue for about another 2 inches.
3. The thinnest rope will be used to wrap the handle. Tie the rope onto the handle and start wrapping. Use a little glue to secure in place.
4. Go out and garden those veggies!
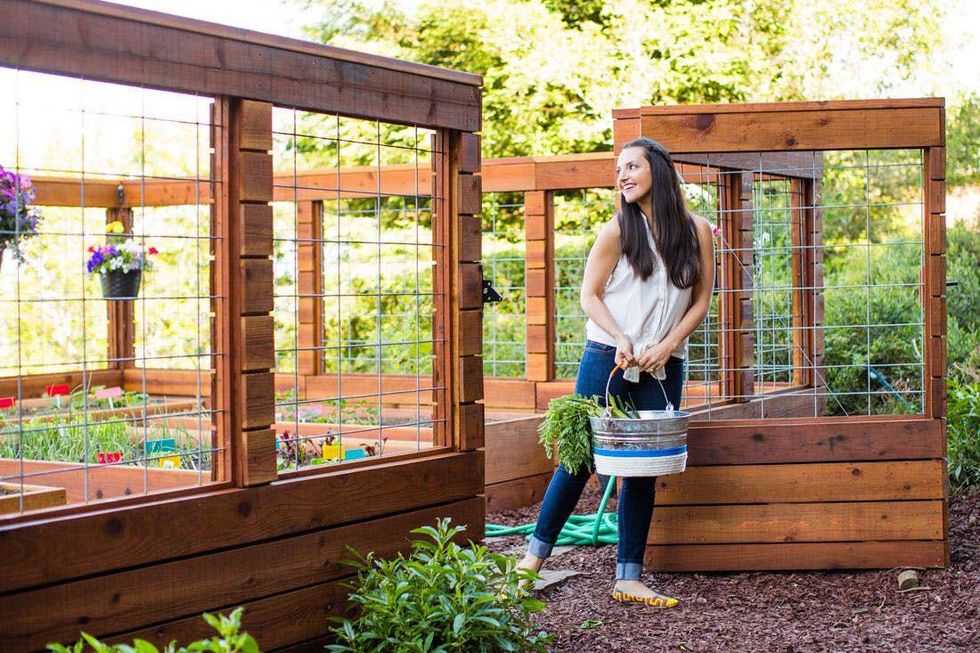
Instead of a basket for gathering, we went for a more durable bucket. This way, you can even spray herbs and what not to keep them fresh if you can't put them right in the fridge.
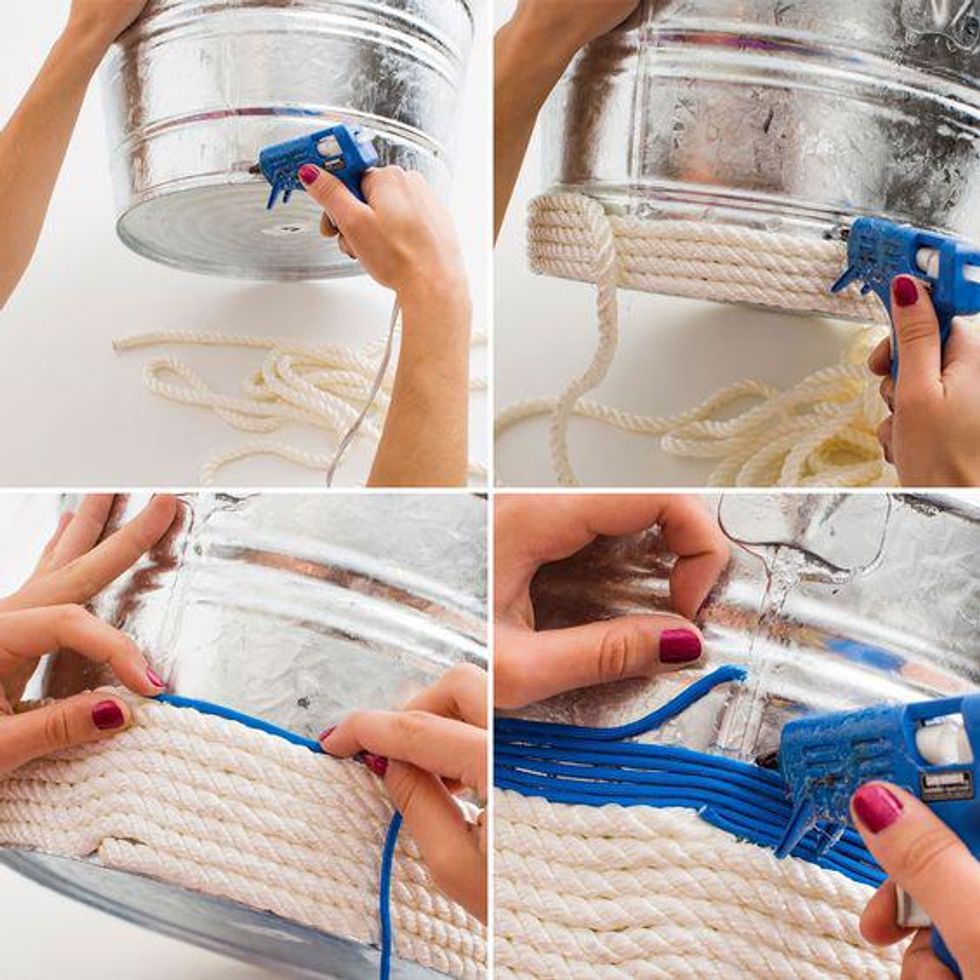
Squeeze out a large pile of hot glue to attach your thickest rope. Add glue about every 1-2 inches as you wrap the rope up the bucket. Once you've wrapped at least 2 inches, cut the rope on a diagonal and glue down. Time to wrap the second thickest rope. For us that was our royal blue. Follow the same gluing, wrapping and cutting pattern from above.
Time to add some flare to your handle. Tie a knot and wrap your thinnest rope around to create a nice handle grip. Add some glue periodically so the rope doesn't slip down the handle.
Color blocked bucket? Yes please!
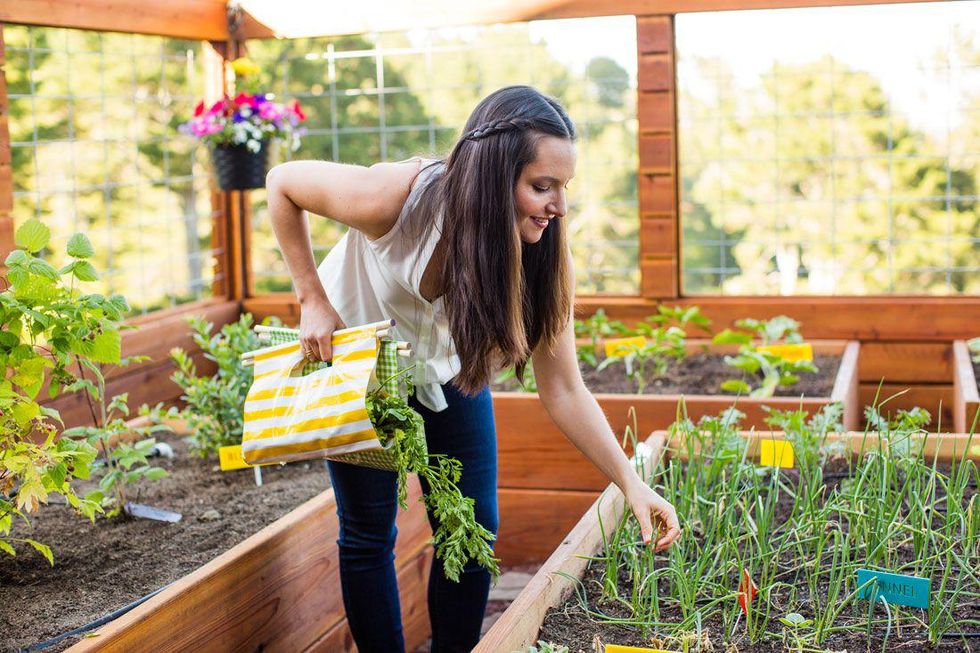
We also created little open-ended totes for you to collect produce to give to friends and family! :)
Thanks to Lowe’s for bringing this dream garden to life!
Follow us on Pinterest for more DIY inspo and check out our podcast episode with Lettuce Grow's Zooey Deschanel!
This post has been updated.


0 Commentaires