
Ladies, when something breaks or when you want to improve your space, don’t call a handyman. You’re no damsel in distress, after all! You just need the know-how to get those jobs done. That's why we teamed up with Sherwin-Williams® to create the Handygirl's Guide.
Part-life hack, part-adulting manual, we're here to arm you with the steps to completing DIY home projects all on your own. Our projects will help you fix up and level up your living room, bathroom, kitchen, and bedroom. Follow along and then conquer your home to-dos just like the capable, empowered woman you are.

Living Room
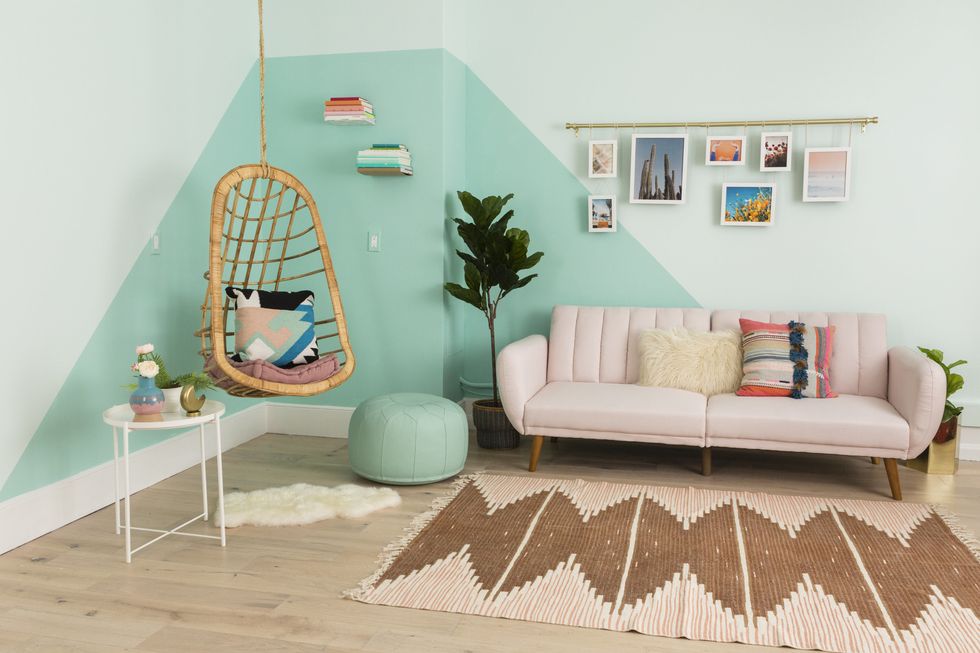
We’re giving your most lived-in room a practical and trendy upgrade. Scroll on to learn the basics of patching and painting your own walls, mounting an egg chair, and installing a hanging gallery. These projects came beautifully together in a living room, but you can literally do these projects in any room in your home.
Living Room: Patch and Paint a Statement Wall

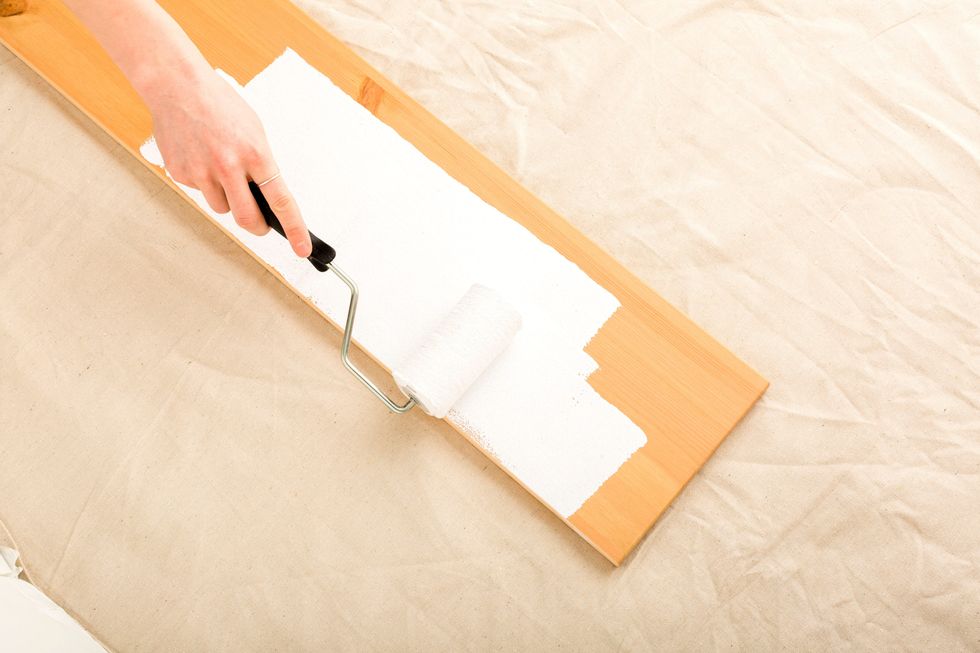
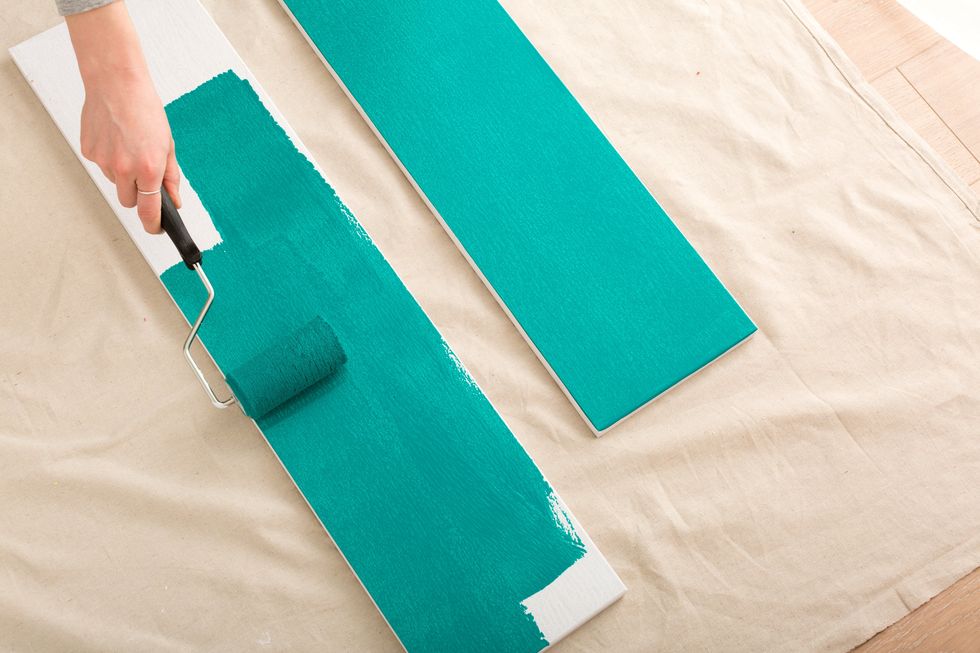
Learn how to patch pesky holes *and* give the room a vibrant, multi-colored effect. Why stop at just one shade when two will do?

Gorgeous and easy! Didn't catch all that? Here's the step-by-step gallery to walk you through the nitty gritty of completing this gorg statement wall look.
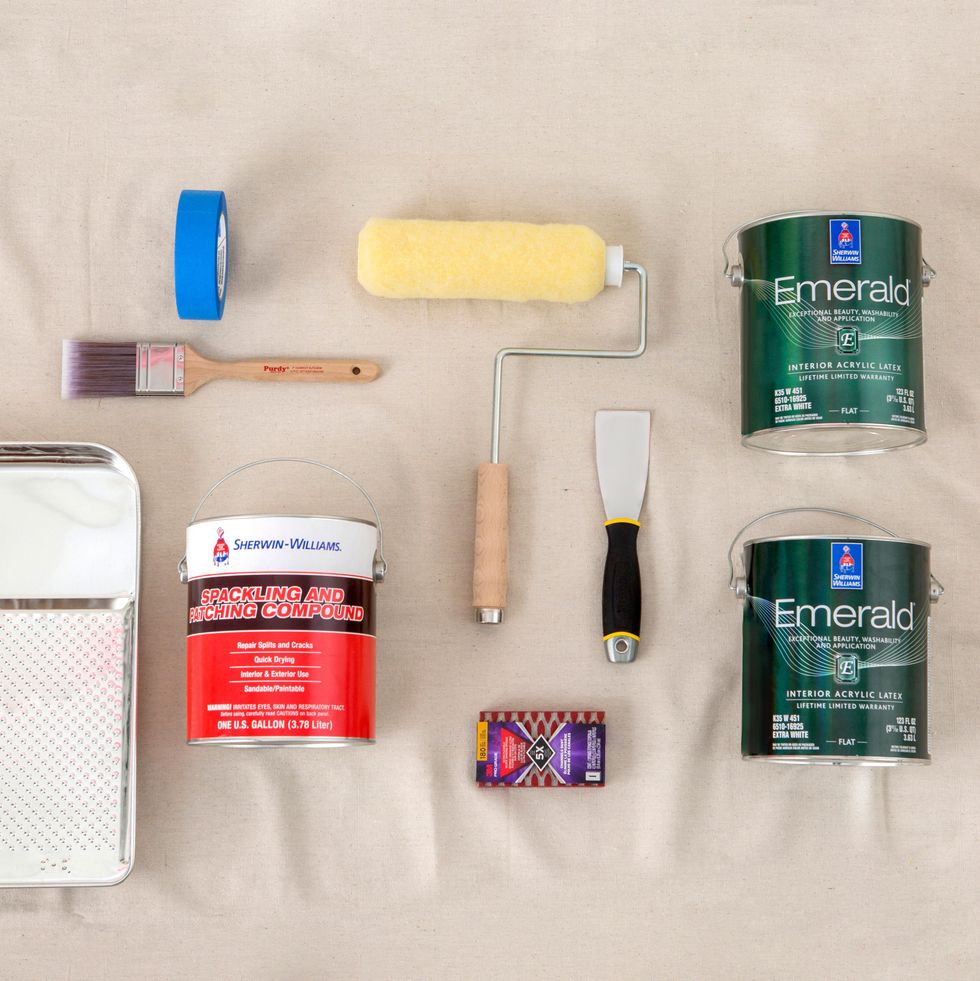
What you need:
- Paint: We used Sherwin-Williams® Emerald® Interior Paint in Embellished Blue (SW 6749) and Refresh (SW 6751)
- Spackling paste/hole repair
- Sandpaper
- Drop cloths/paper
- Rags
- Painter's tape
- Stir sticks
- Paint rollers
- Paint tray
- Paint brushes, for cutting in or touch-ups
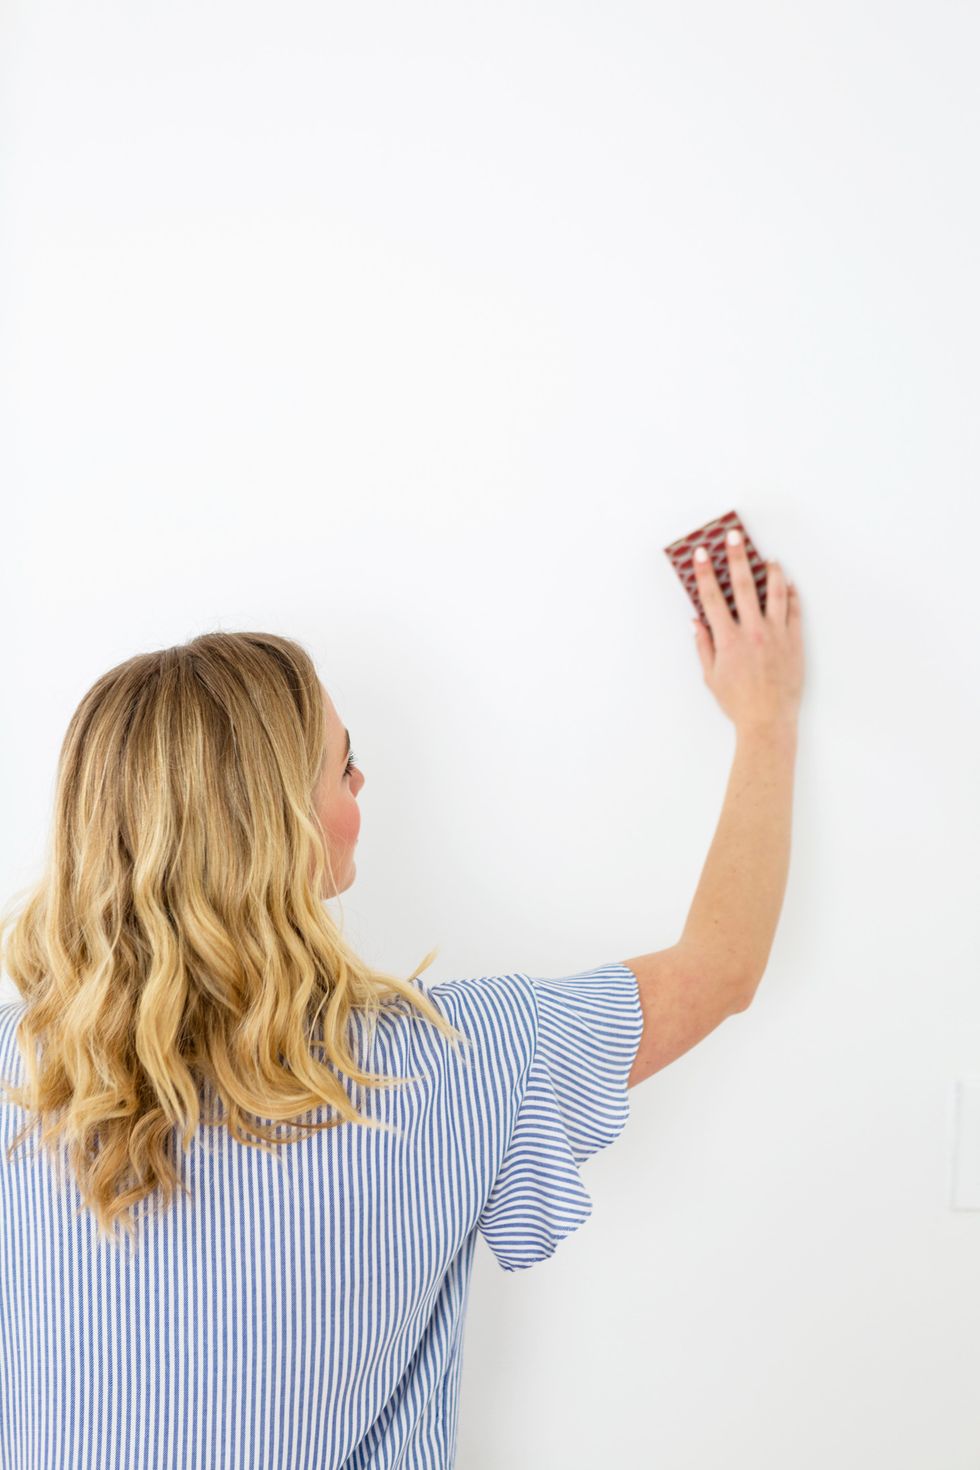
How To:
- Clean all surfaces.
- Apply spackling.
- Sand, and wipe away dust.
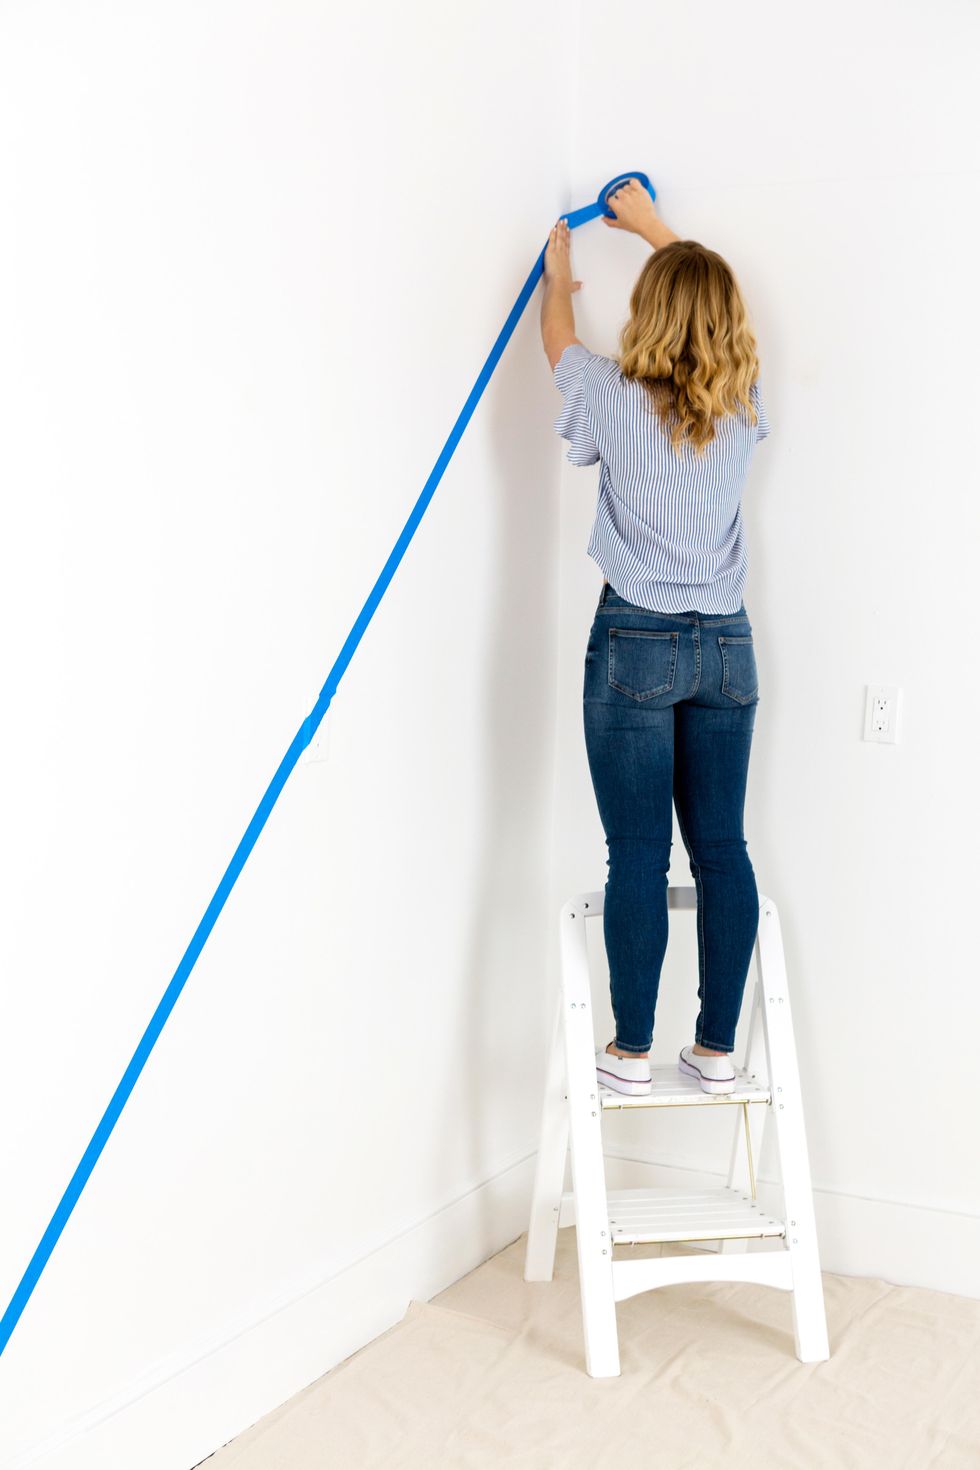
4. Add painter's tape to create your design.
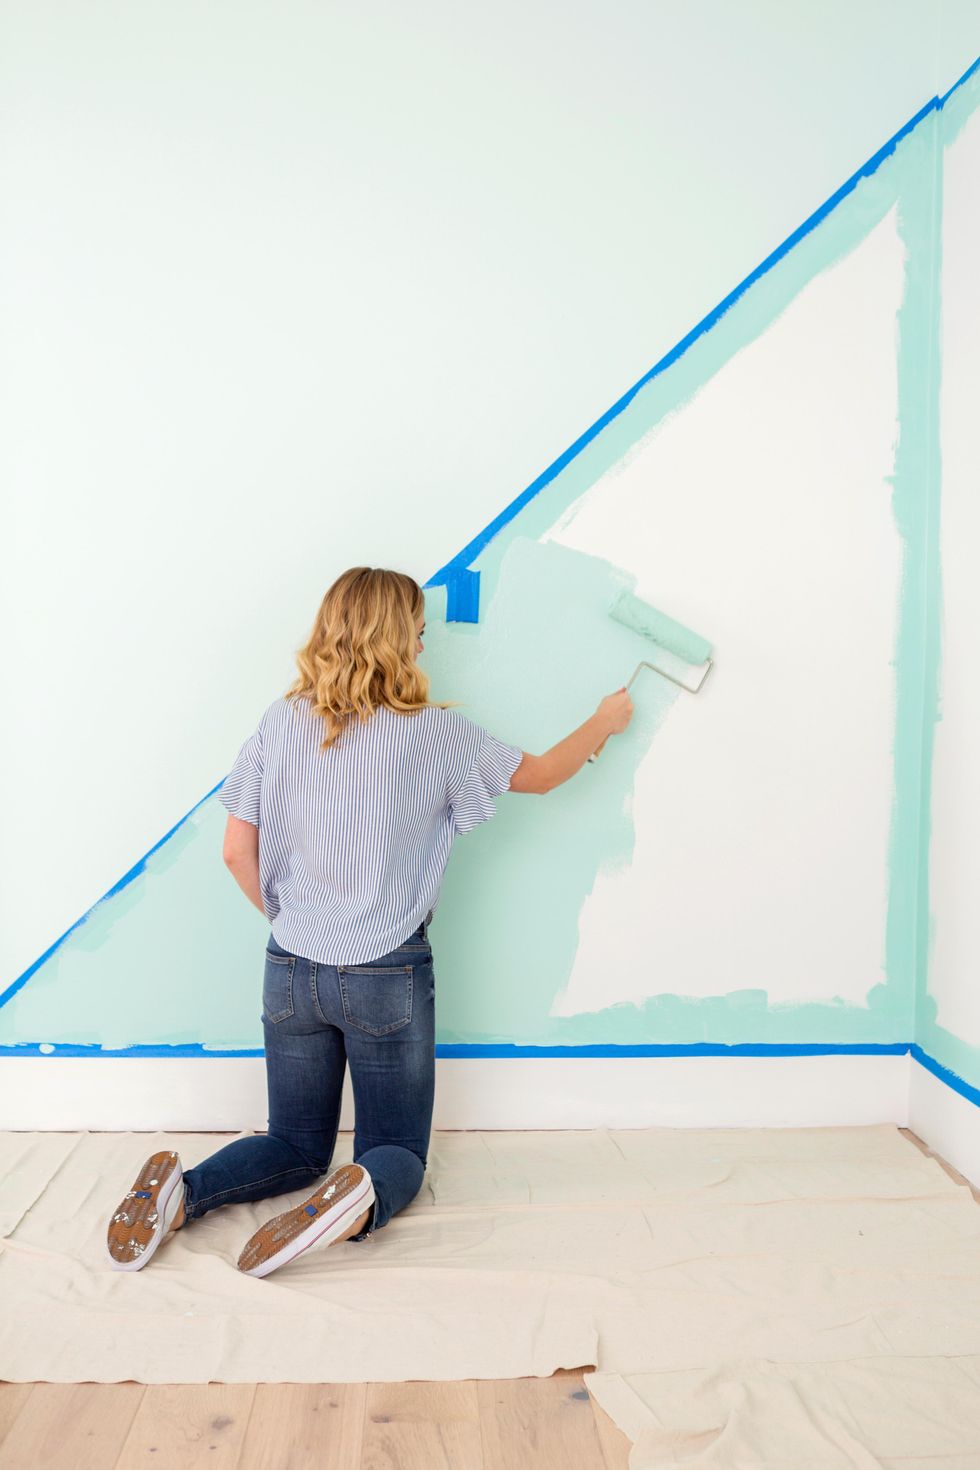
5. Apple lighter shade of paint and dry for 3 hours.
6. Adjust tape and apply second color.

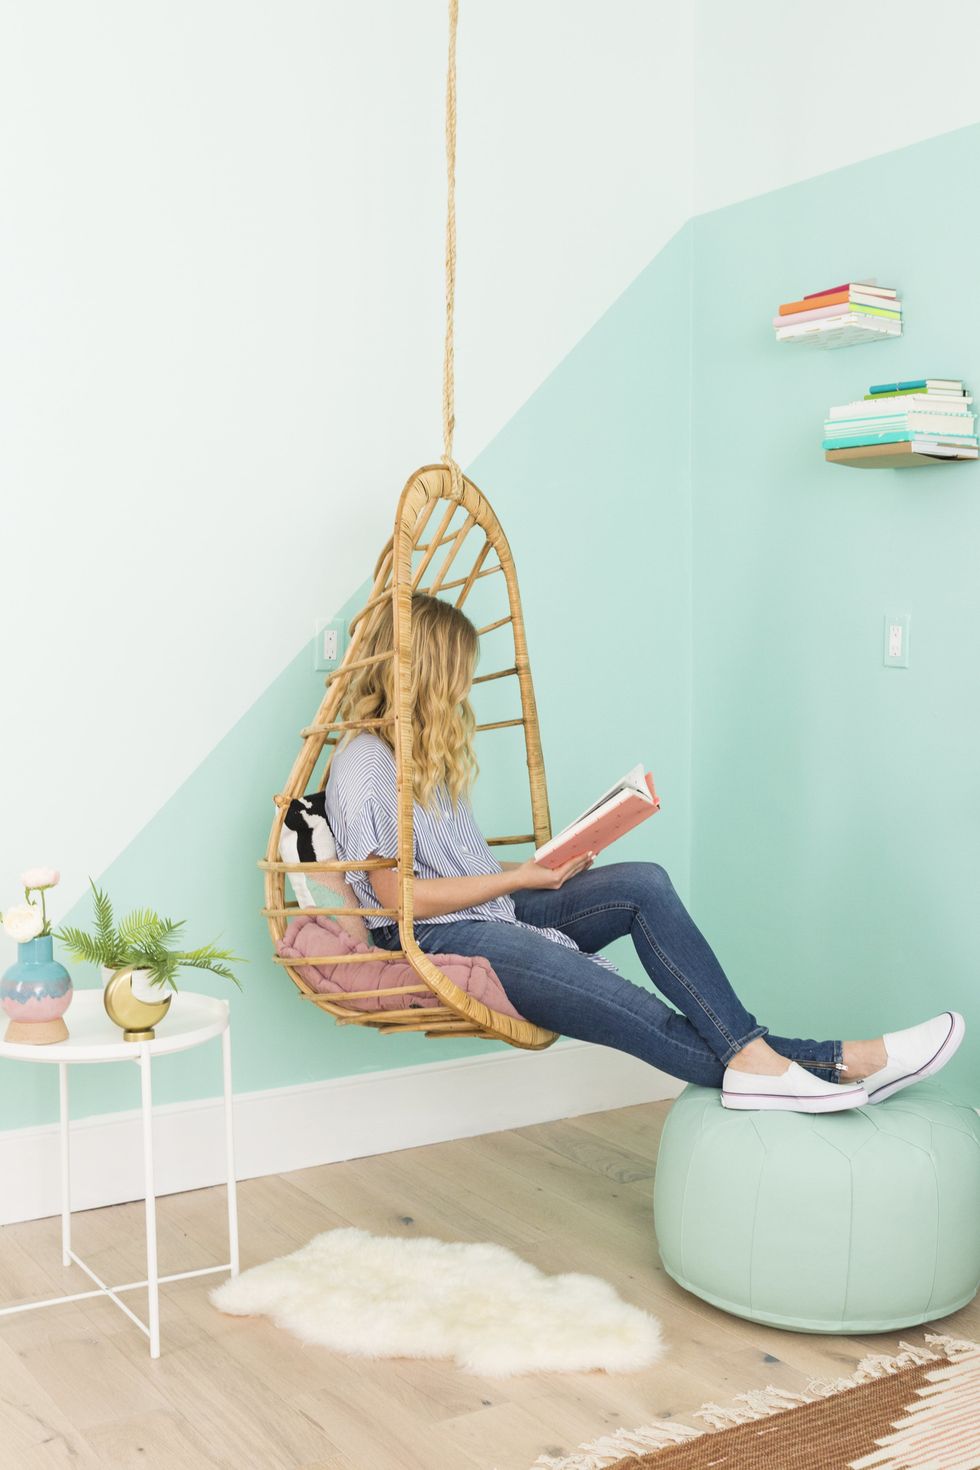
Let dry and voilà!

Style your room as you wish!
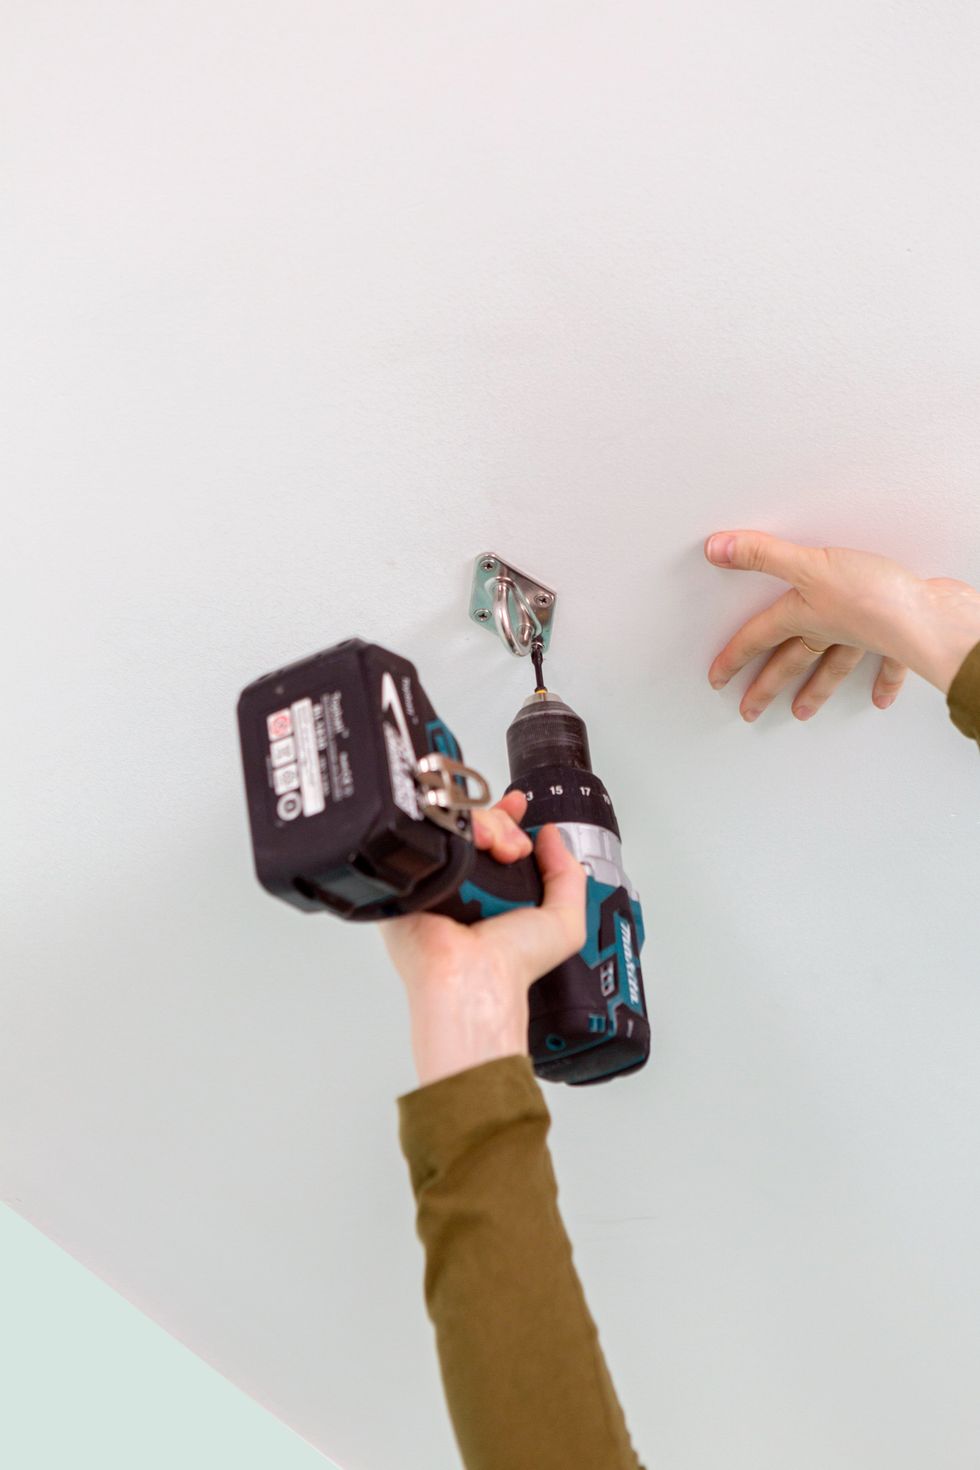
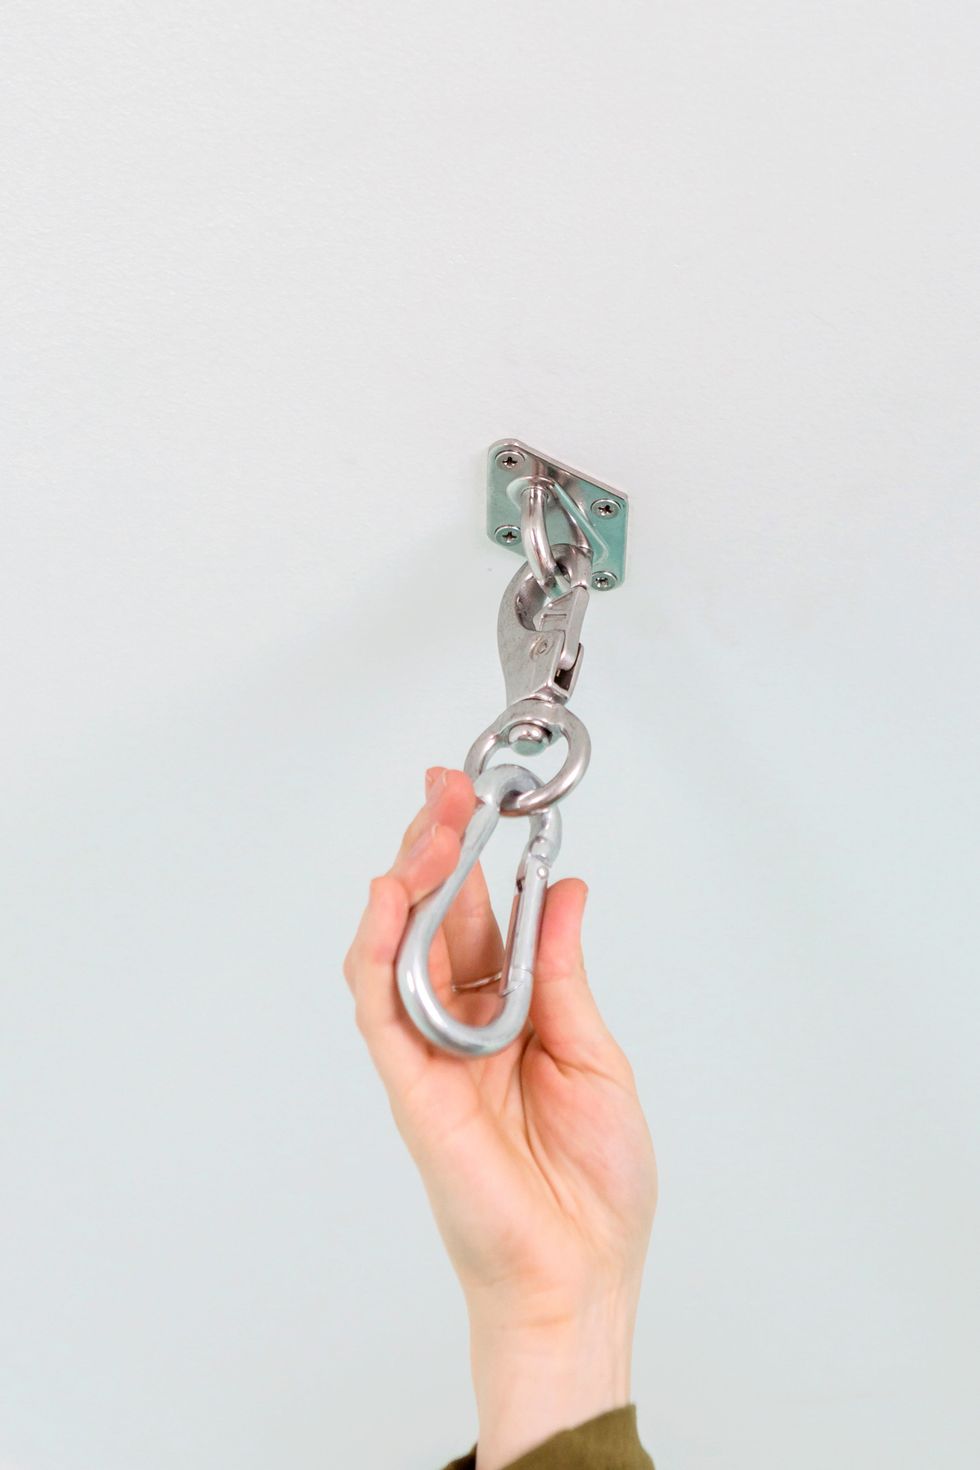
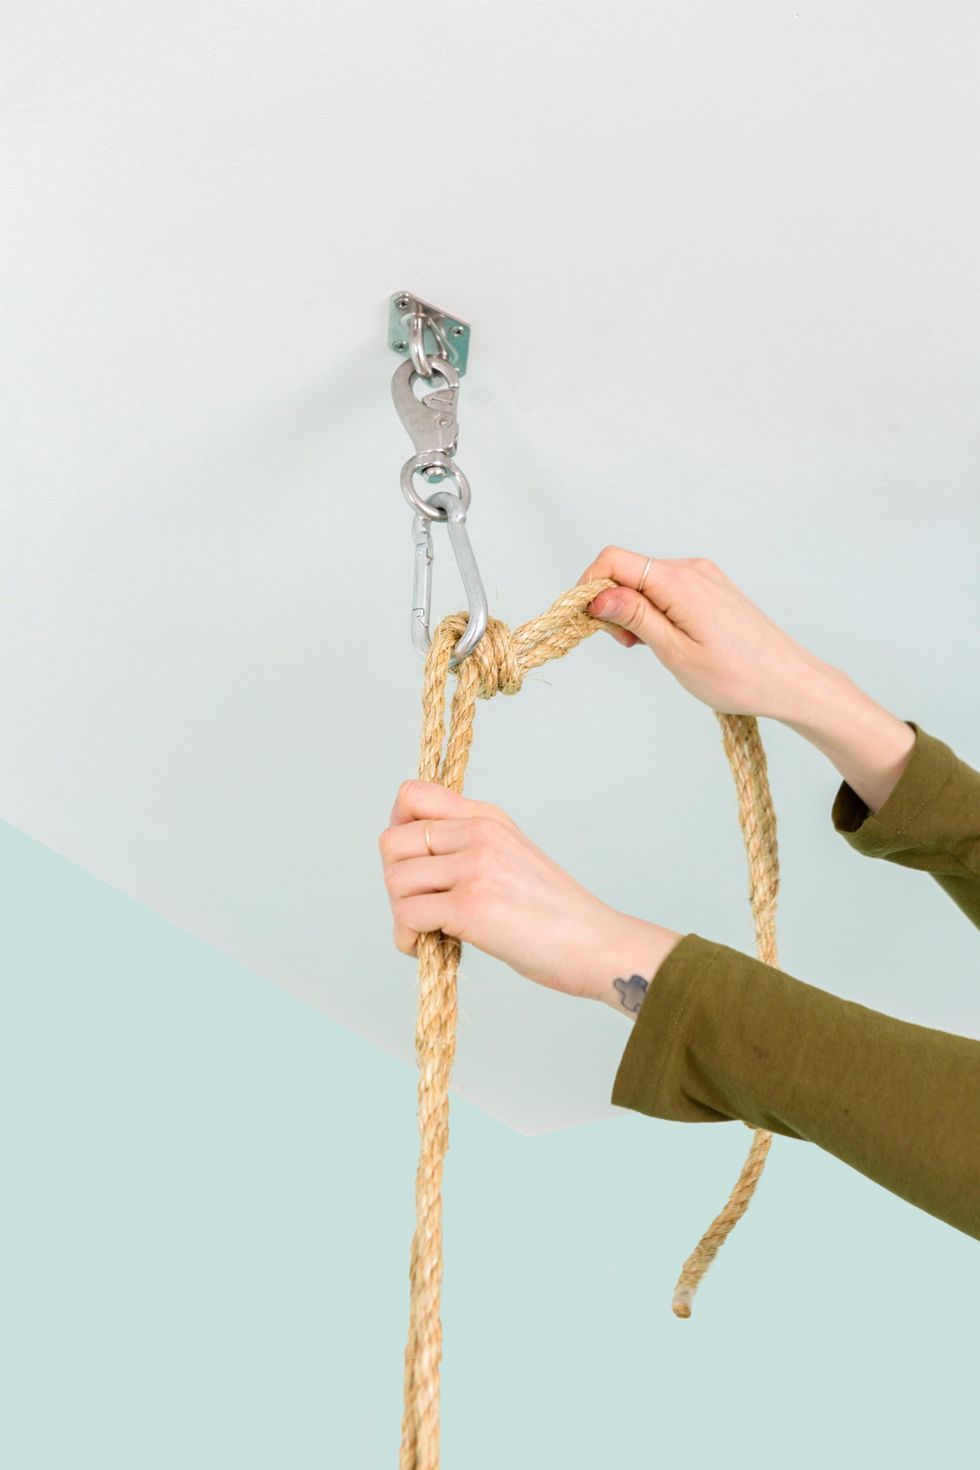
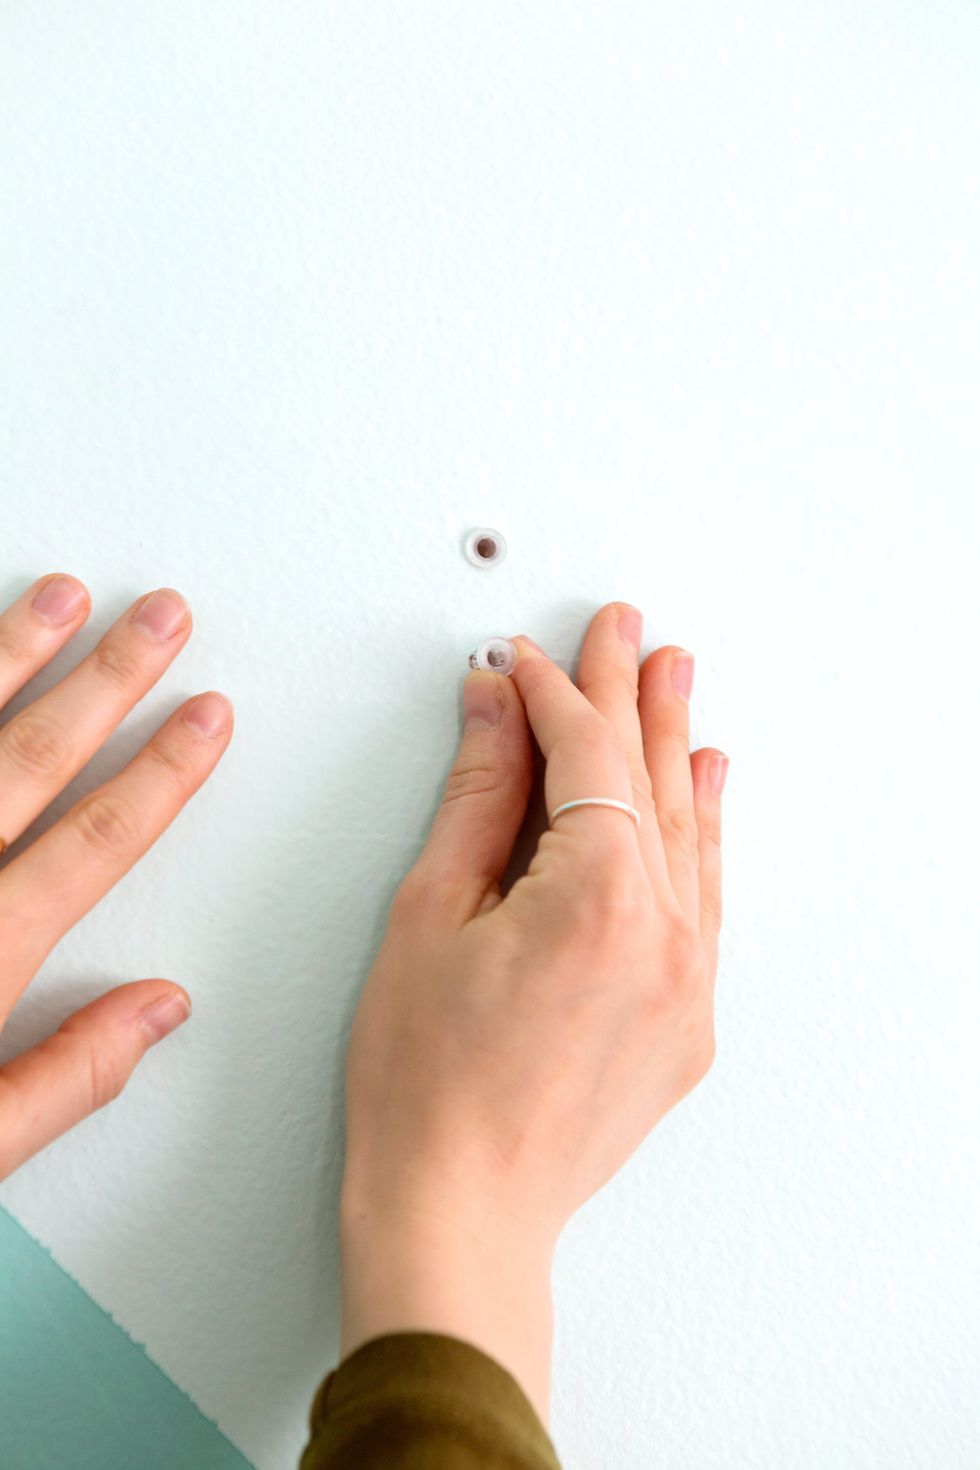
Living Room: Mount a Hanging Chair
Hanging a basket chair in your home is a creative and cozy way to utilize small spaces while adding dimension, style, and comfort. Learn the safest and most stylish way to add one to your living room.
Follow our visual guide to complete your project!


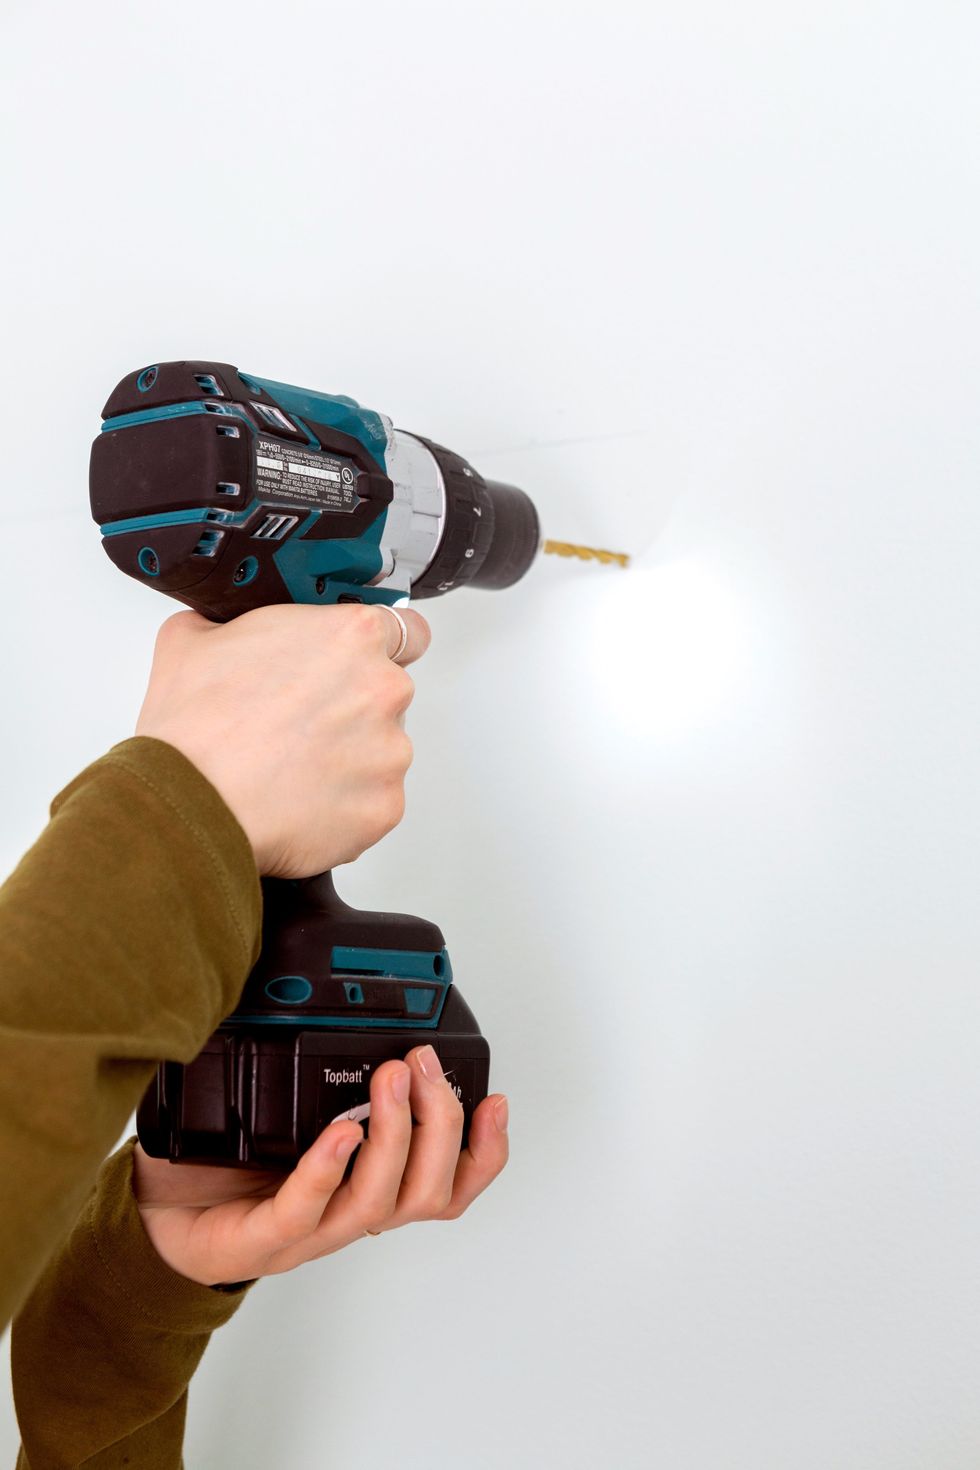
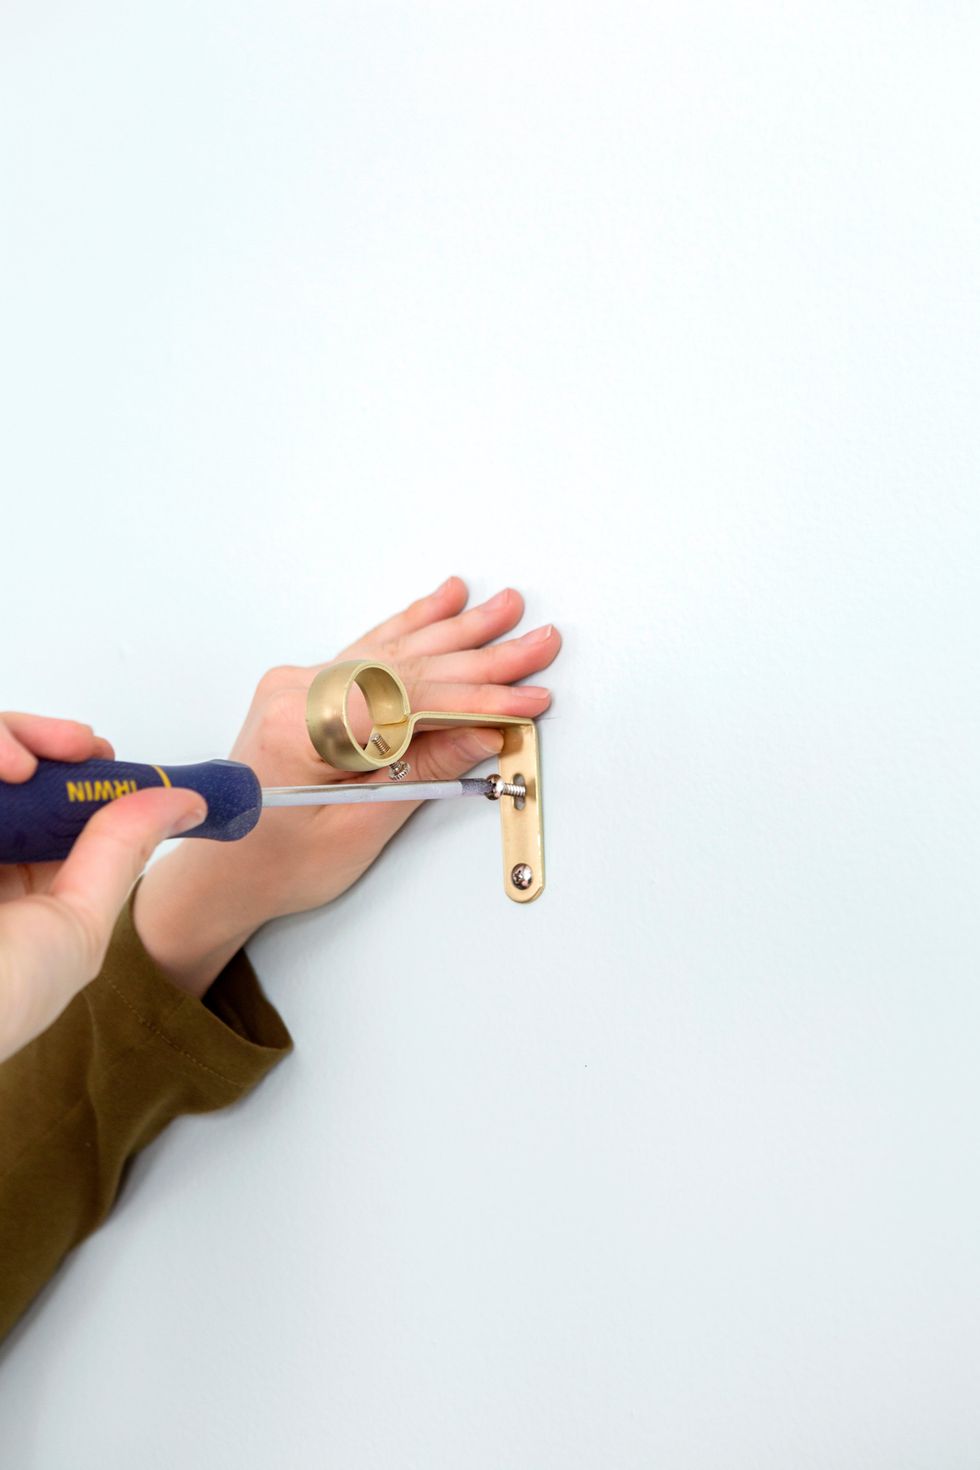
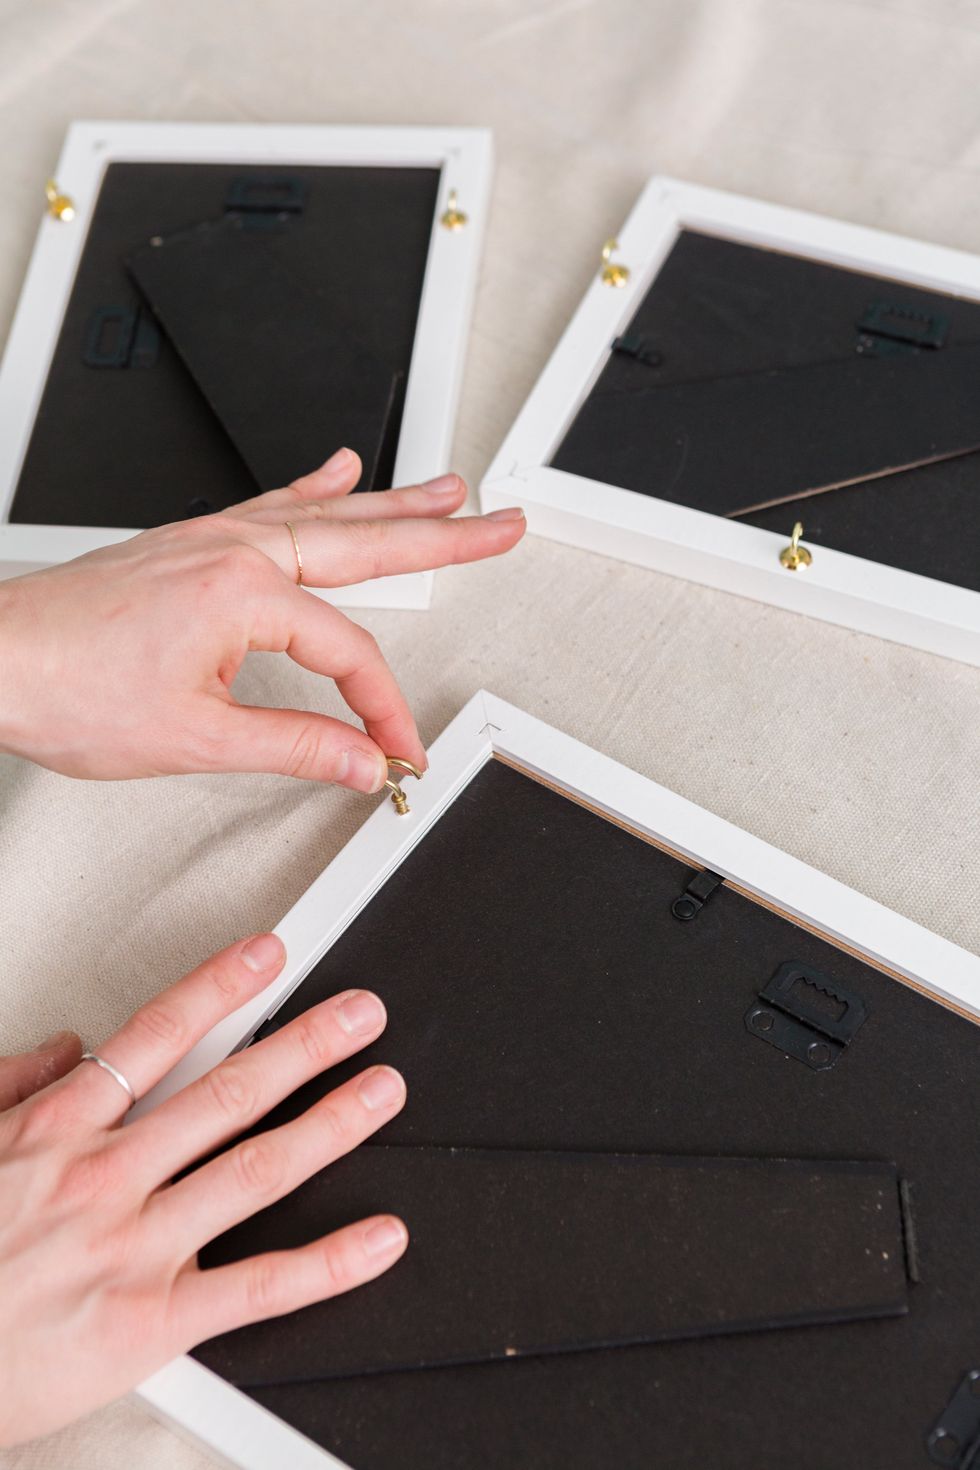
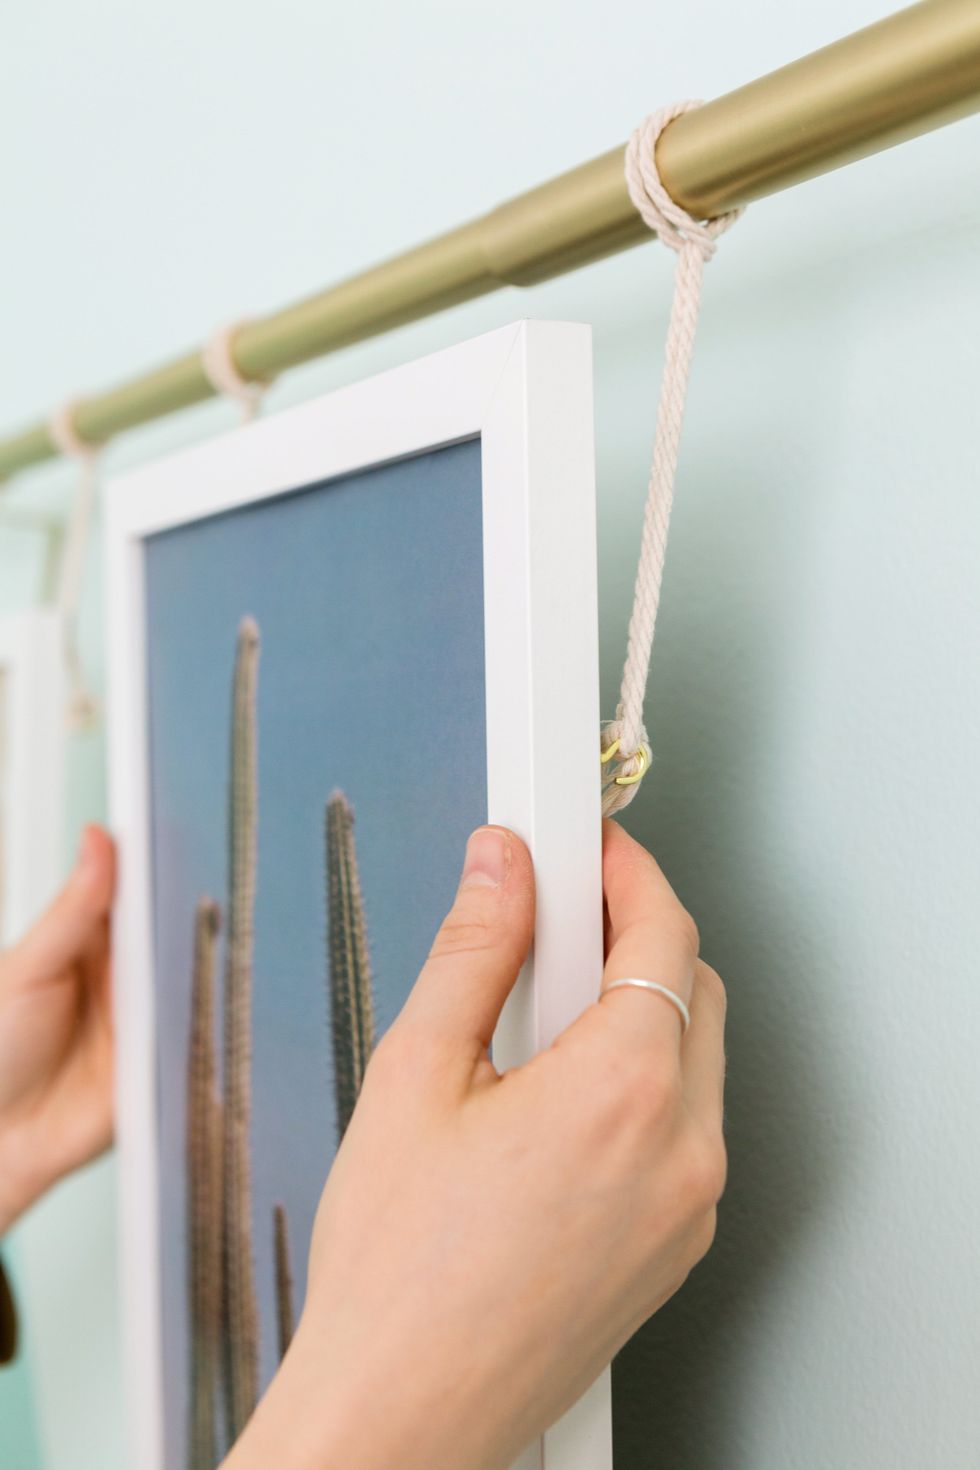
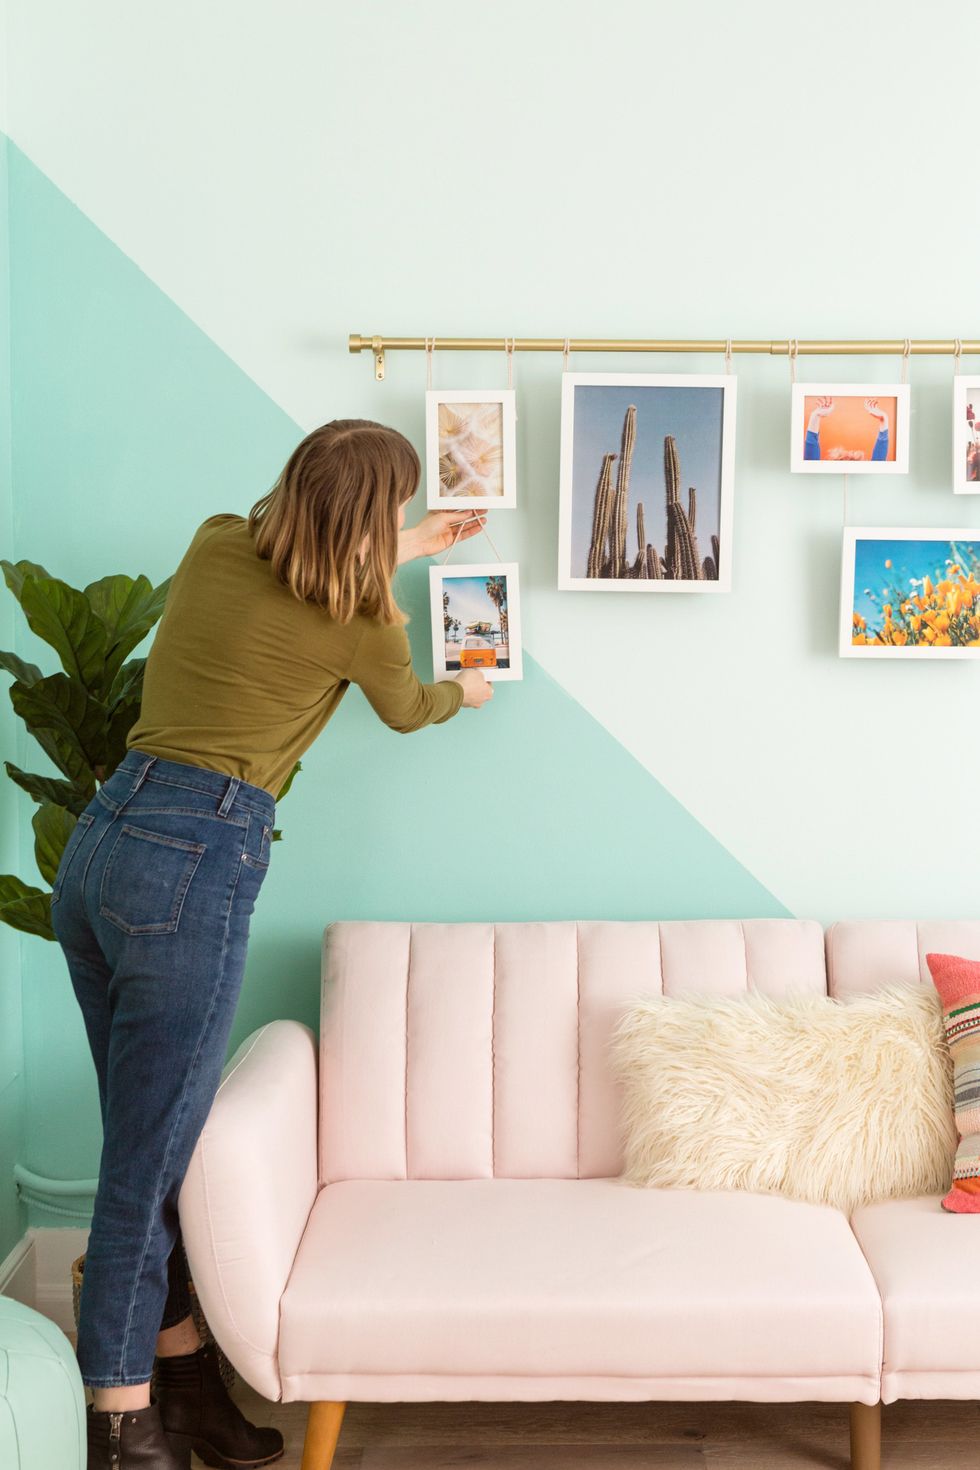
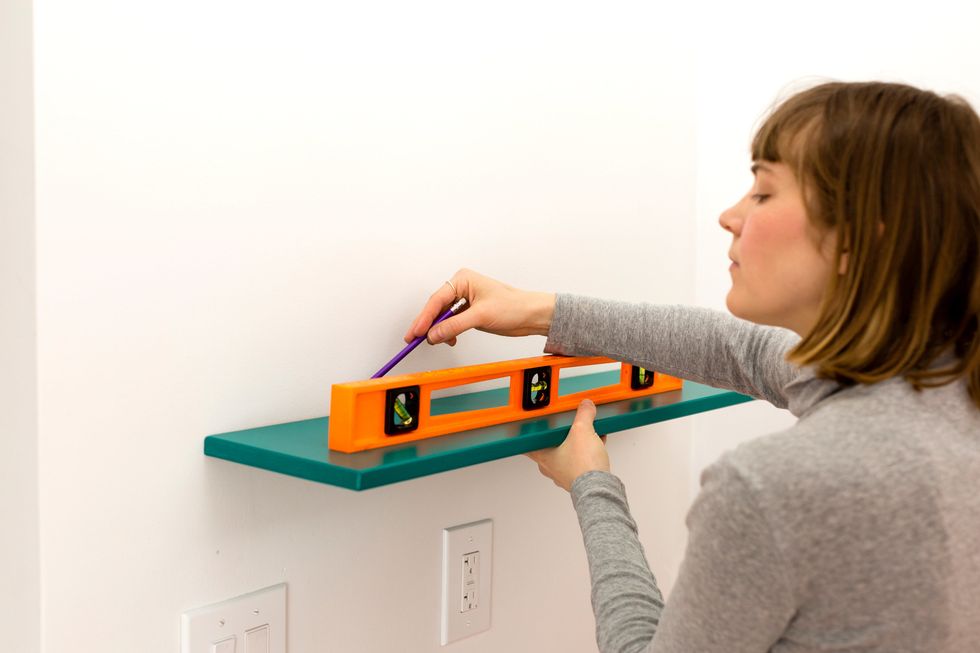
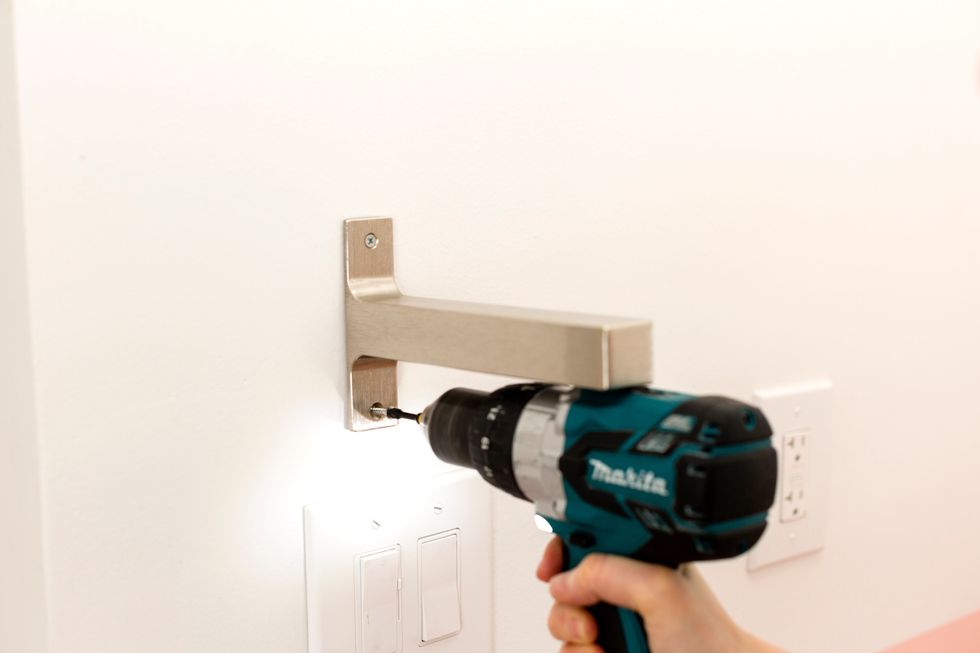
Living Room: Install a Hanging Picture Gallery

Create a colorful hanging gallery with your favorite artwork to completely transform the look of your living room. Mix and match photography, paintings, and anything else that tickles your curating fancy.
Follow our visual guide to complete your project!


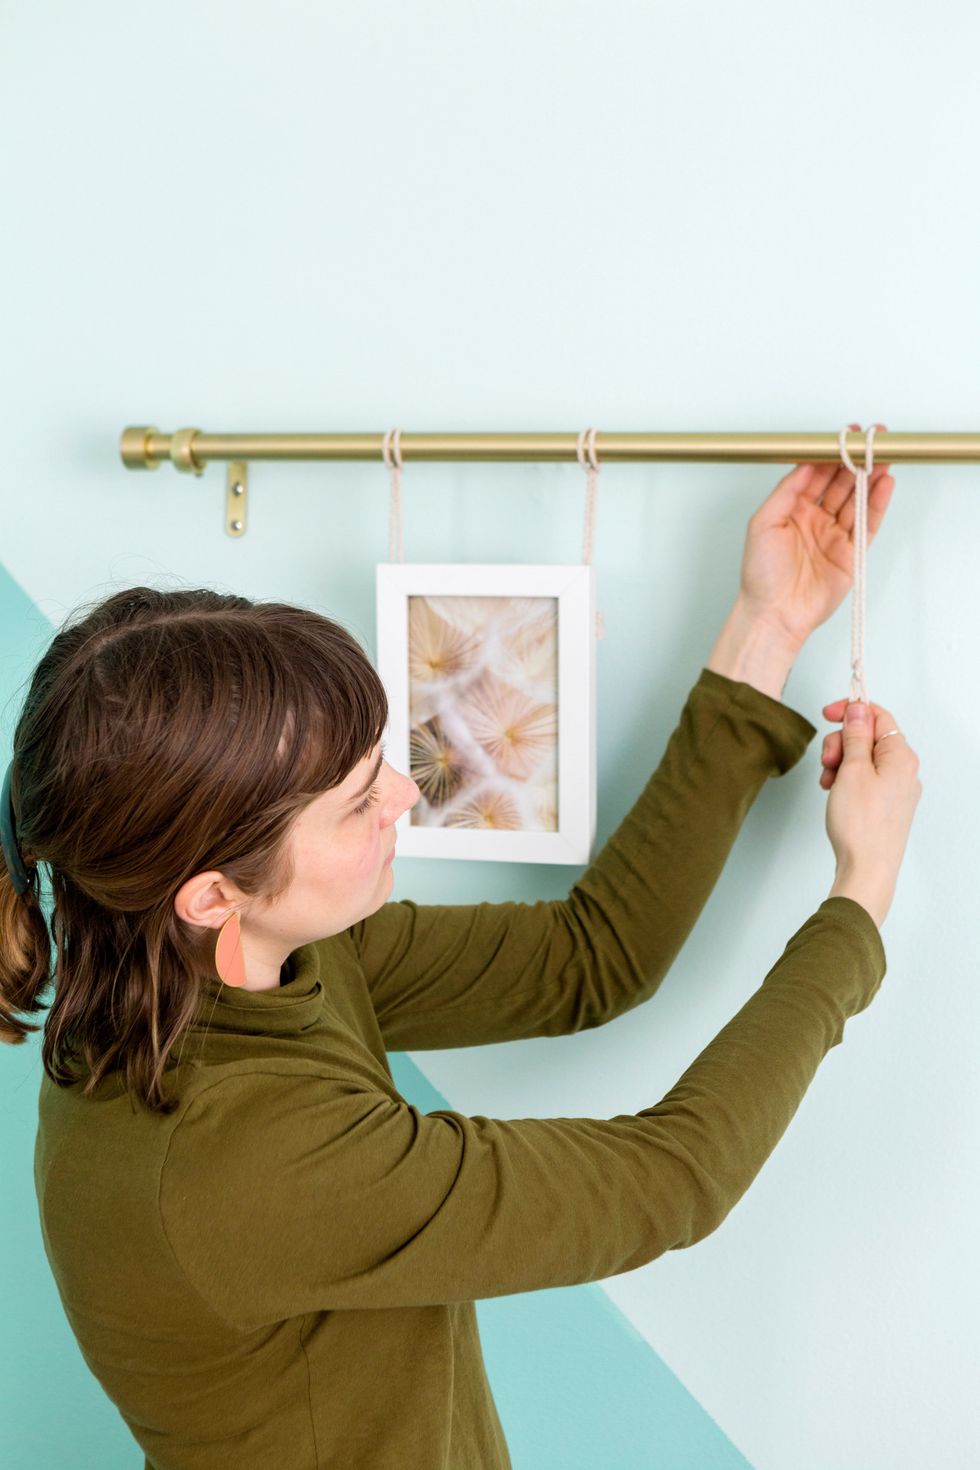


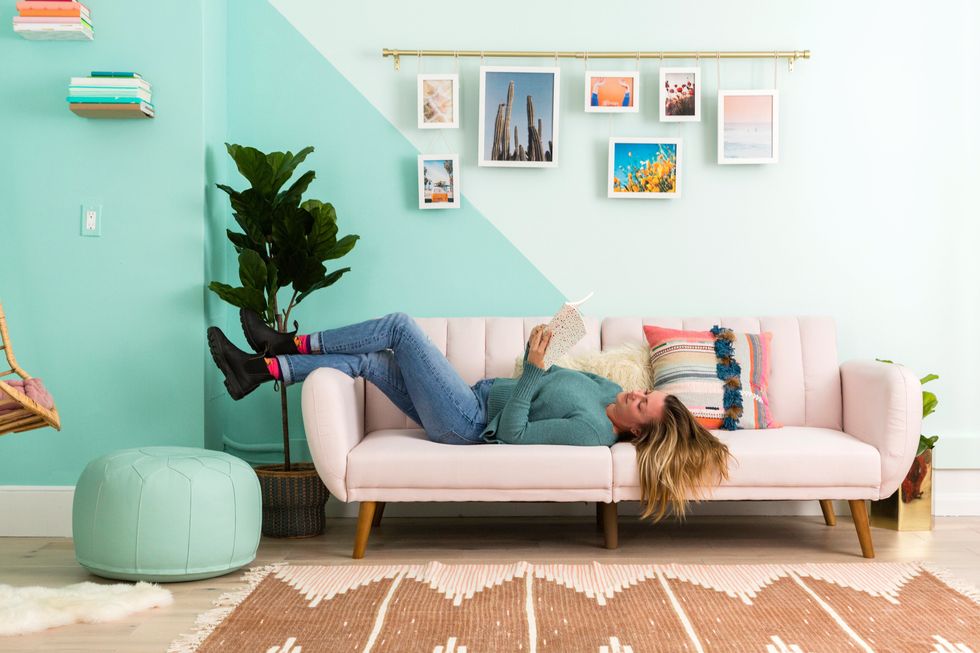
Get The Look from Our Living Room: UO Cappa Curtain Rod, Frametory Gallery Wall Frames, Umbra Conceal Floating Shelf, Bayou Breeze Swing Chair, Hammock Hanging Kit, Macrame Rope, Novogratz Brittany Sofa Futon.
Now, let's get cookin' in the kitchen!
Kitchen

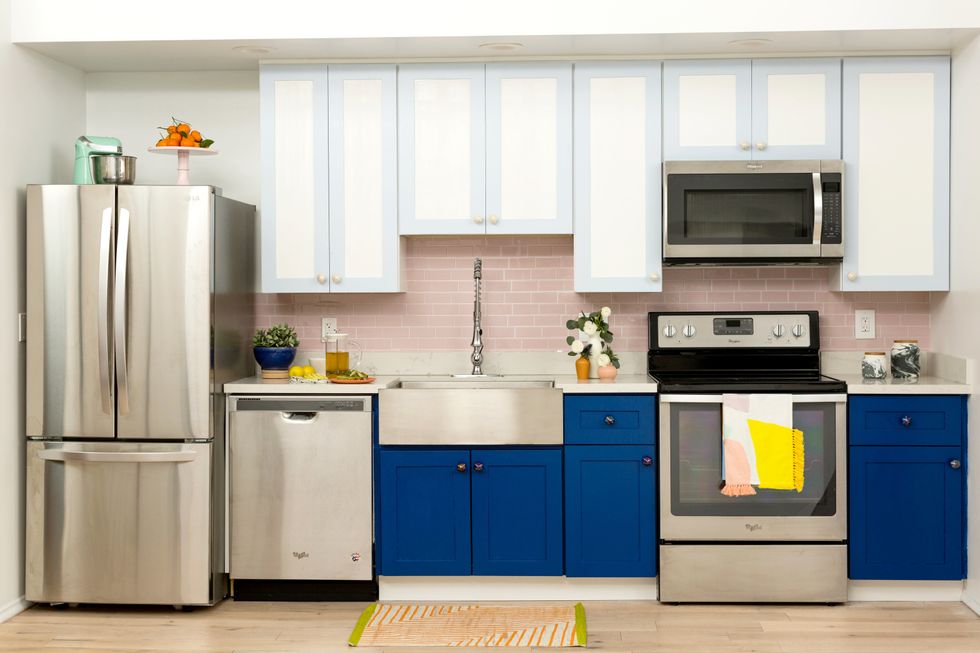
No matter what you use your kitchen for — making toast, practicing for Top Chef, or a mix of the two — it’s truly the heart of the home. Give it some love by elevating your cabinets with colorful, two-tone paint, adding a bold tiled backsplash, and upgrading your old faucet with a chic new fixture.
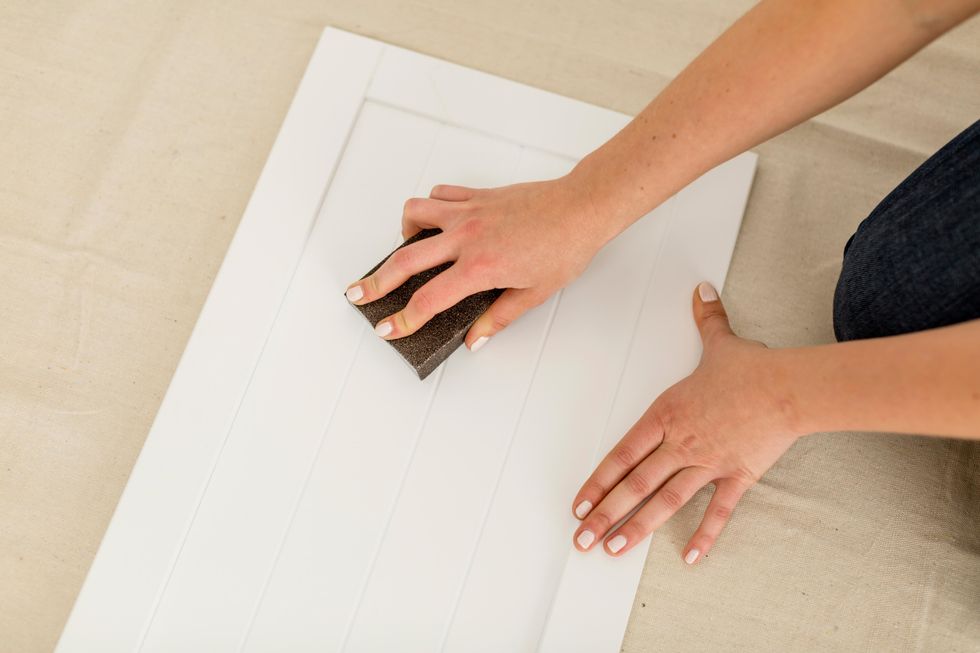
Kitchen: Revive Old Cabinets with a Two-Toned Facelift
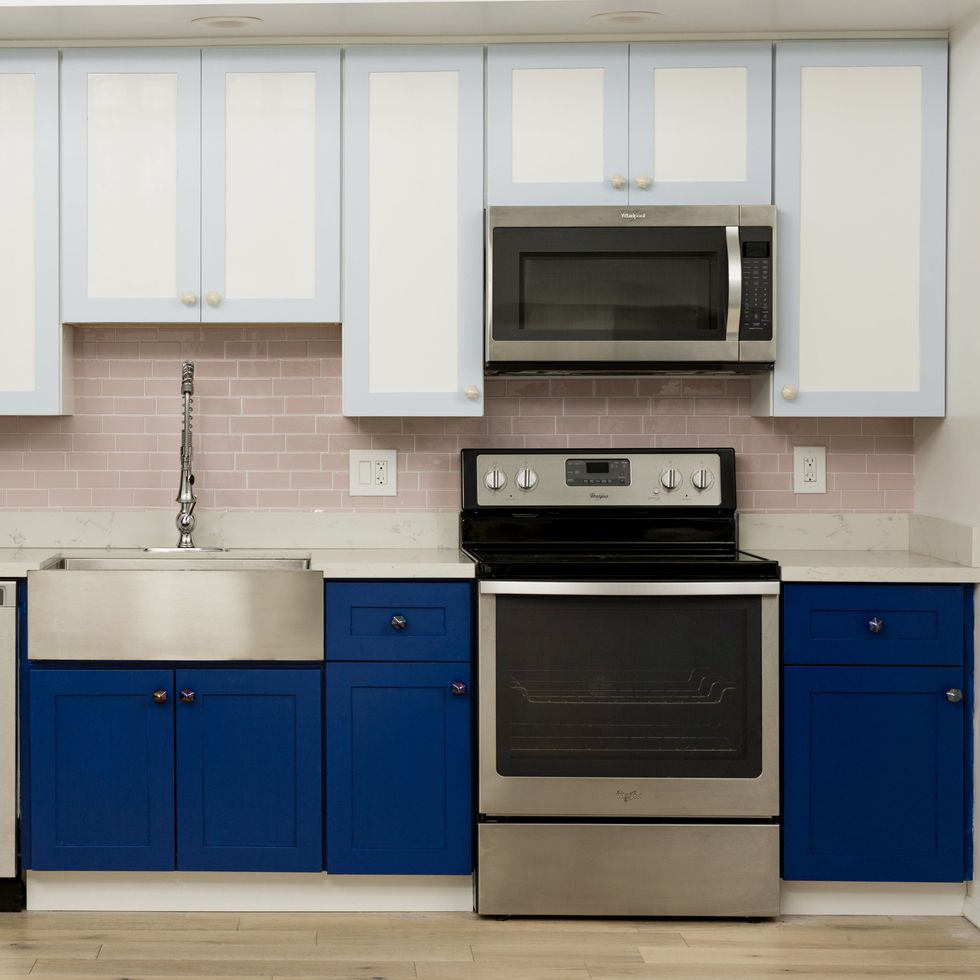
Don't replace your old cabinets, refresh them. This straightforward, two-toned painting project breathes life back into your old cupboards to make it a space you'll love entertaining in again.

And voila — you've got beautiful new cabinets! Need a full recap? Here's the step-by-step gallery to walk you through each phase of achieving that next-level kitchen look.
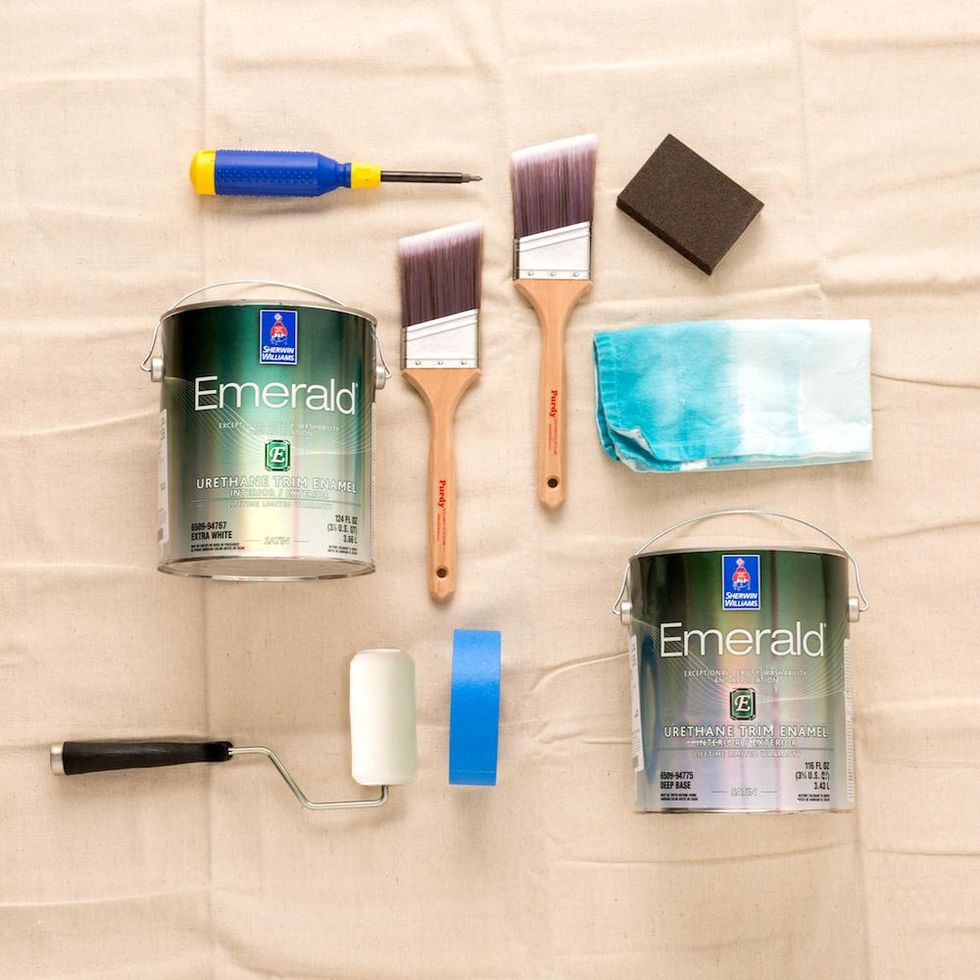
What you need:
- Paint: We used Sherwin-Williams® Emerald® Interior Paint in Rhythmic Blue (SW6806) for top cabinets and Indigo (SW6531) for bottom cabinets
- Sandpaper
- Drop cloths/paper
- Rags
- Painter's tape
- Stir sticks
- Paint rollers
- Paint tray
- Paint brushes, for cutting in or touch-ups
- Screwdriver

How to:
- Remove doors and hardware
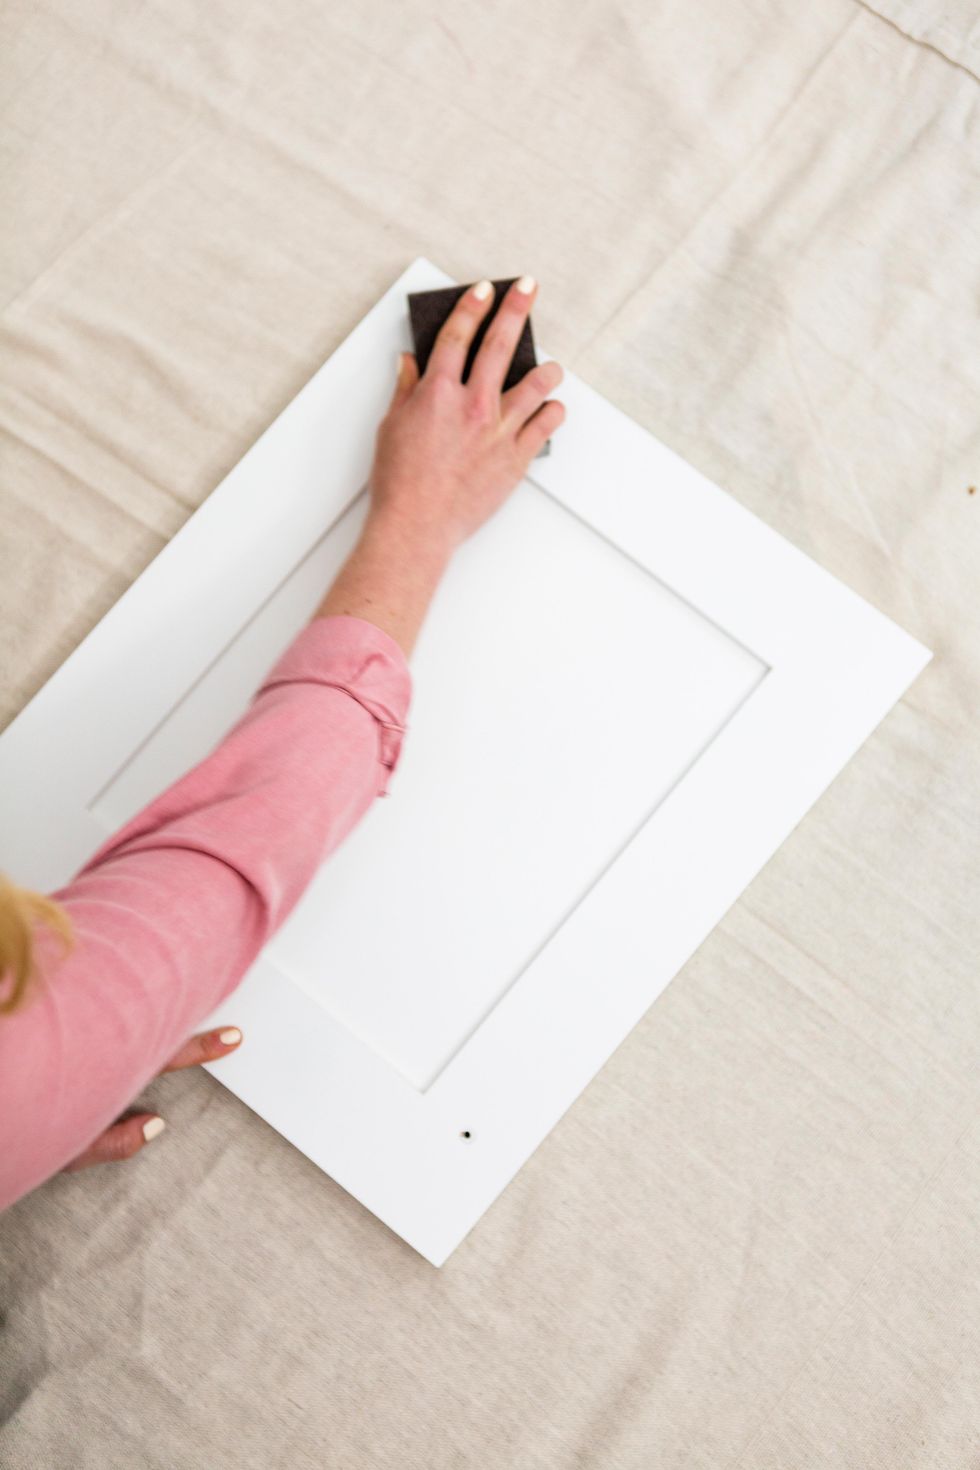
2. Sand and wipe away dust

3. Place painter’s tape as shown.

4. Paint a lighter hue on the upper cabinets.
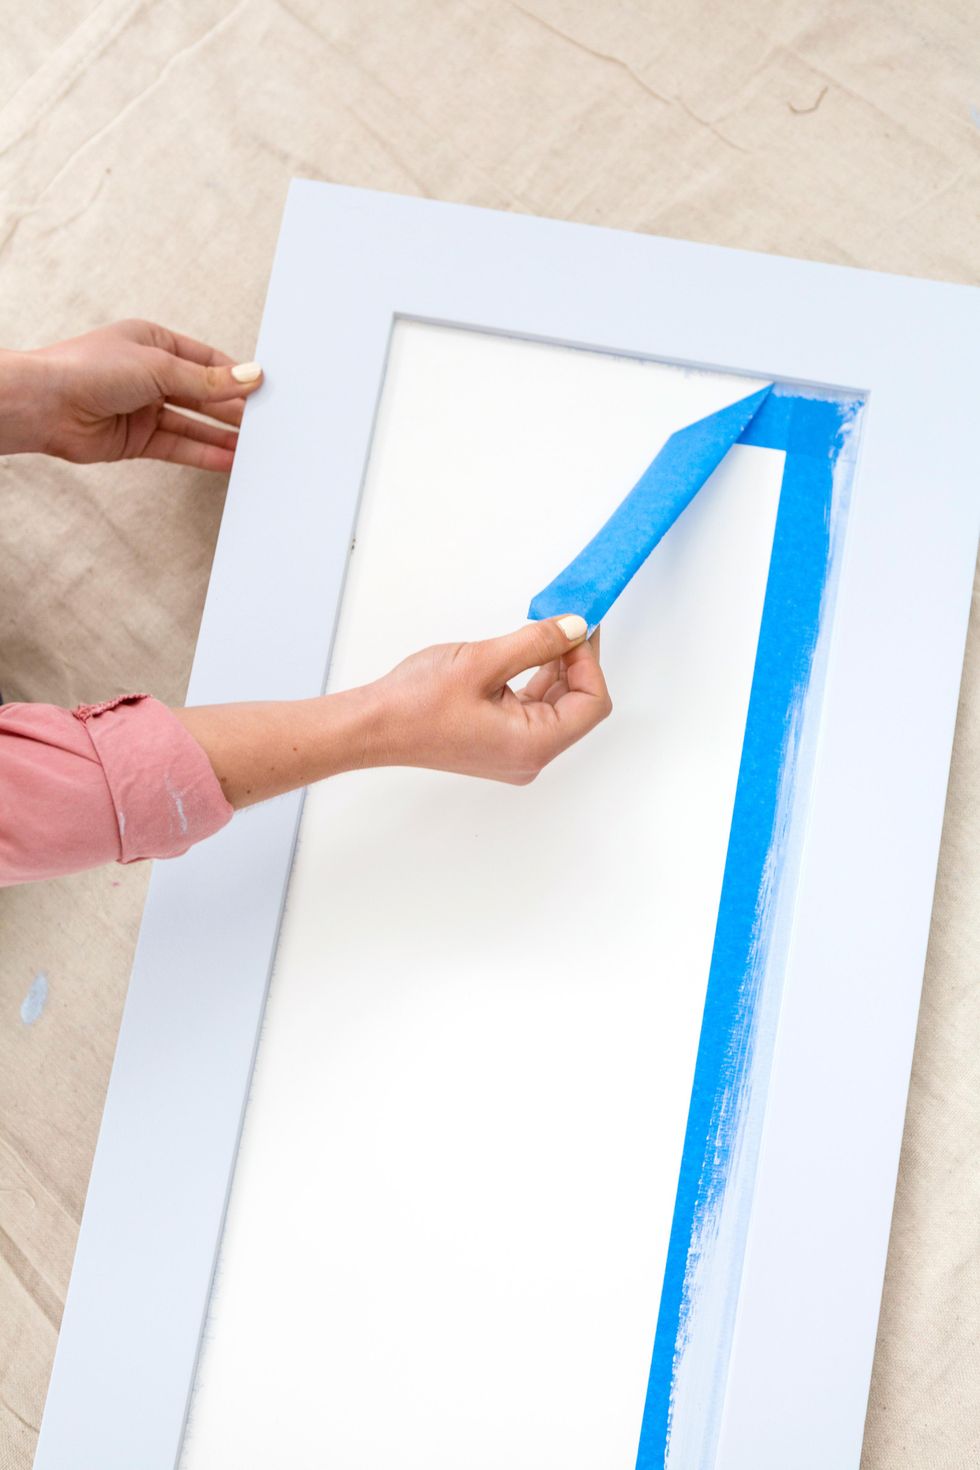
5. Let dry and remove tape.
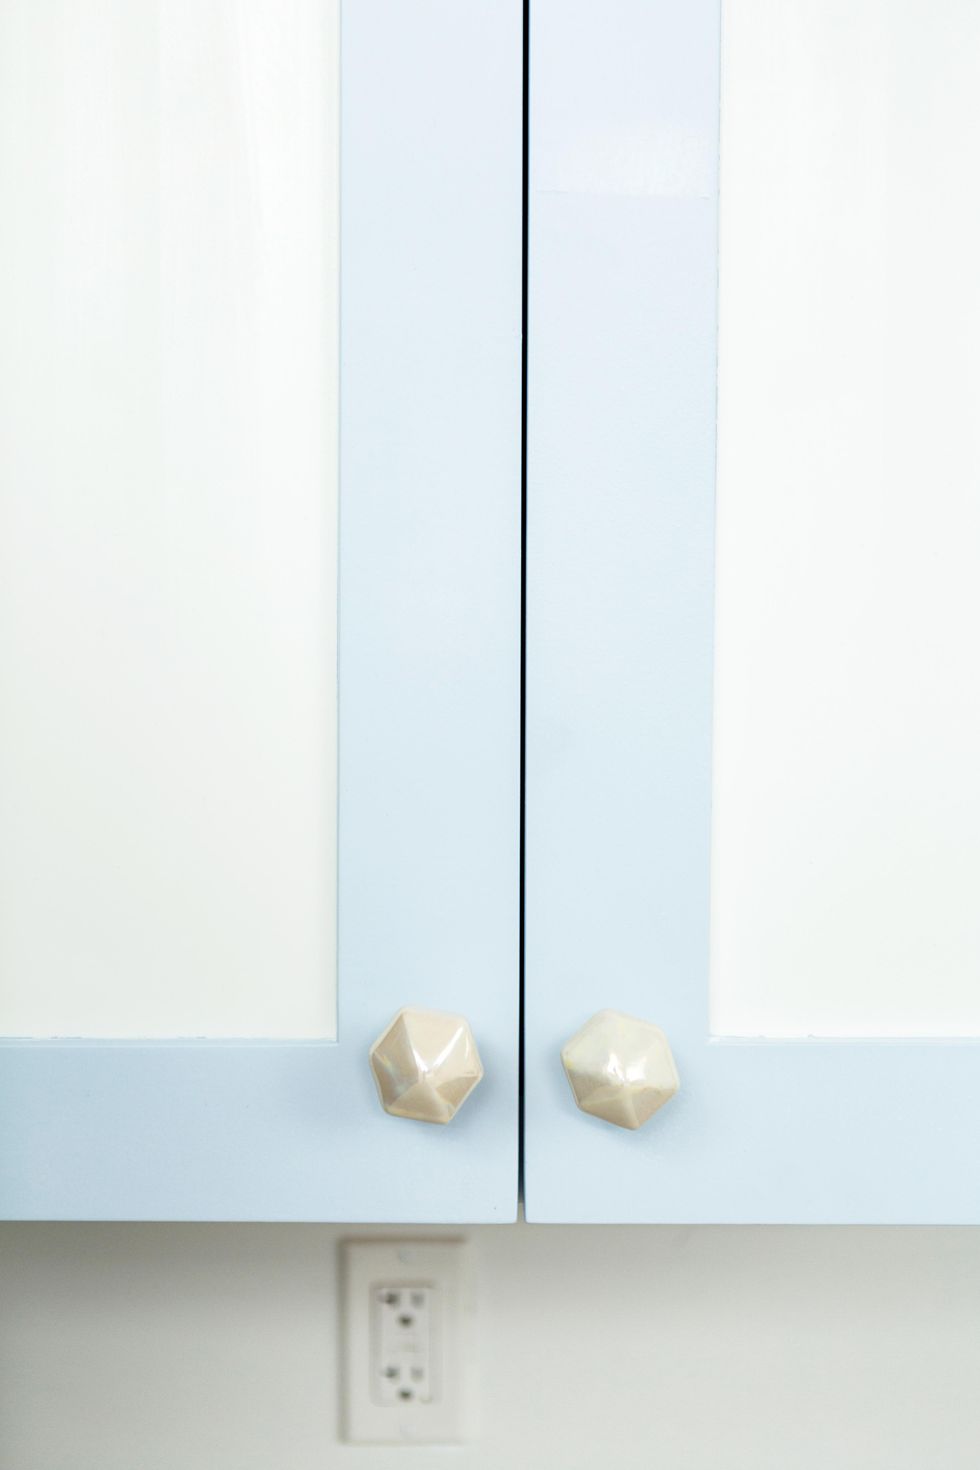
6. Add new hardware.
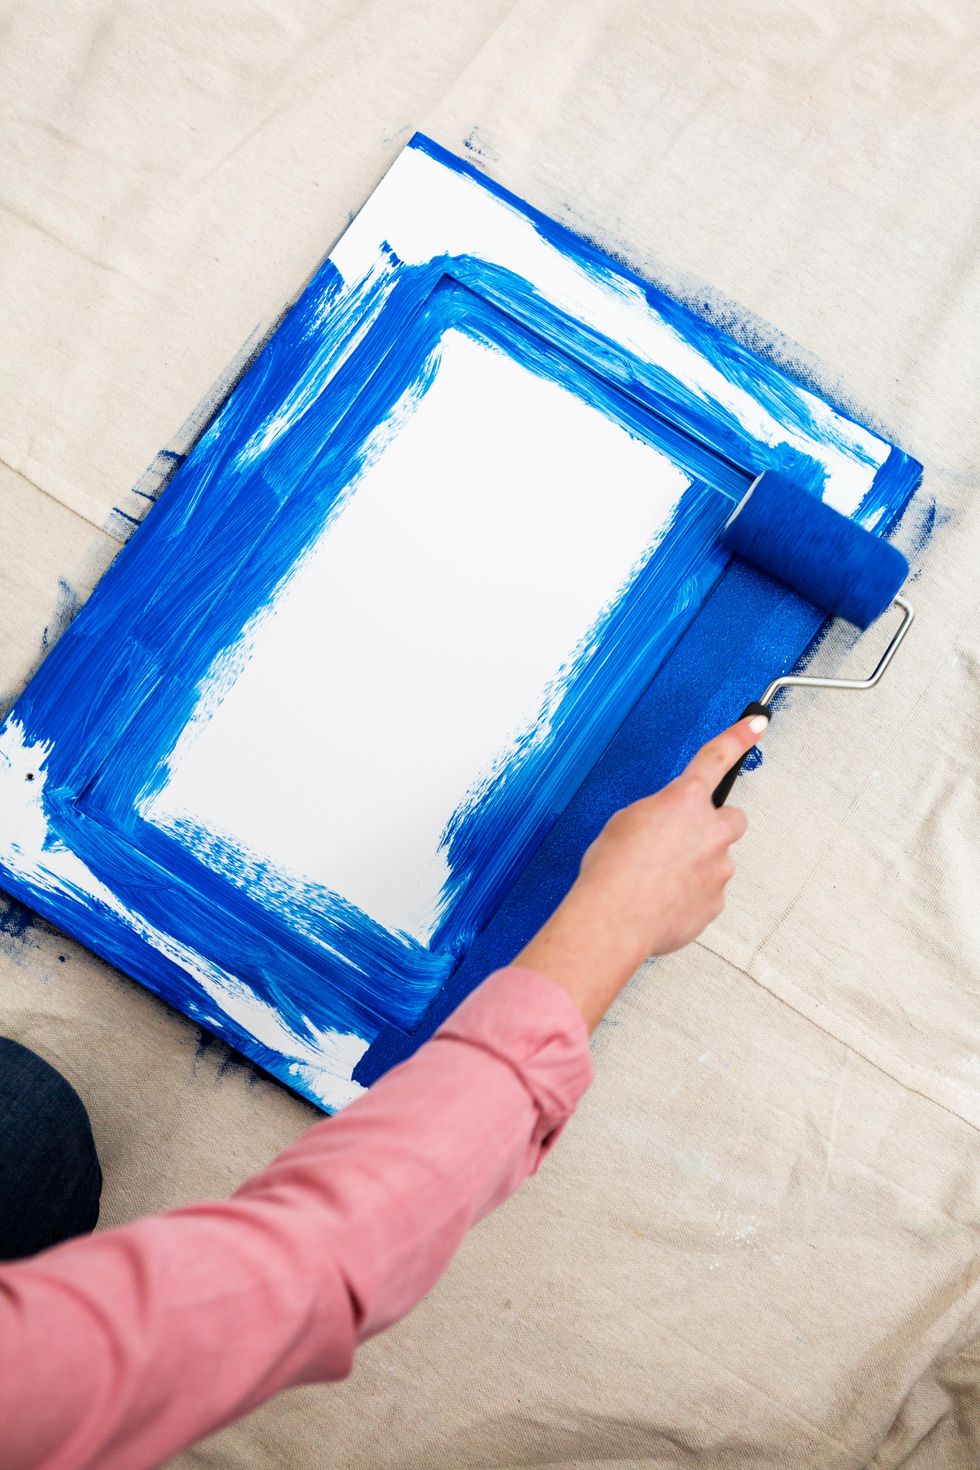
5. Paint a darker hue on lower cabinets.
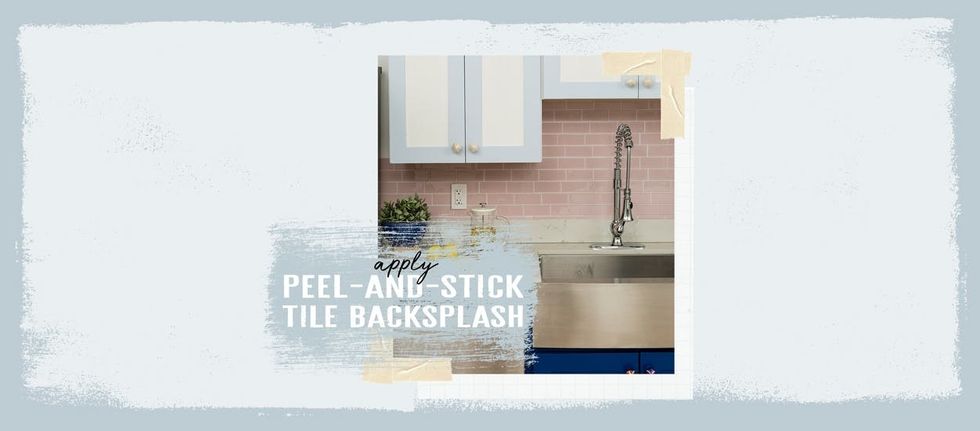
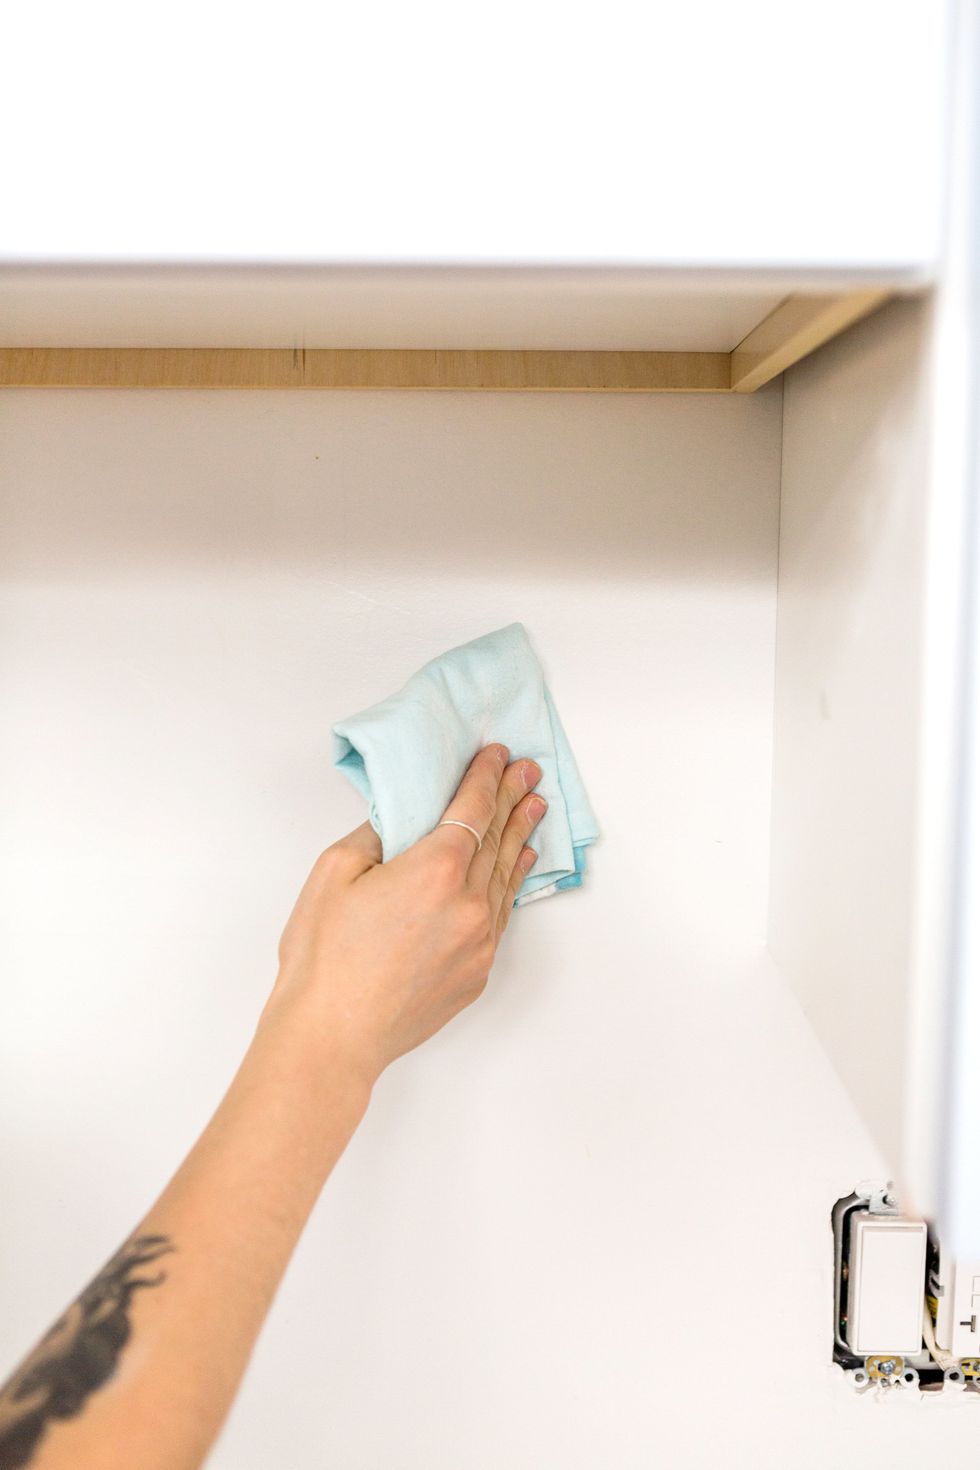
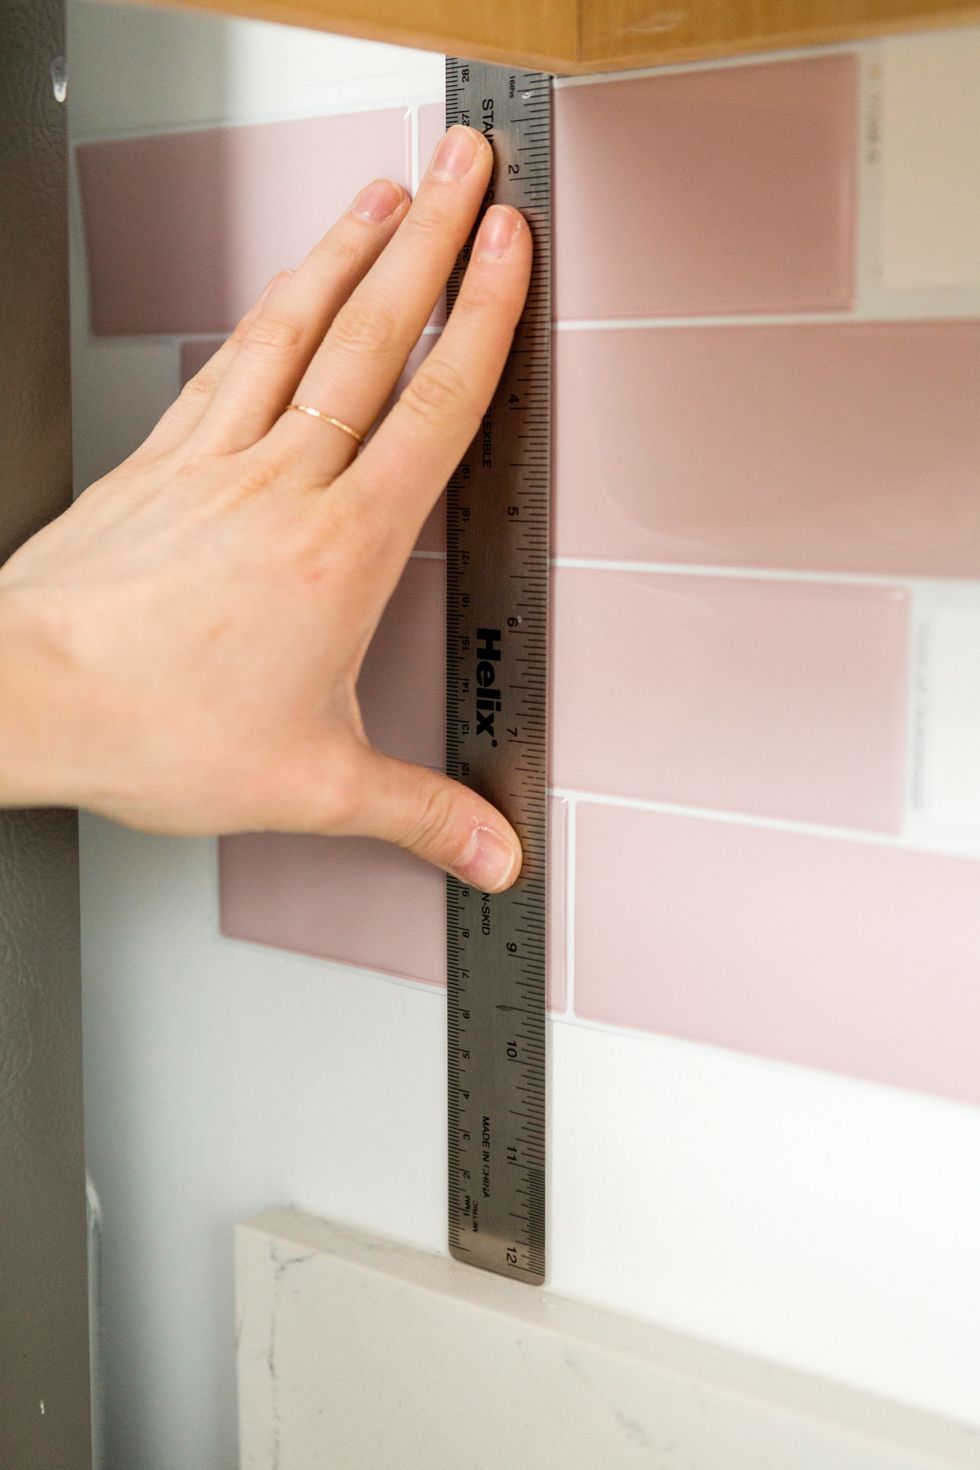
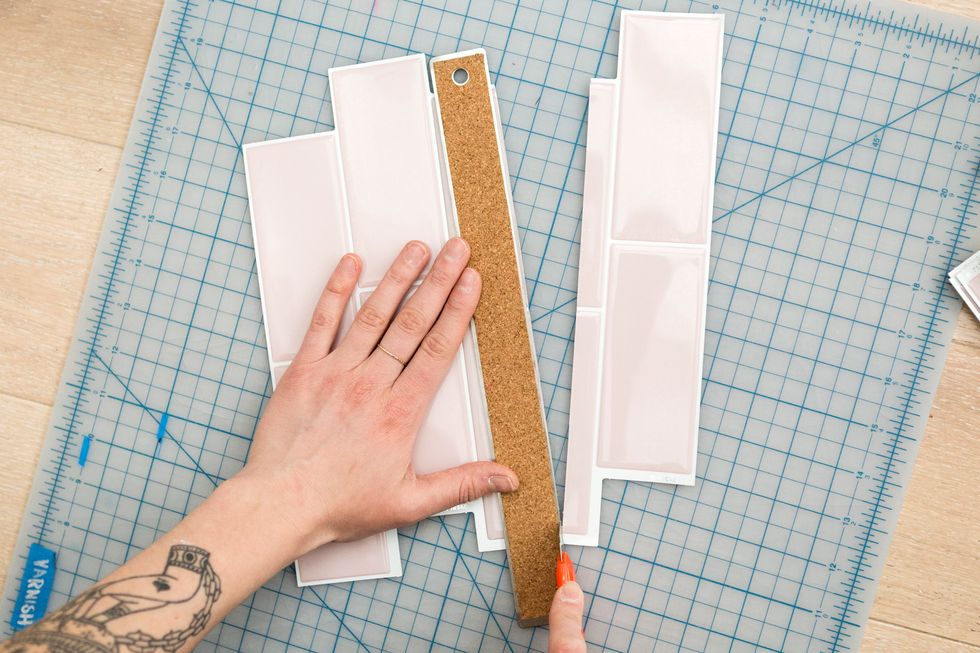
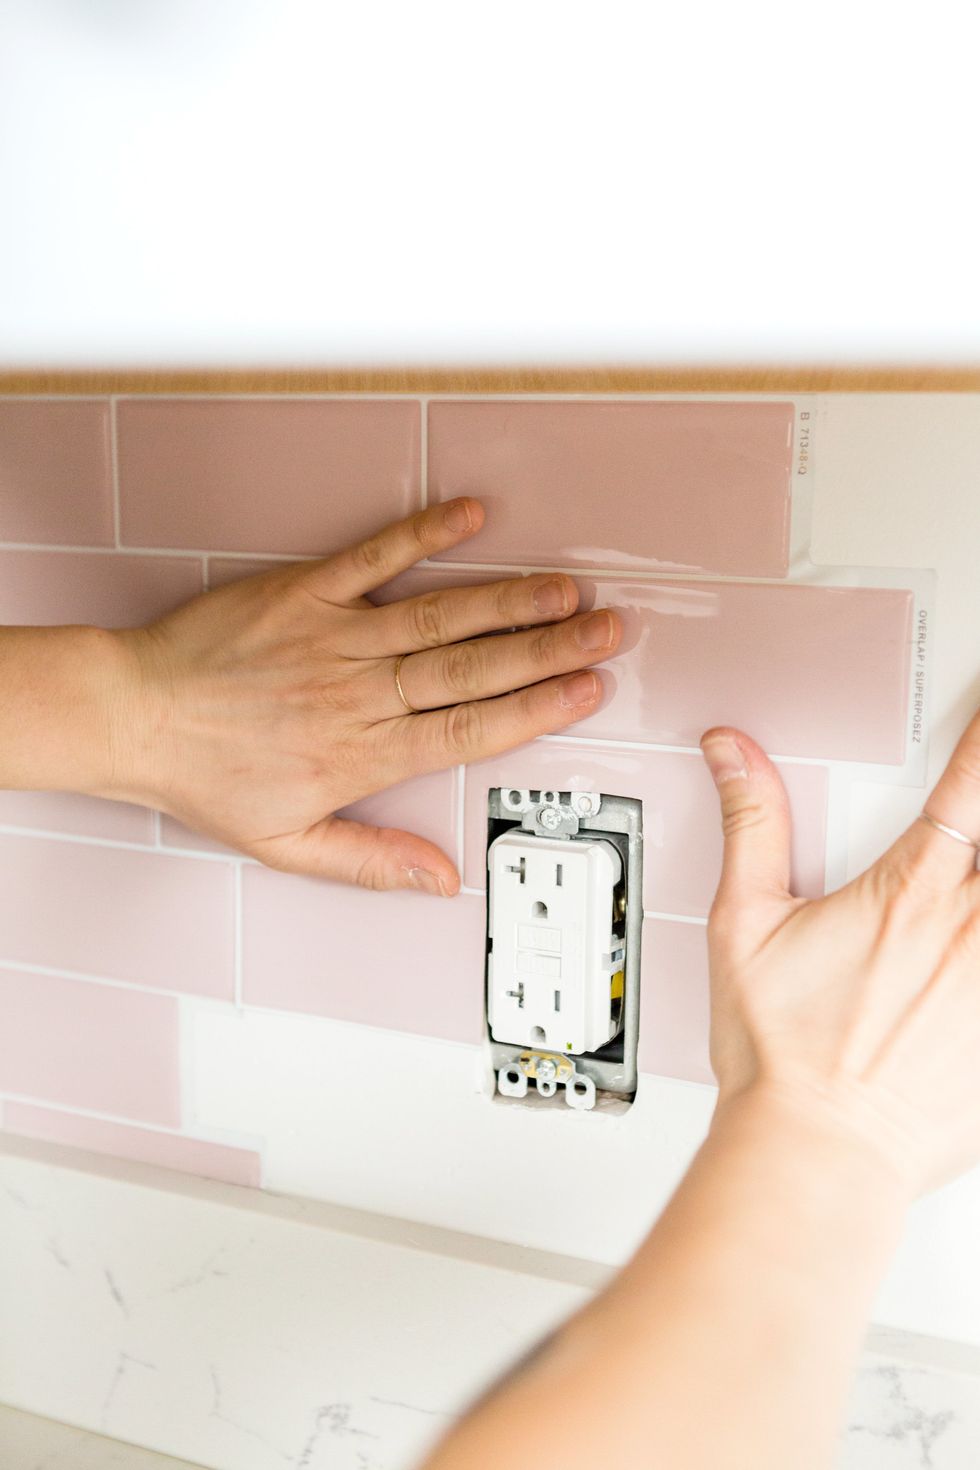
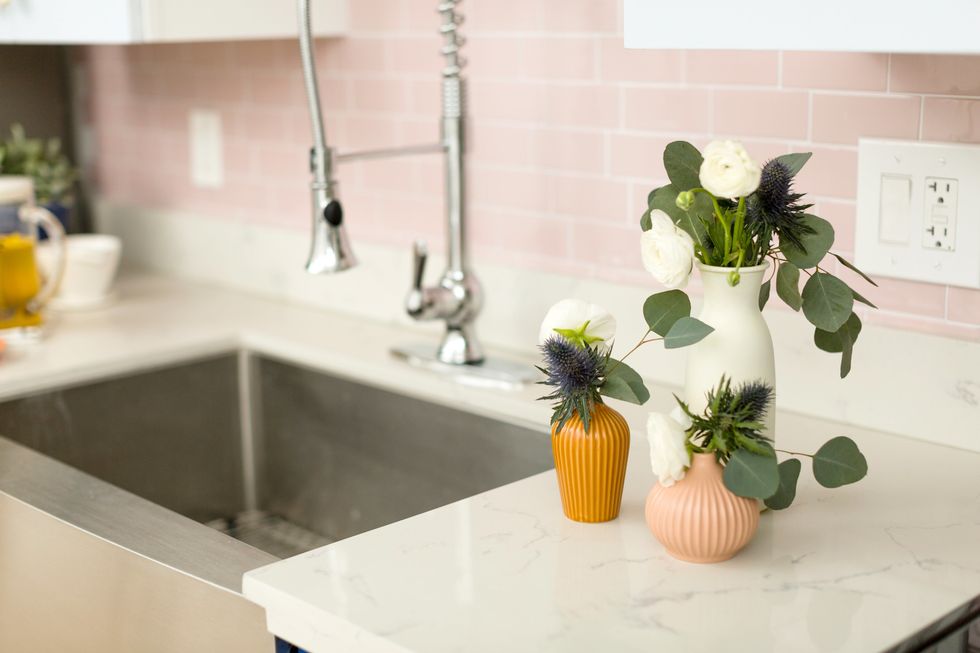
Kitchen: Apply a Peel-and-Stick Tile Backsplash
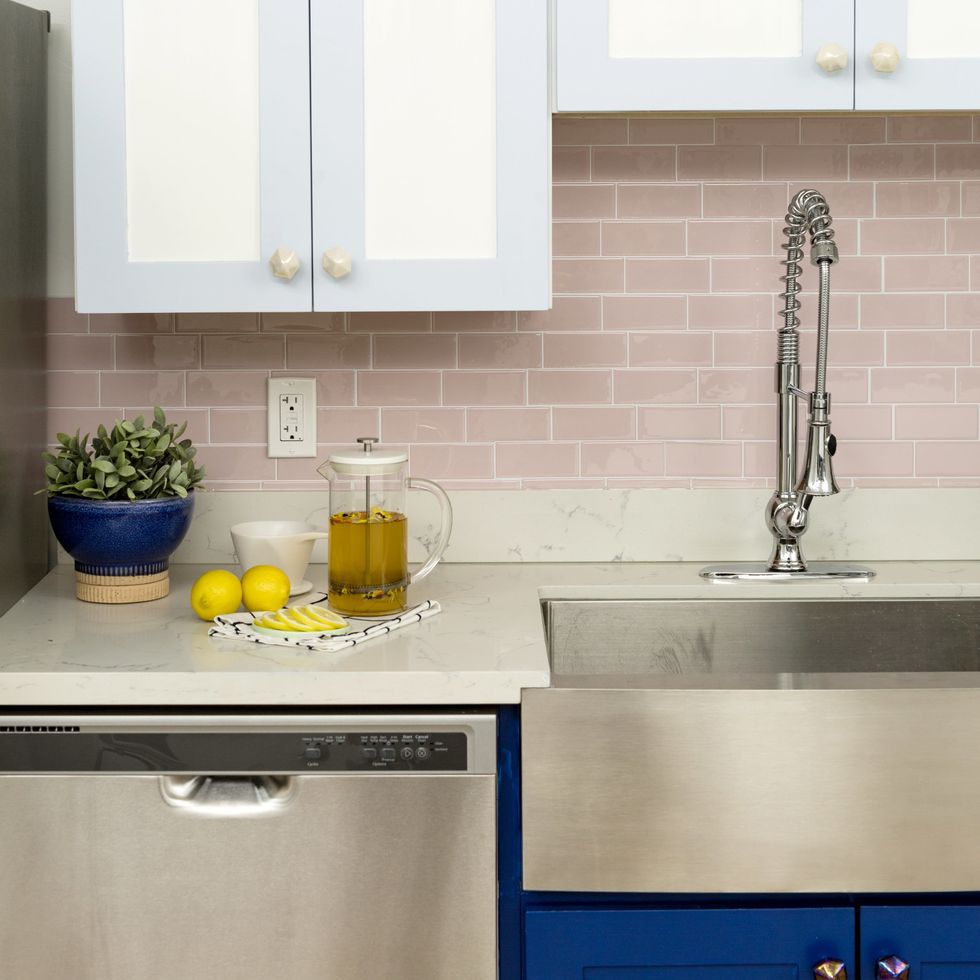
Add texture and personality with a stick-on backsplash to your kitchen wall. It's much simpler than *actual* tiling and creates a seriously Insta-worthy effect.
Follow our visual guide to complete your project!


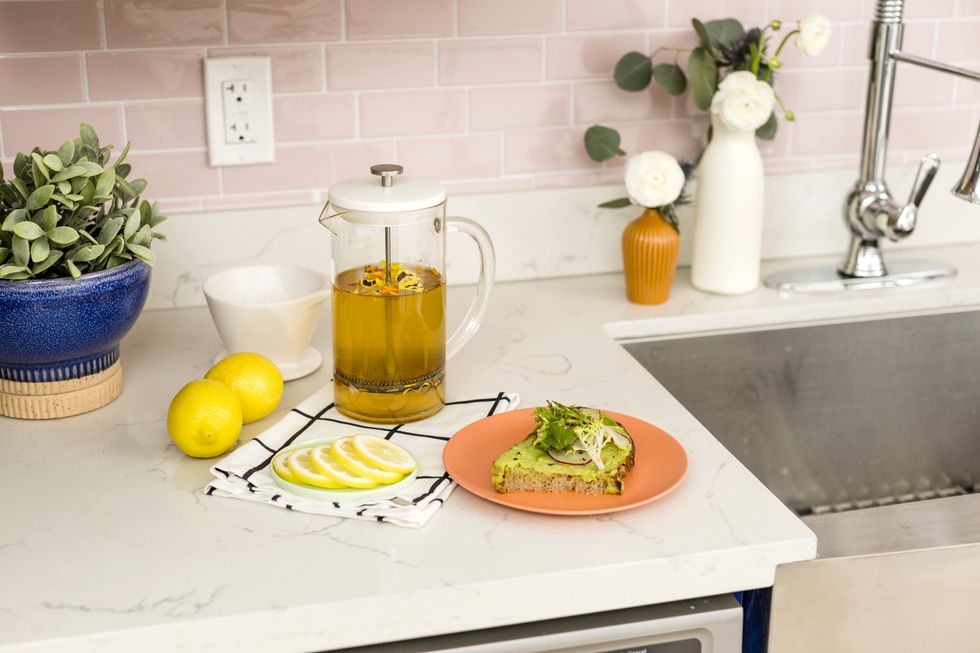
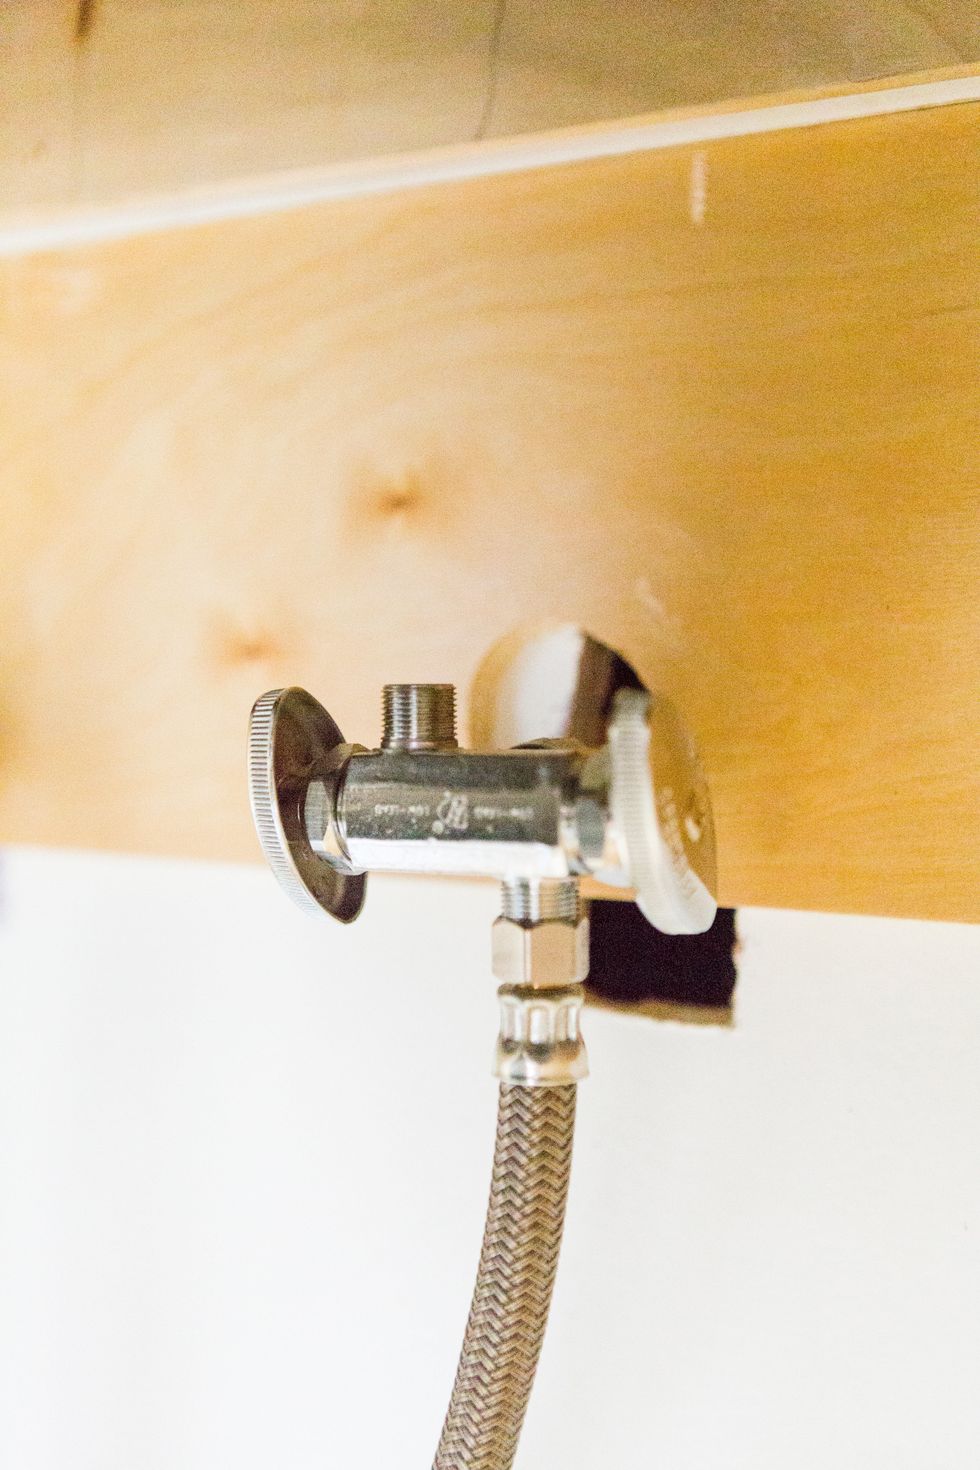
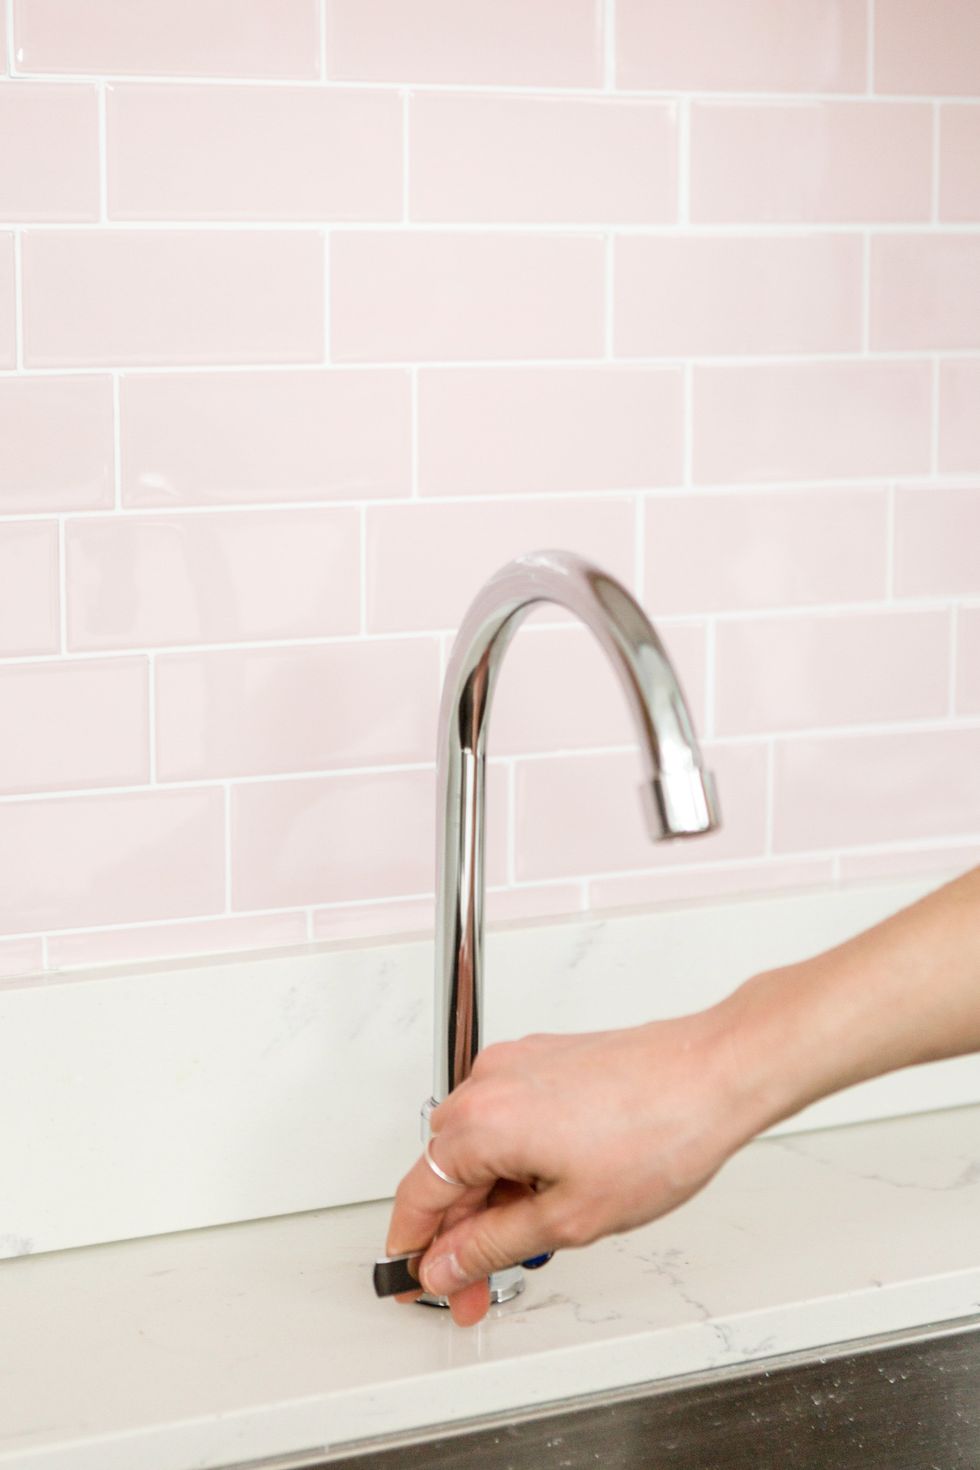
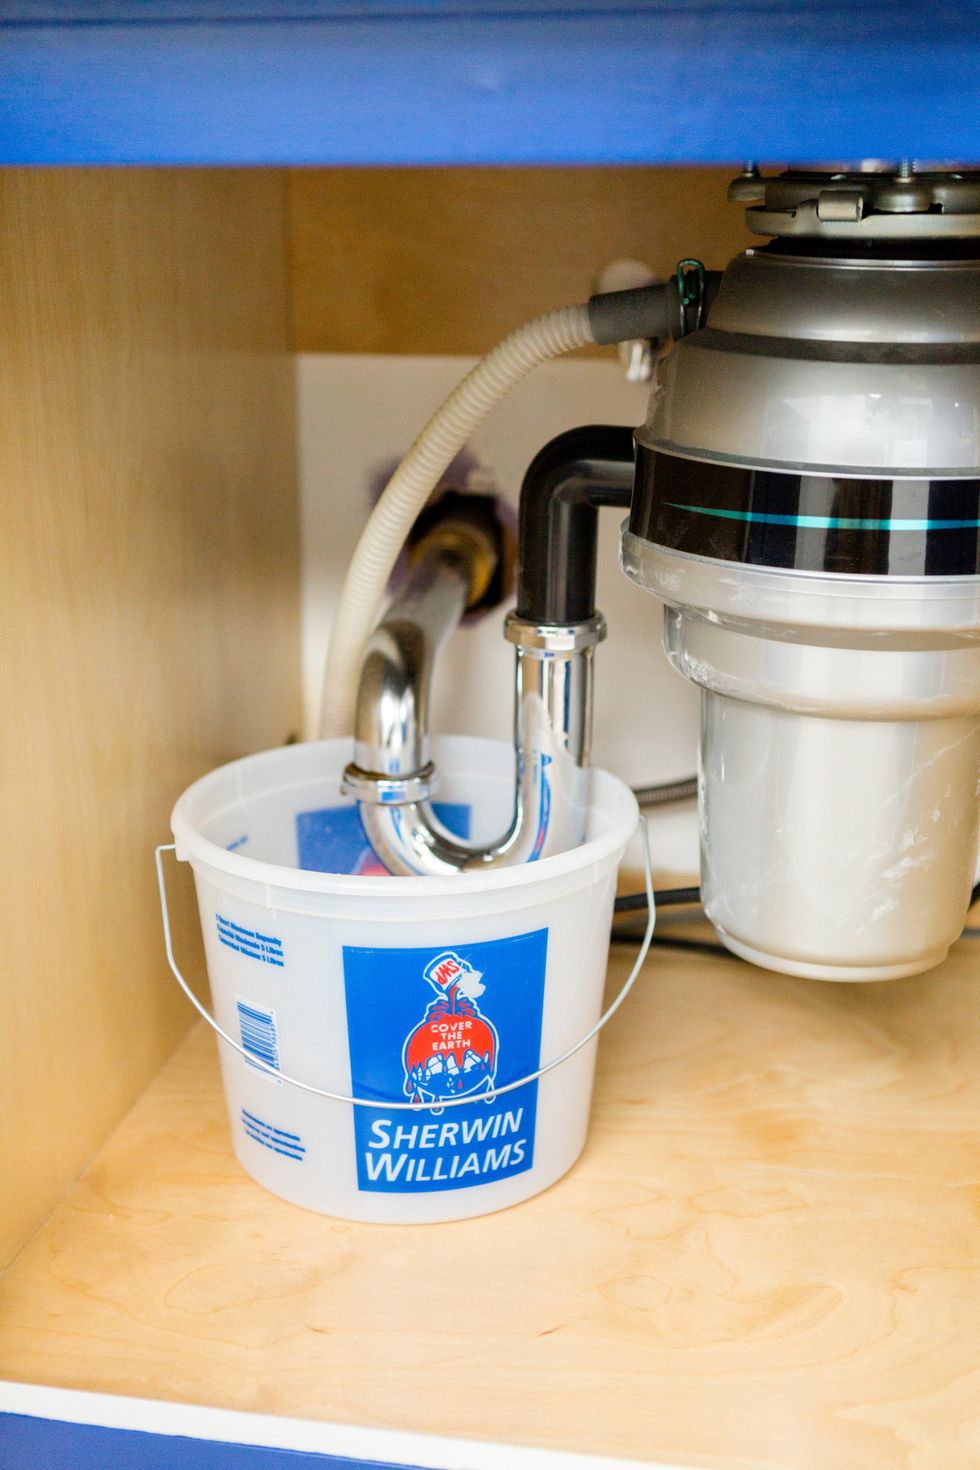
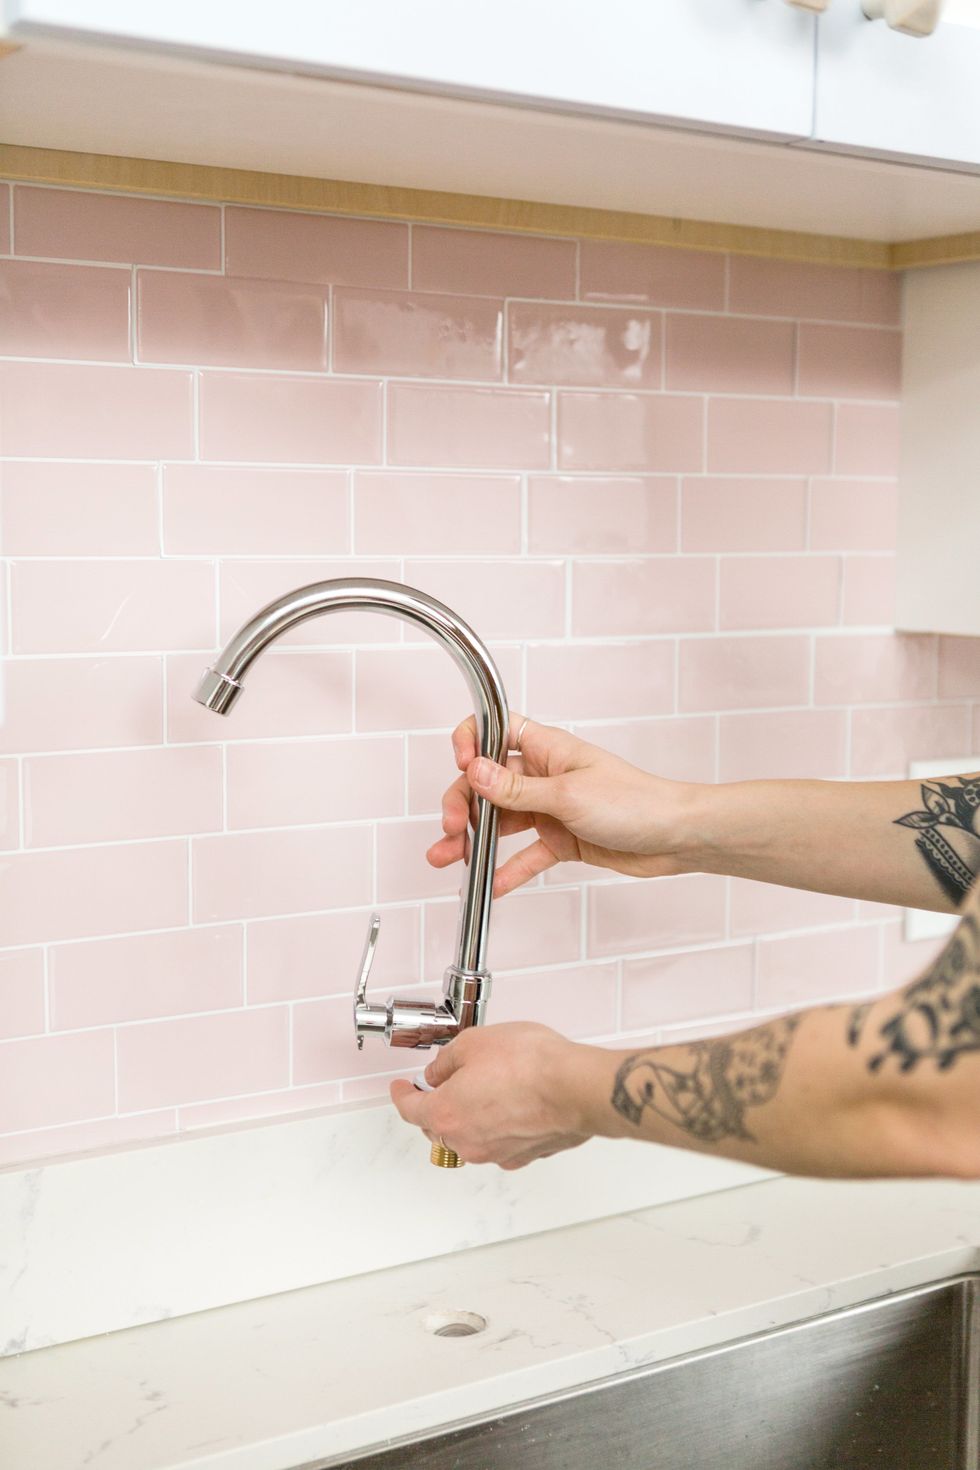
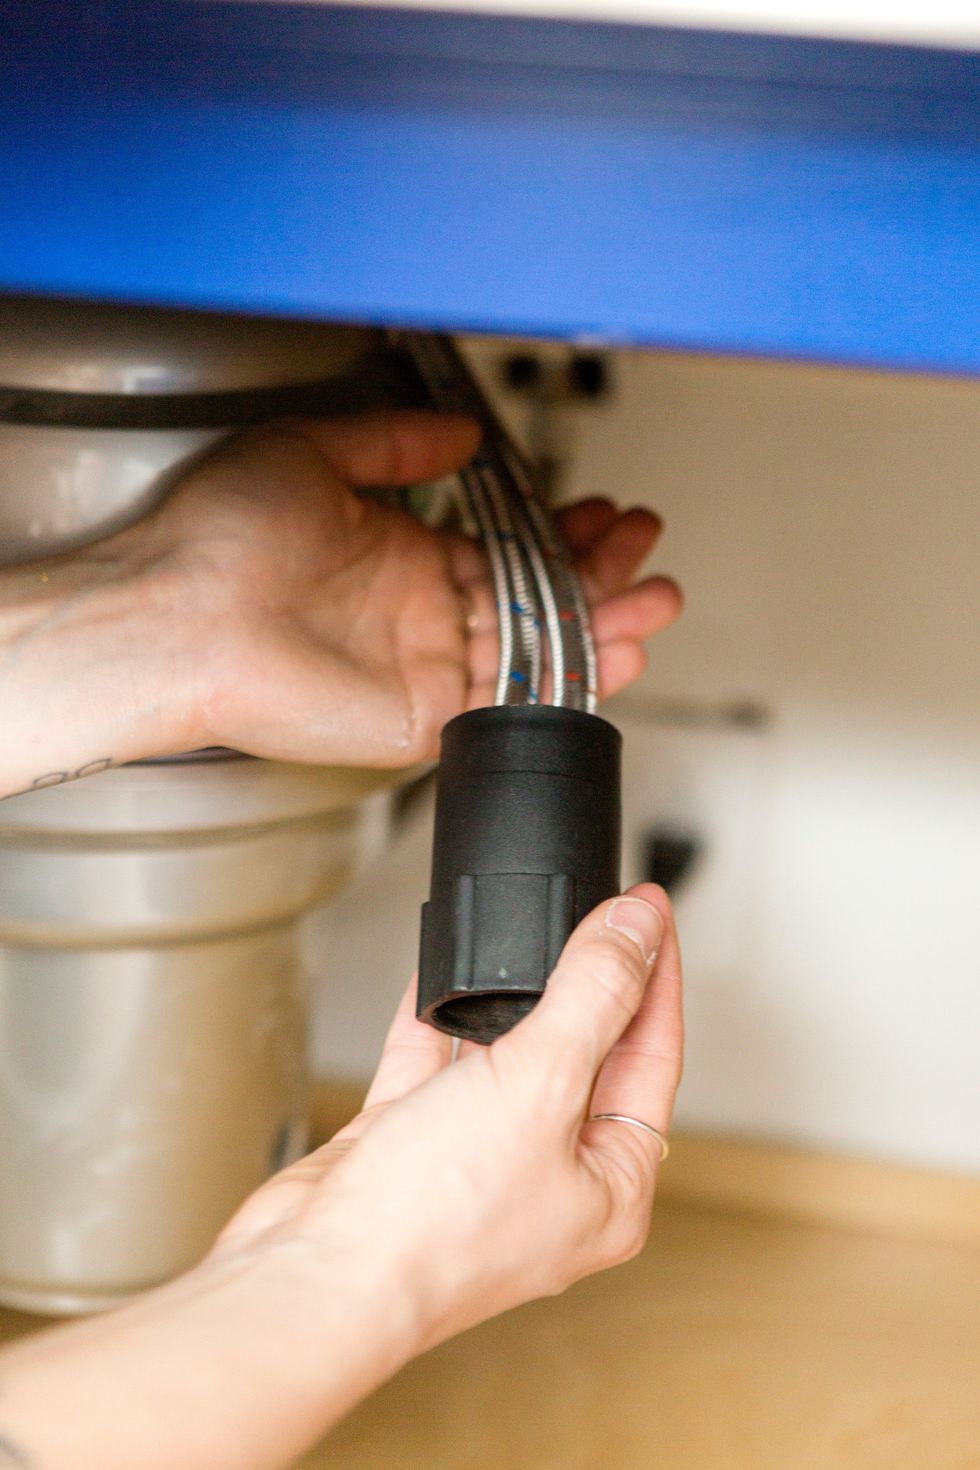
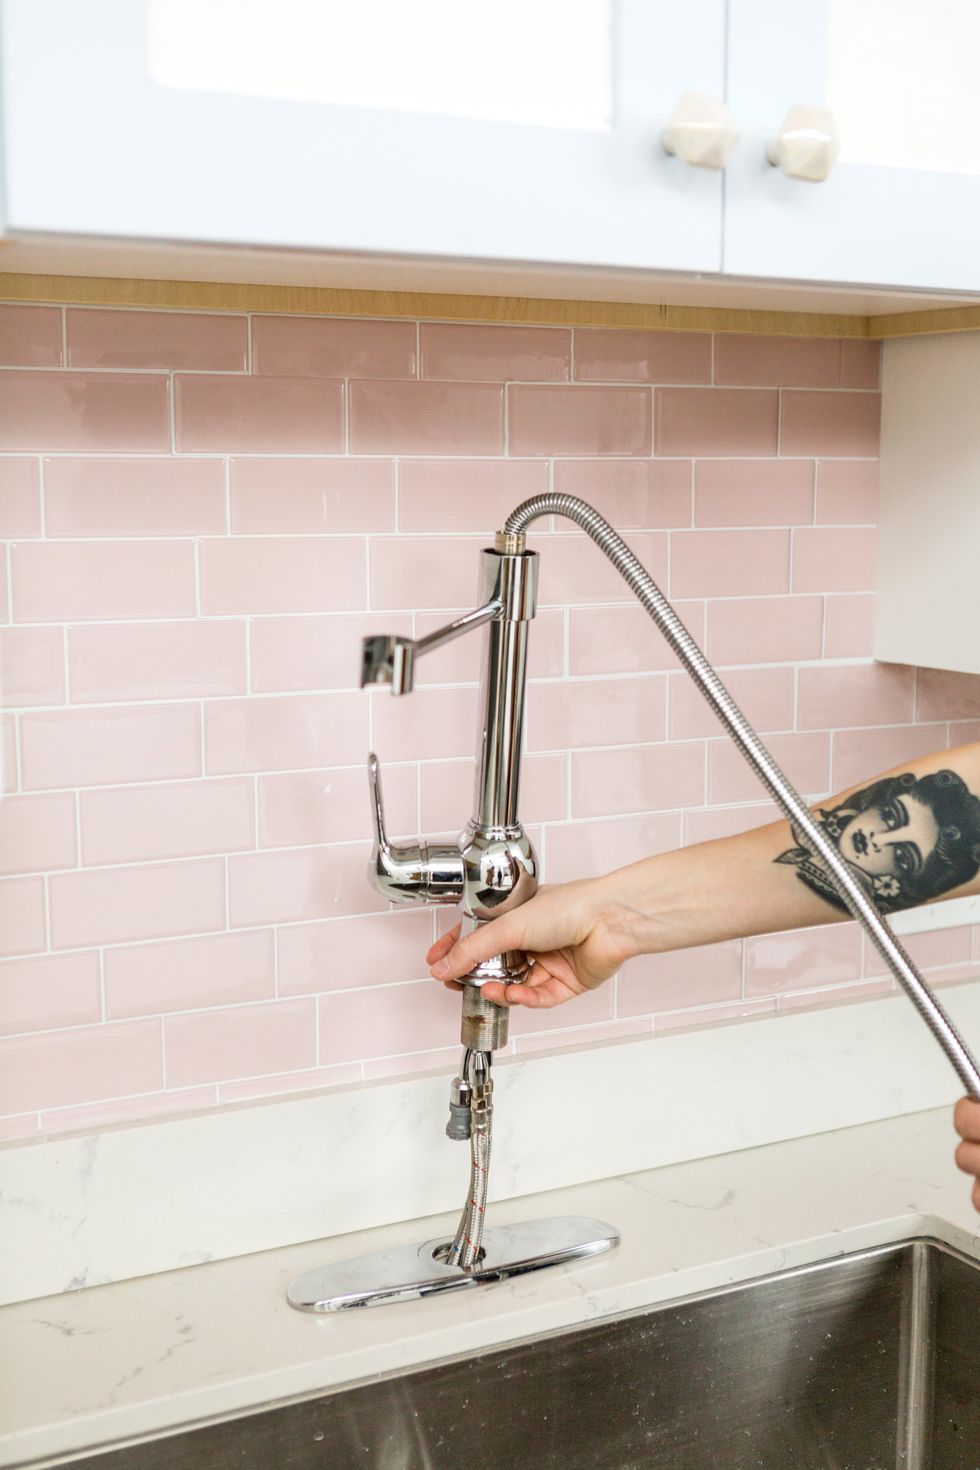
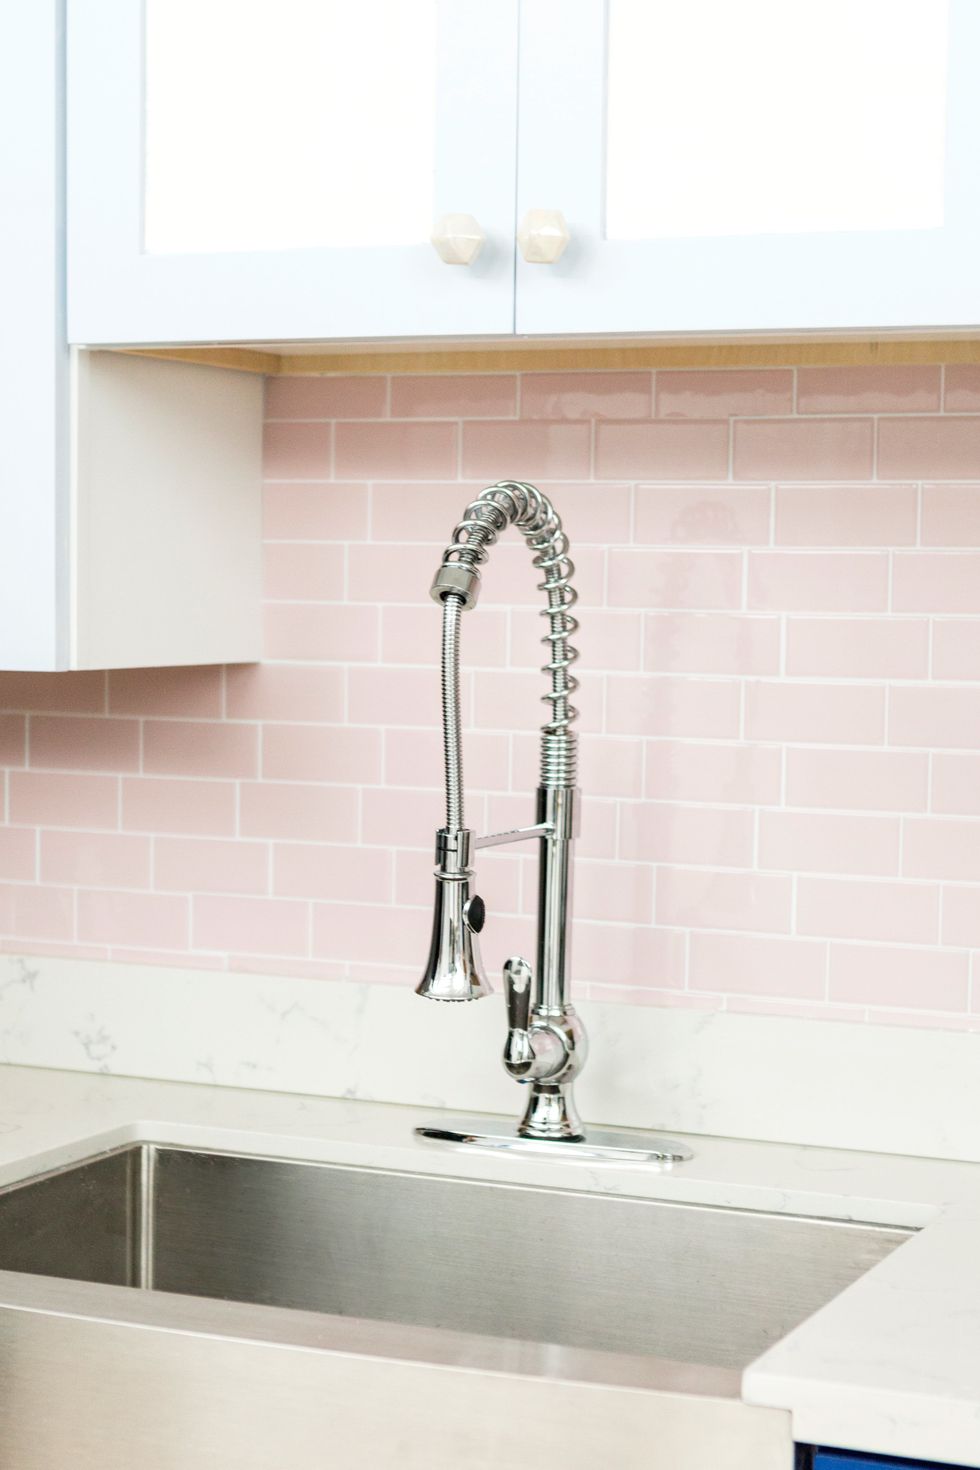
Kitchen: Upgrade to a Fancy Faucet
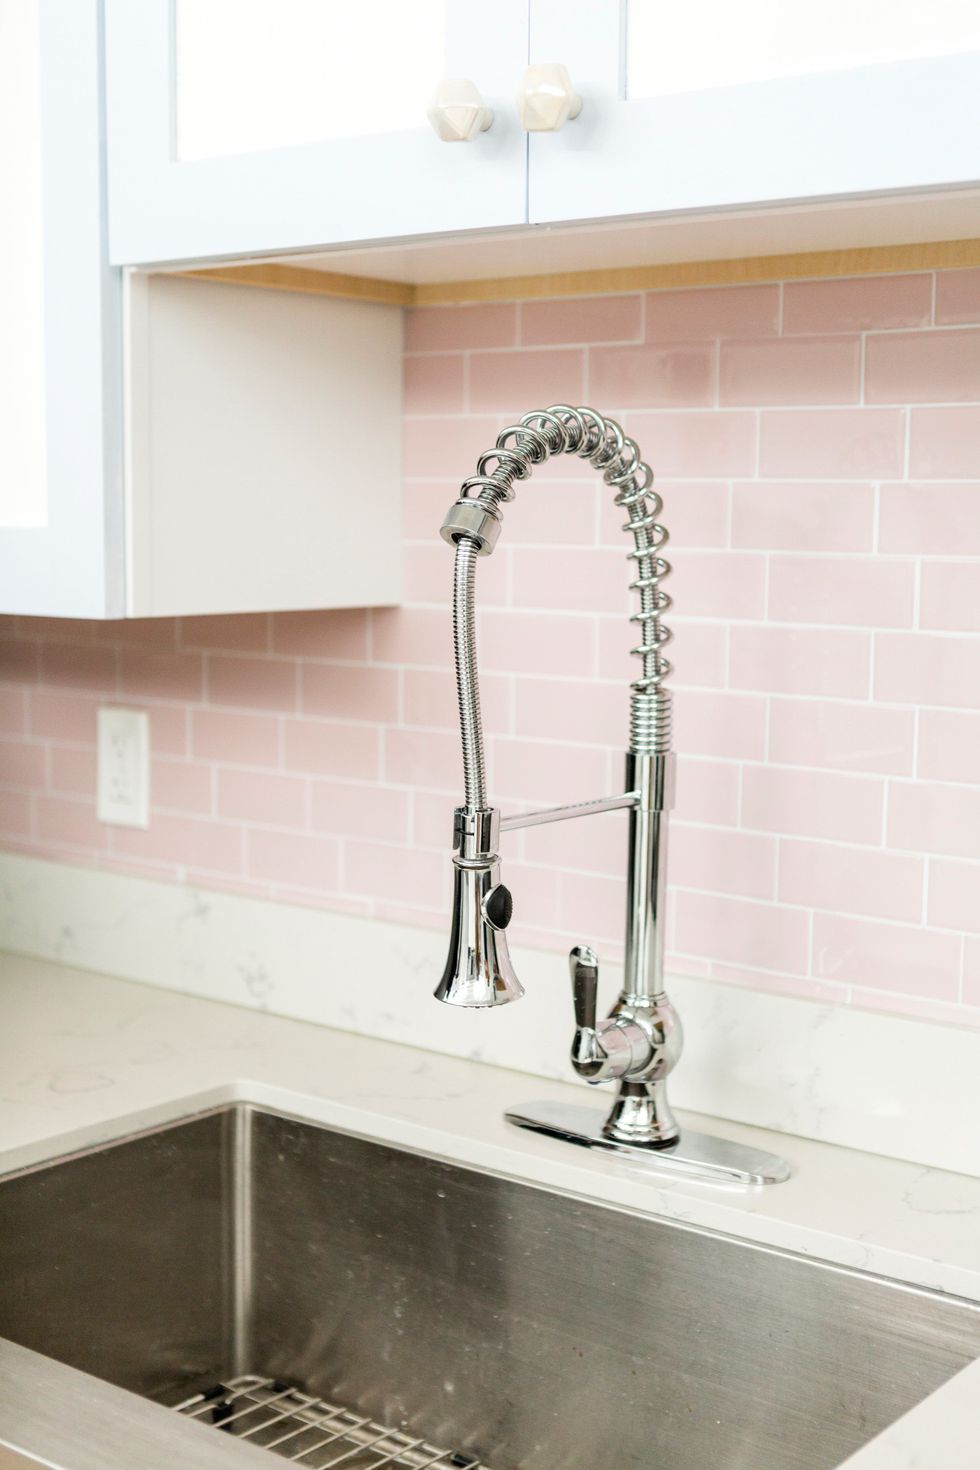
You love everything but the kitchen sink. Instead of removing it entirely, install a beautiful faucet to make your fixture look elevated and upgraded.
Follow our visual guide to complete your project!


Get The Look of Our Kitchen: Smart Tile Metro Ava, Cost Plus World Market Marble Pattern Ceramic Canister
Next up — let's work on that bedroom!
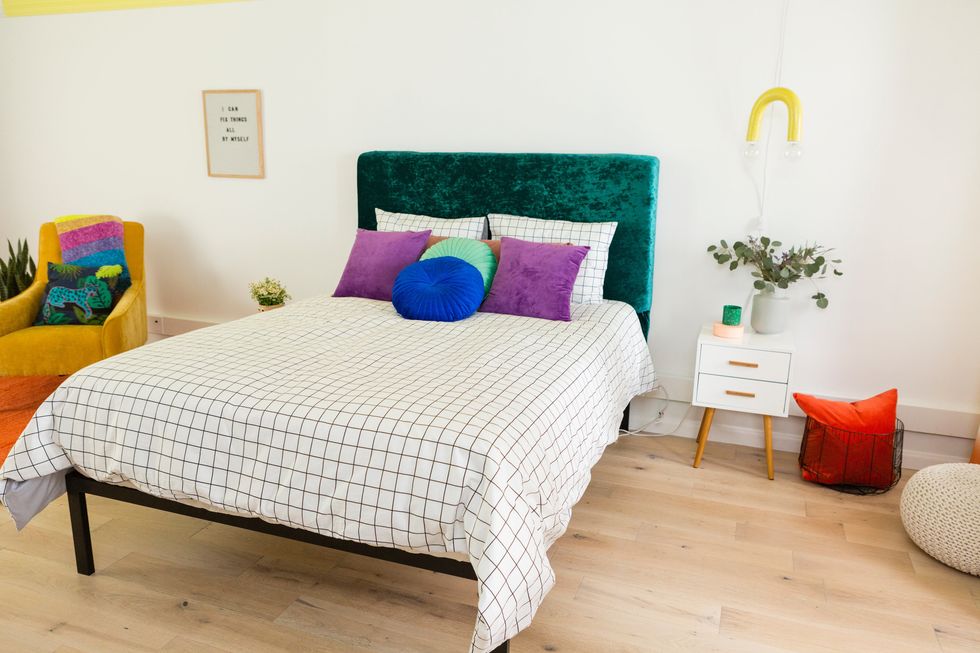
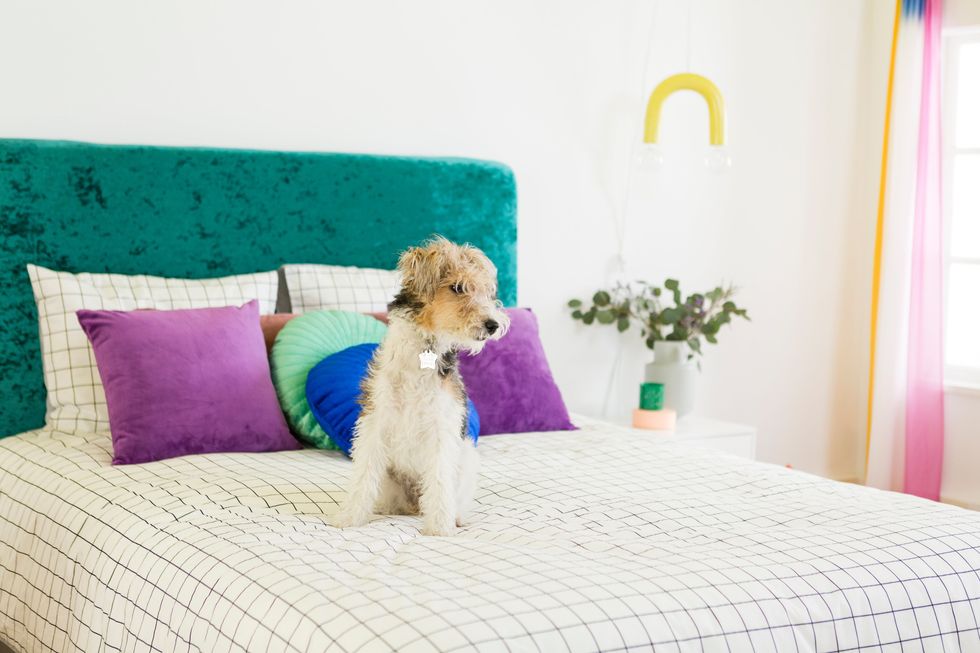
Bedroom
There’s nothing sleepy about these projects that will leave you with a striking ceiling, a new headboard, and colorful curtains. Scroll below to see the dramatic difference a few updates can make.
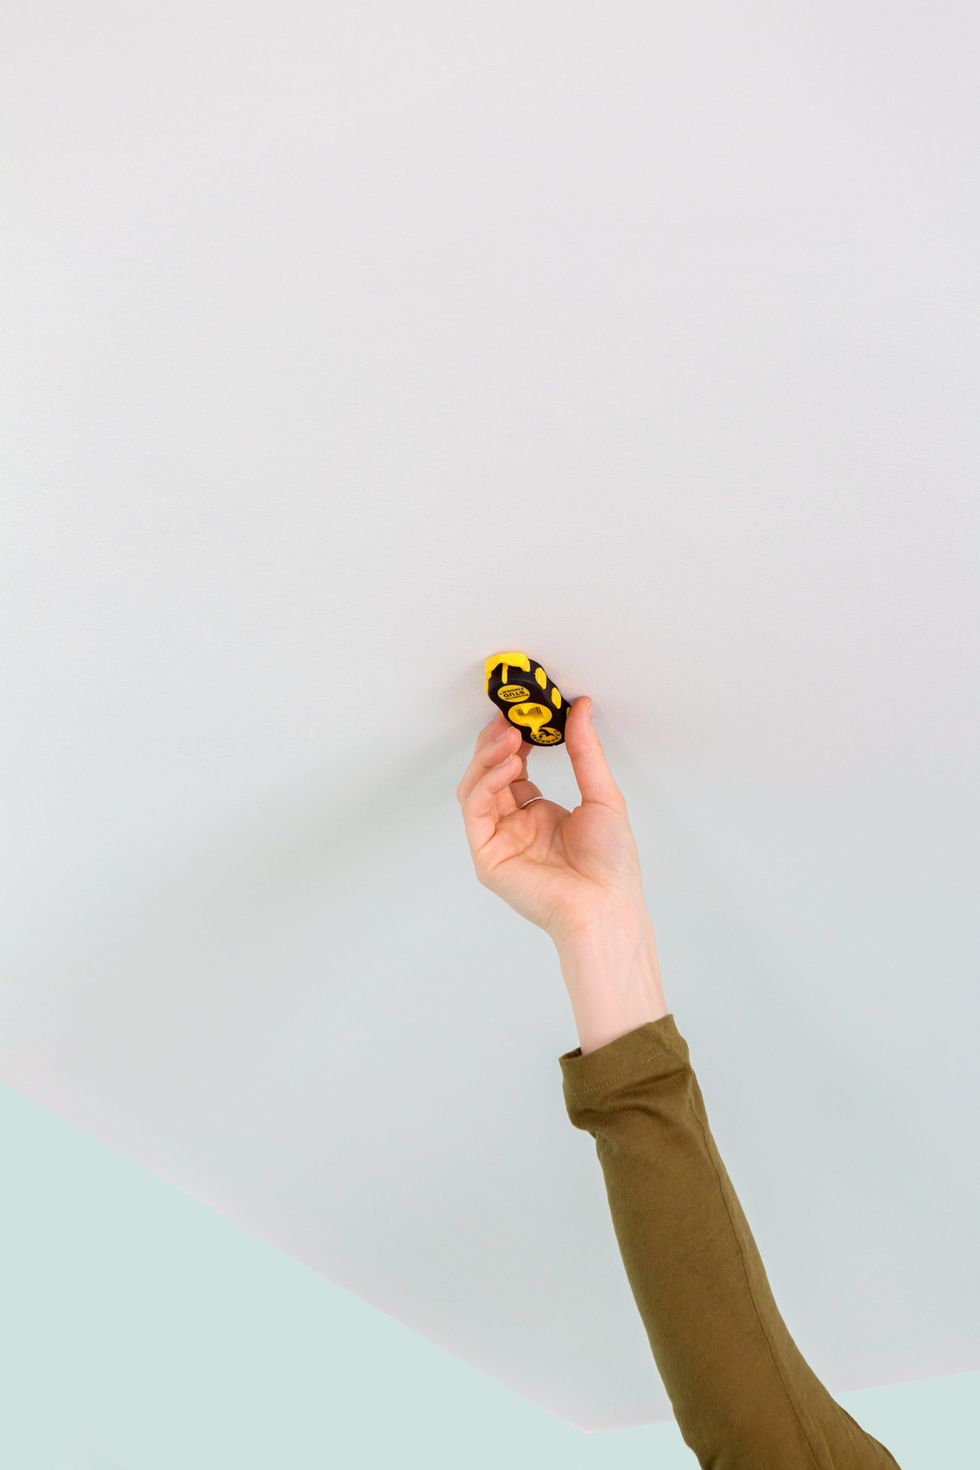
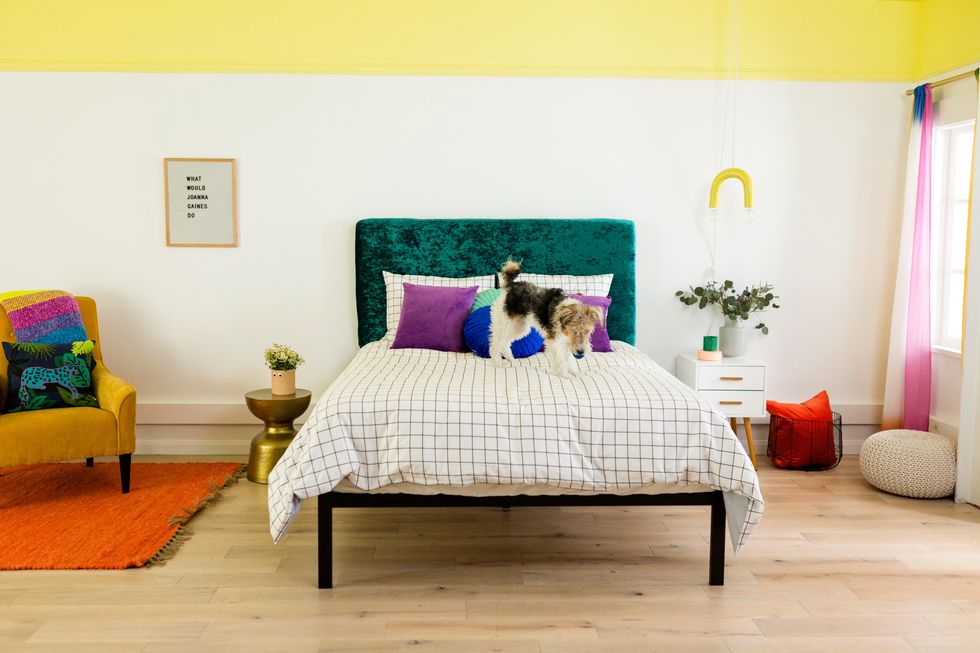
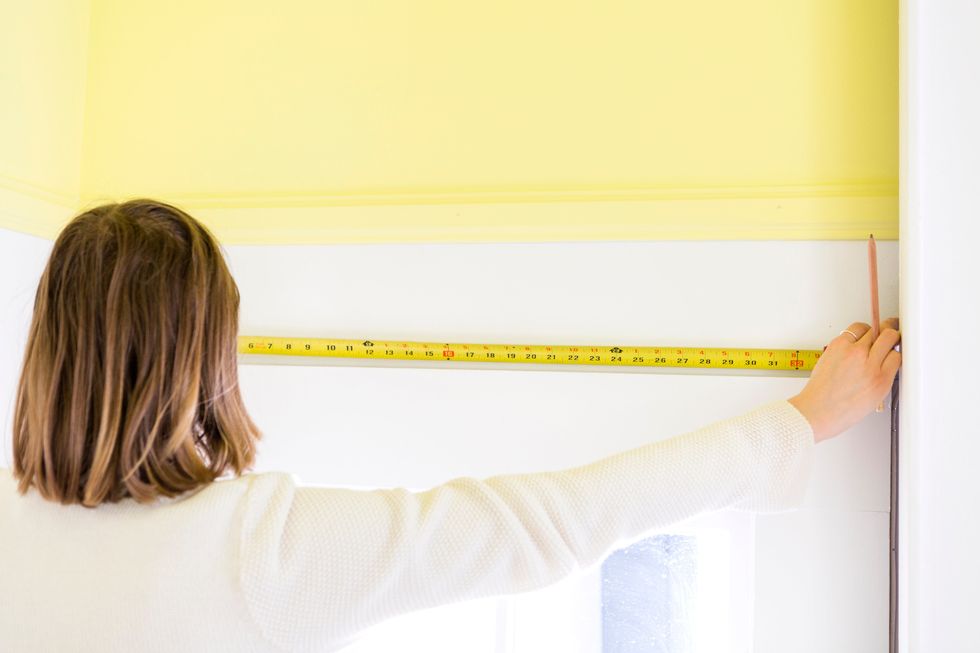
Bedroom: Add Trim and Paint a Drop Ceiling
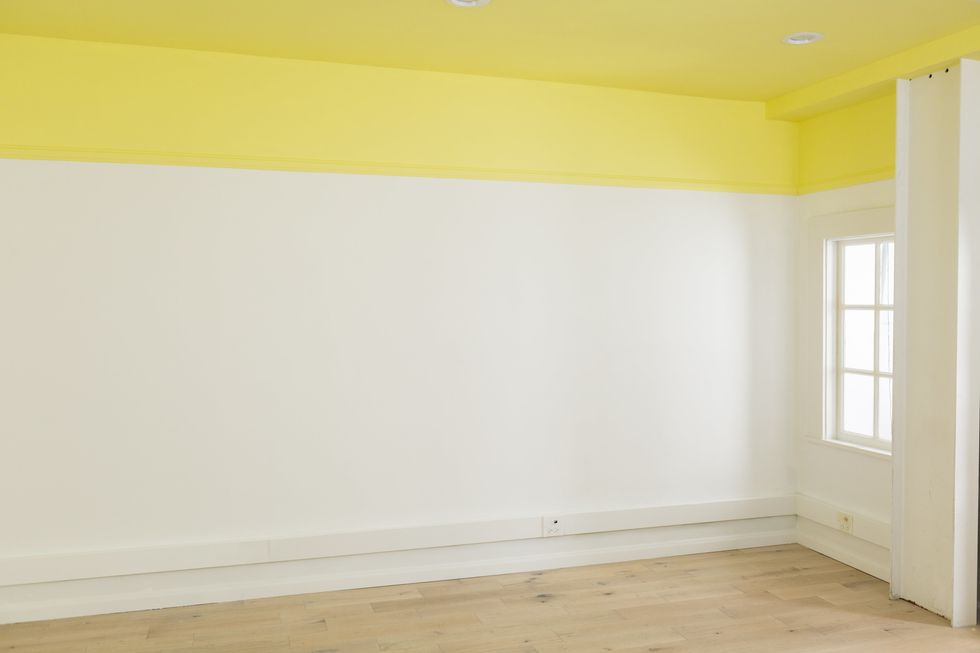
Elevate your bedroom's vibe by adding custom trim and eye-catching paint color to the walls and ceiling. The final product promises to deliver twice as much character as your typical one-coat paint job.

Ready to make it happen? You've totally got this! Just to make sure you have it all down, check out our step-by-step gallery to walk you through how to paint your own bedroom.
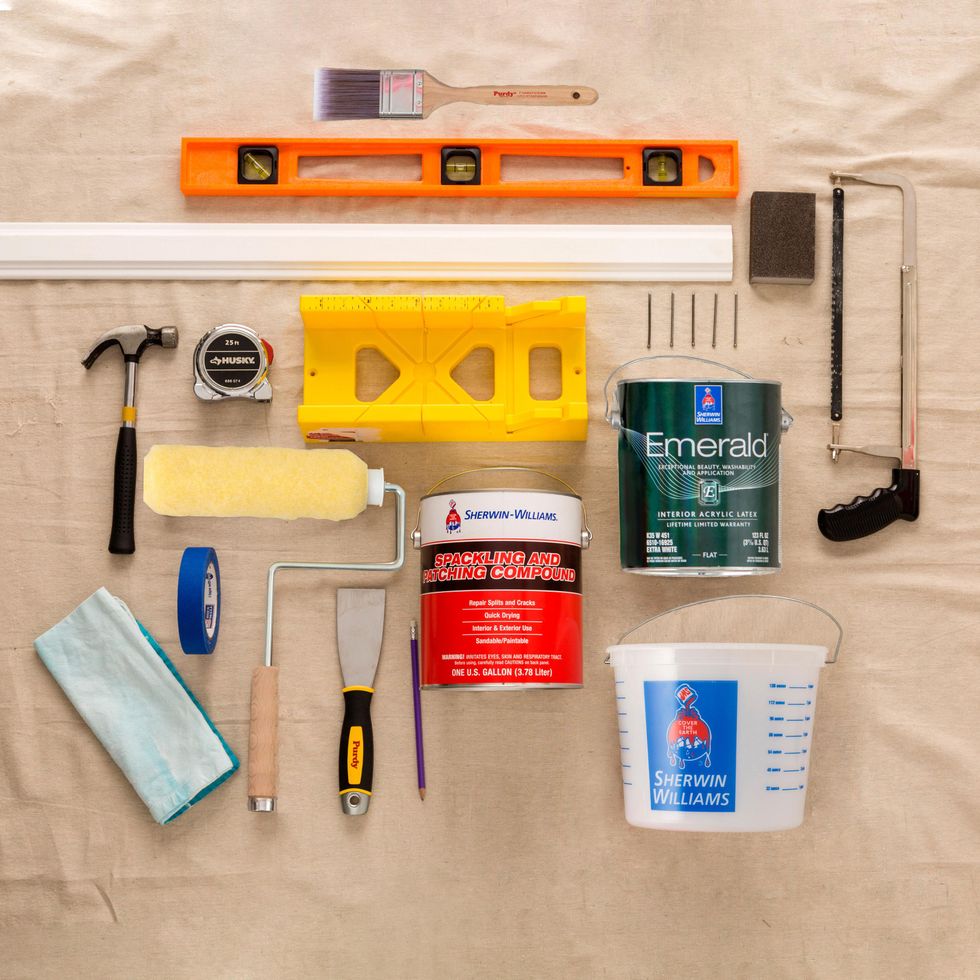
What you need:
- Measuring tape
- Hammer
- Handsaw
- Wood trim
- Miter box
- Paint: We used Sherwin-Williams® Emerald® Interior Paint in High Reflective White (SW 7757) and Fun Yellow (SW 6908)
- Paint bucket
- Spackling paste/hole repair
- Sandpaper
- Drop cloths/paper
- Rags
- Painter's tape
- Stir sticks
- Paint rollers
- Paint tray
- Paint brushes, for cutting in or touch-ups
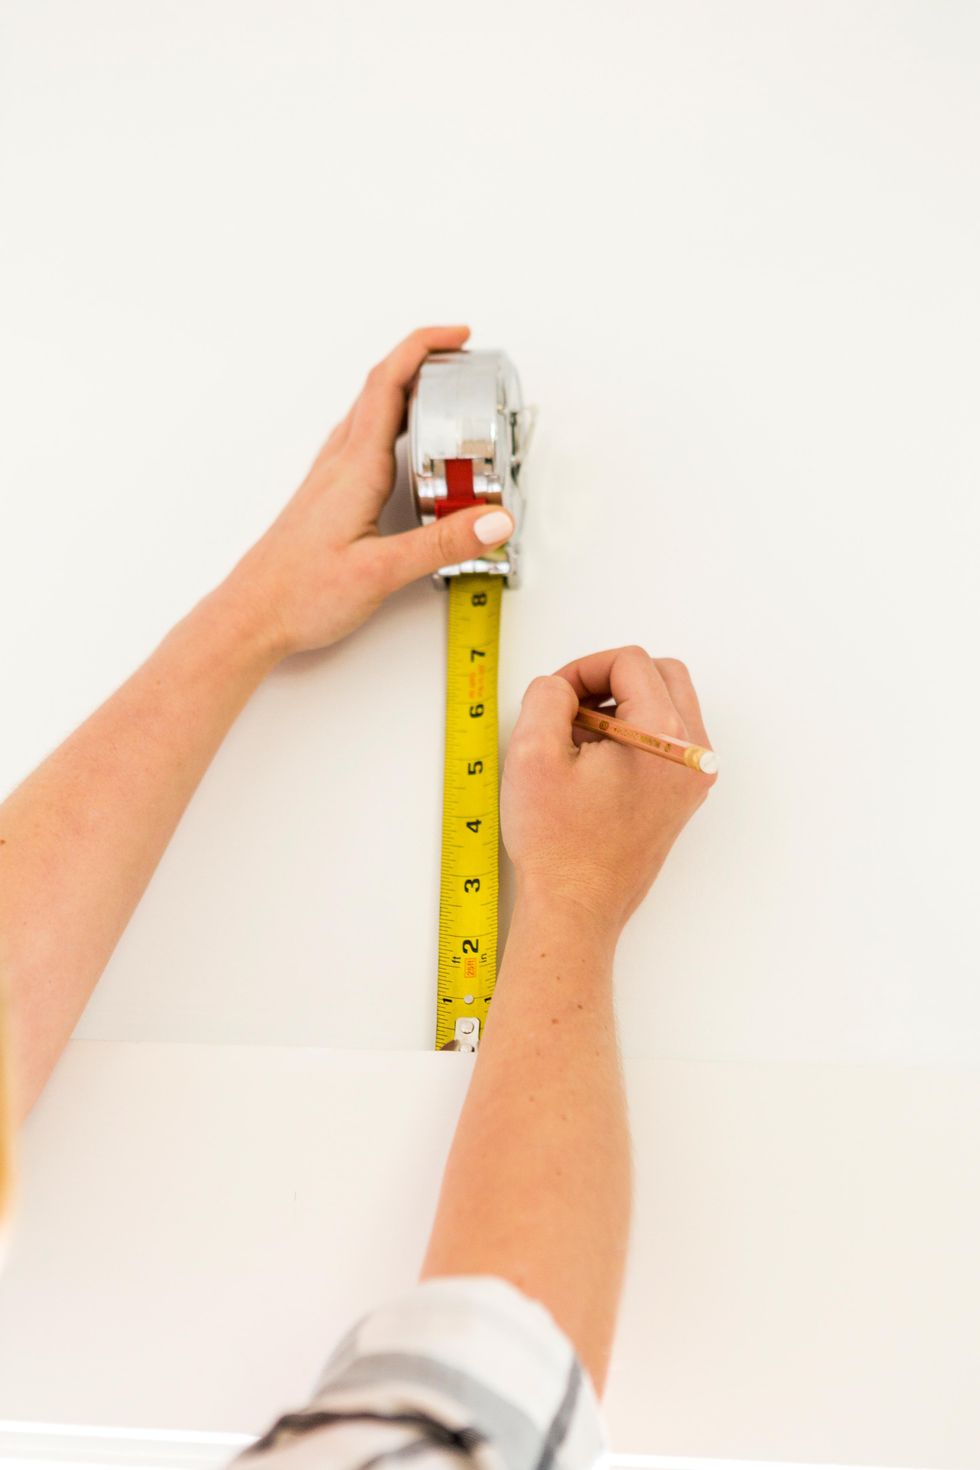
How to:
- Measure the distance of your drop ceiling.
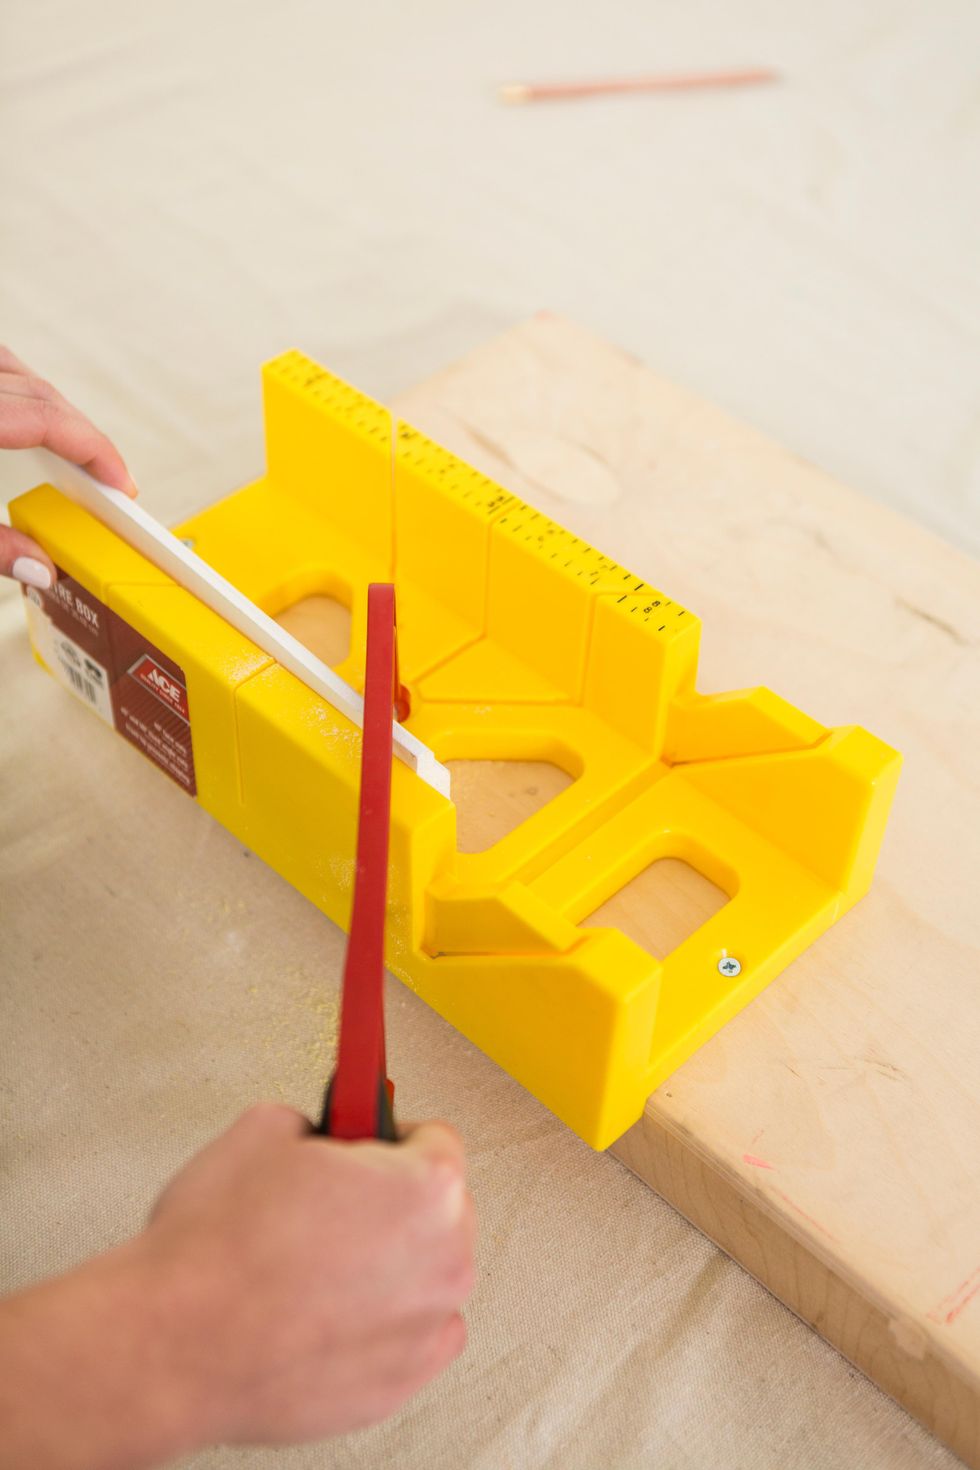
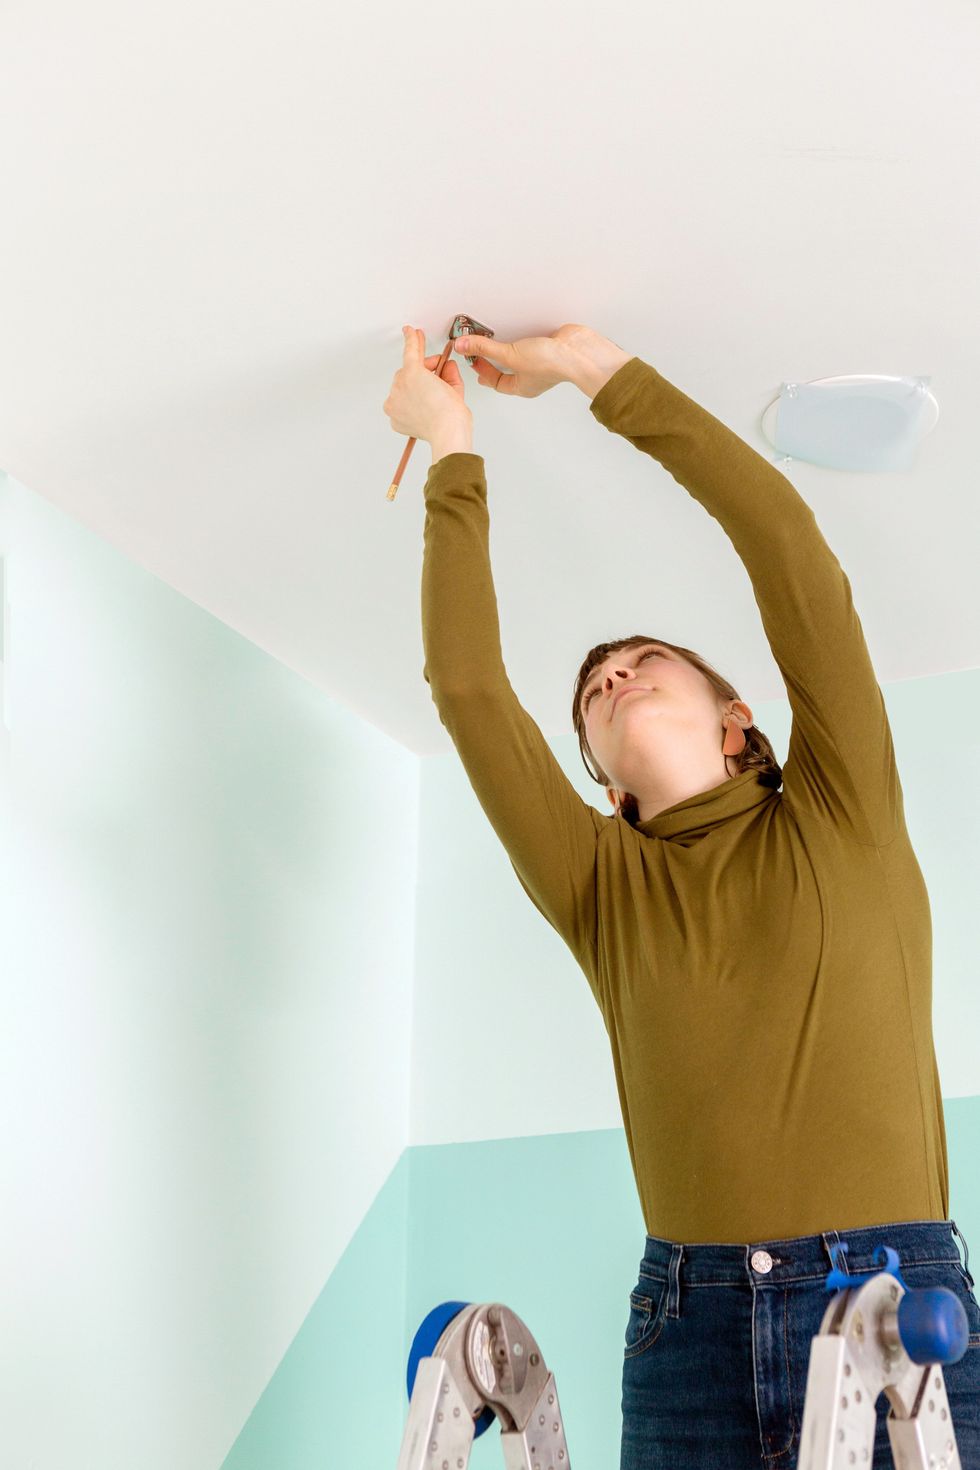
2. Make angled cuts to trim.
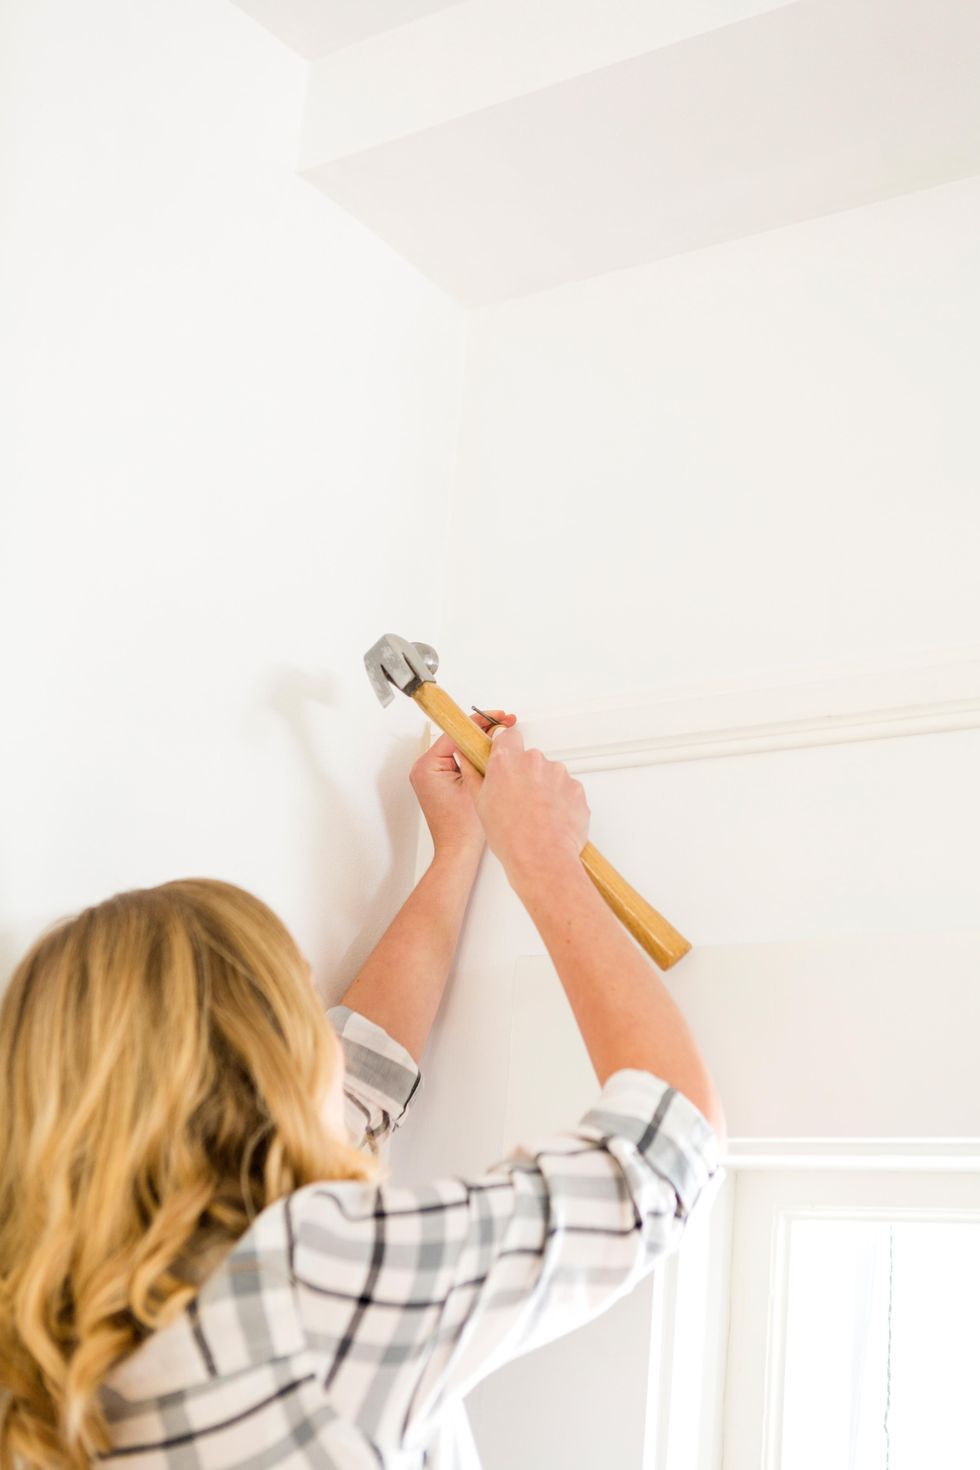
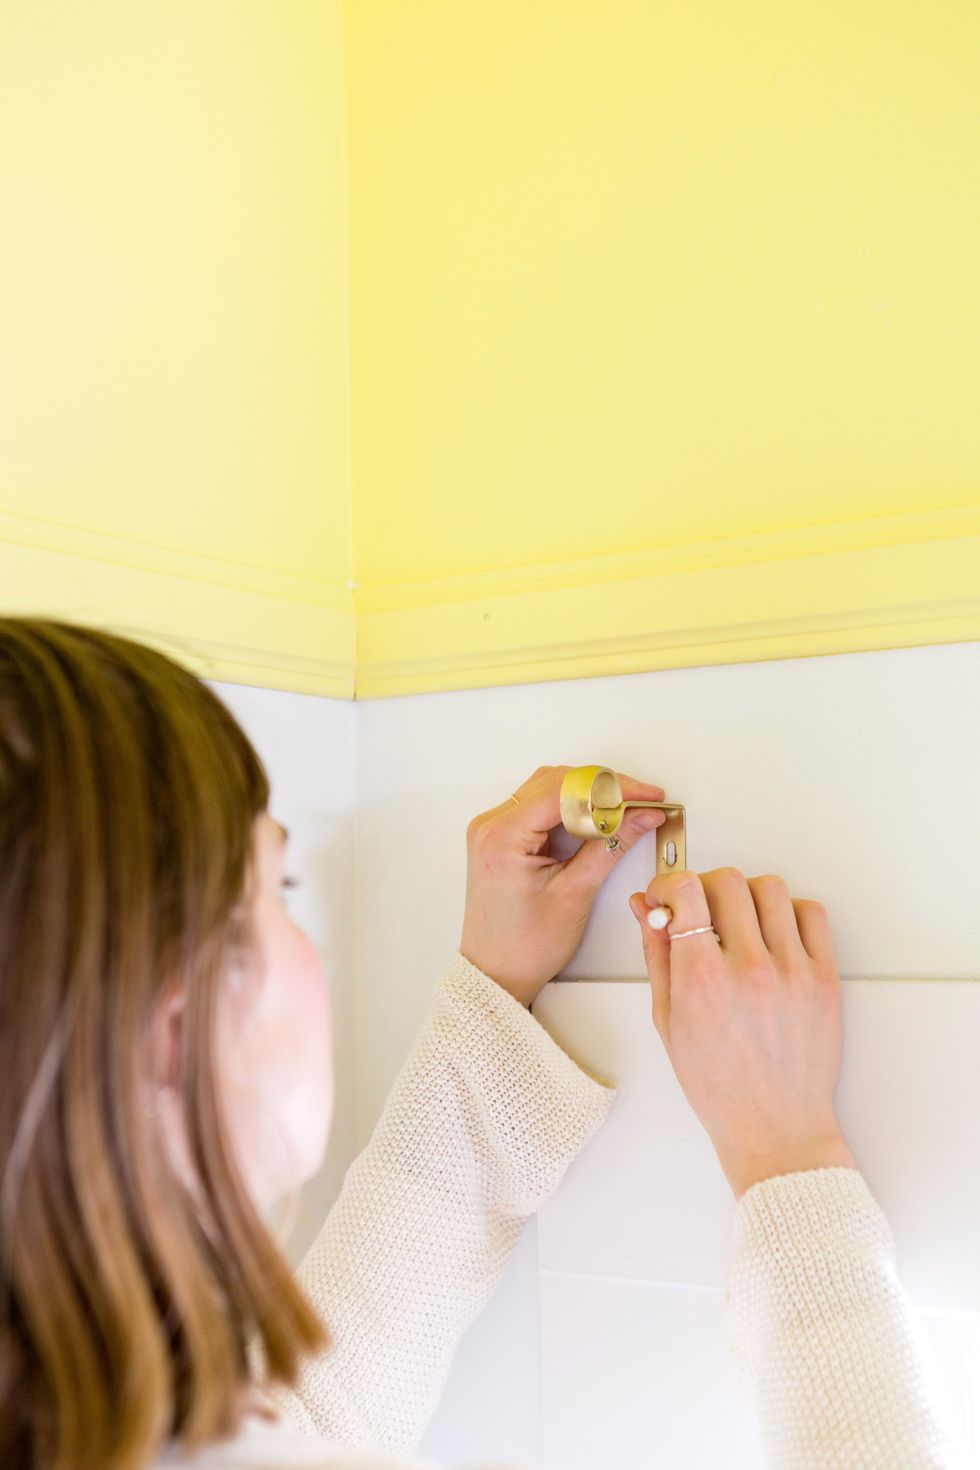
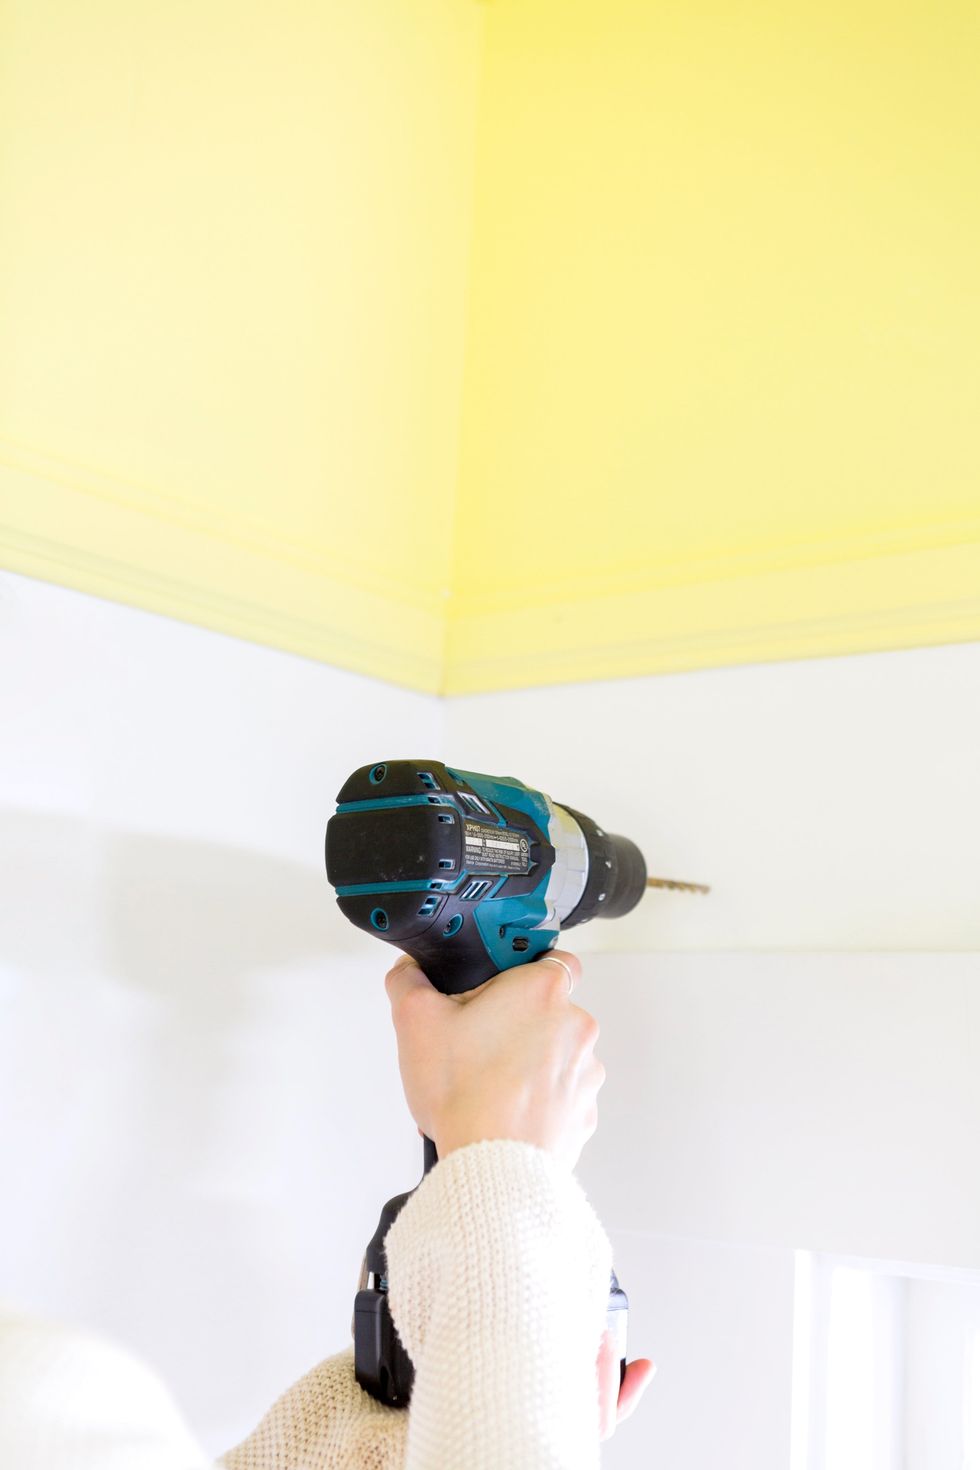
3. Use trim nails to hang your cut pieces.

4. Patch and fill nail holes
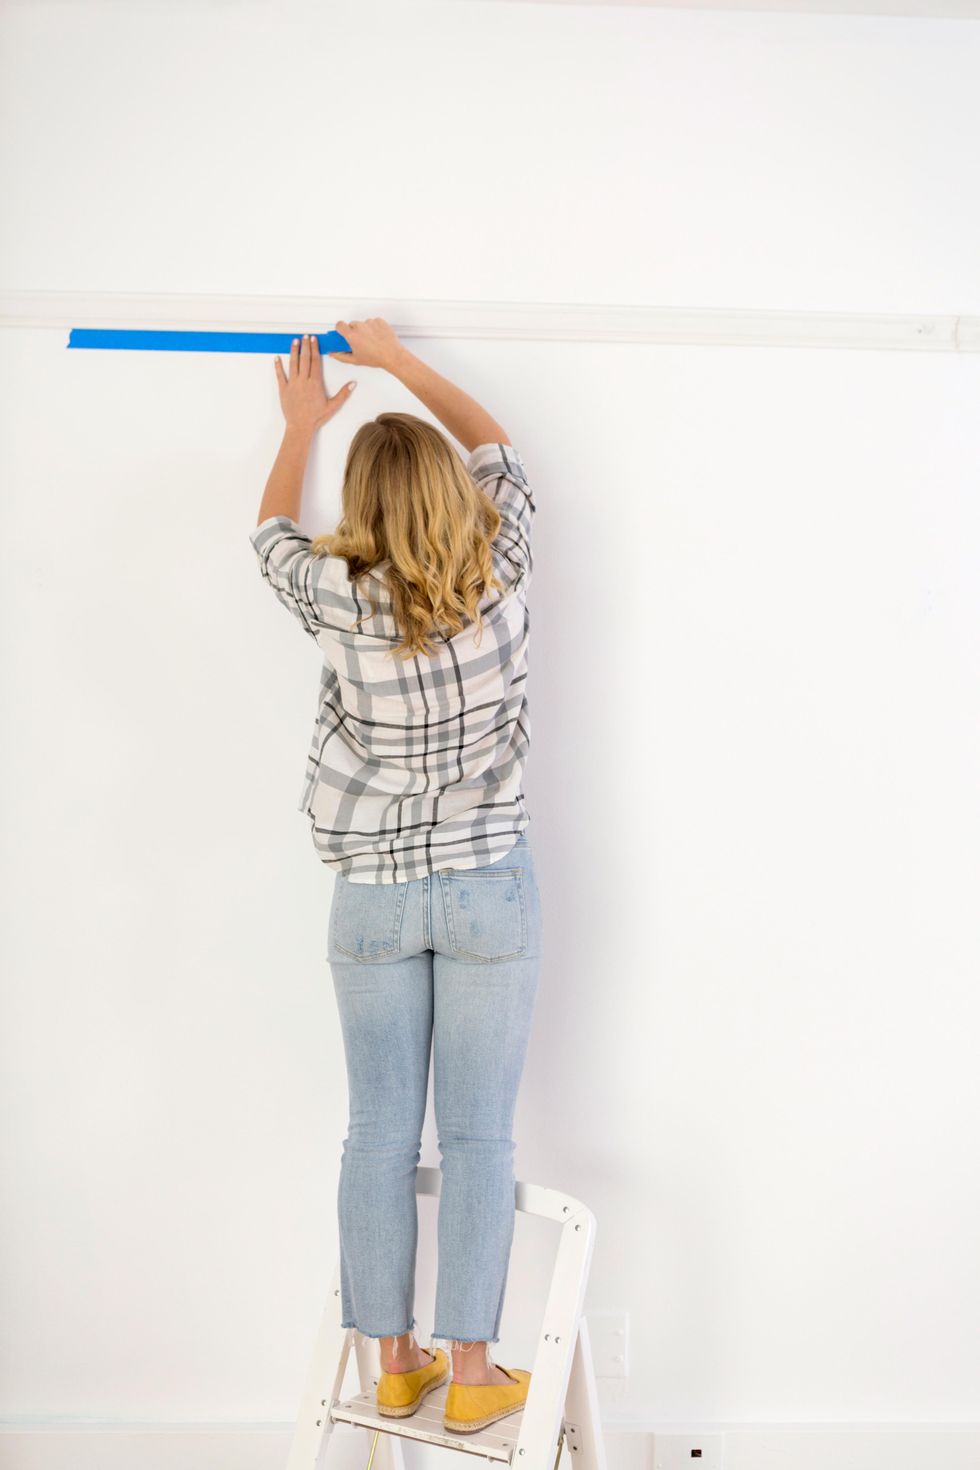
5. Sand and wipe away dust. Apply painter's tape.
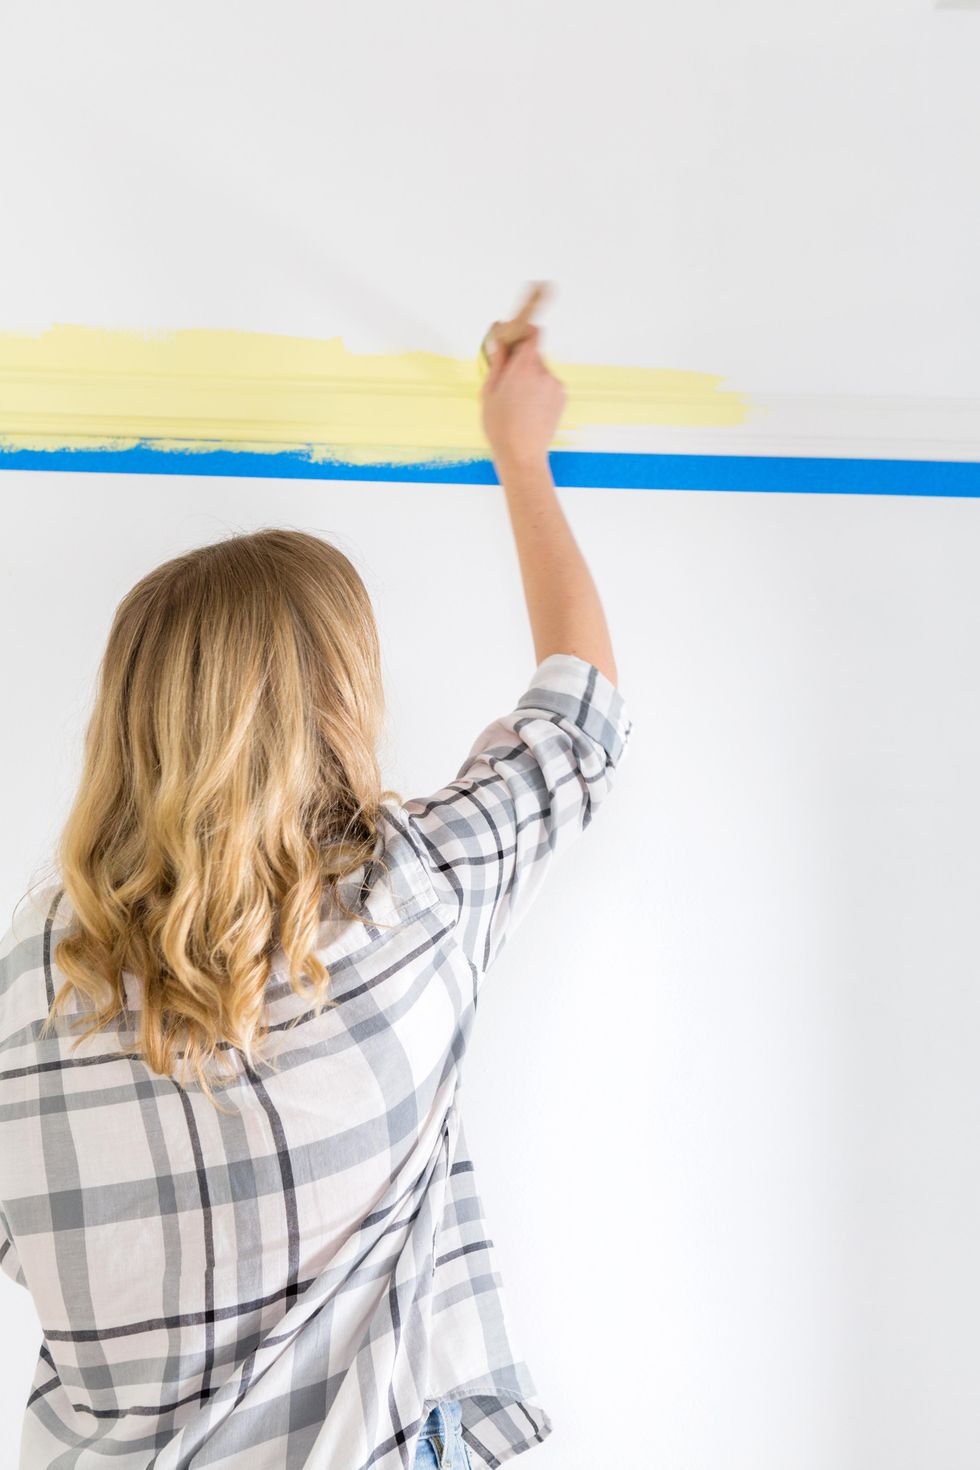
6. Chip in along trim edge, and all corners.
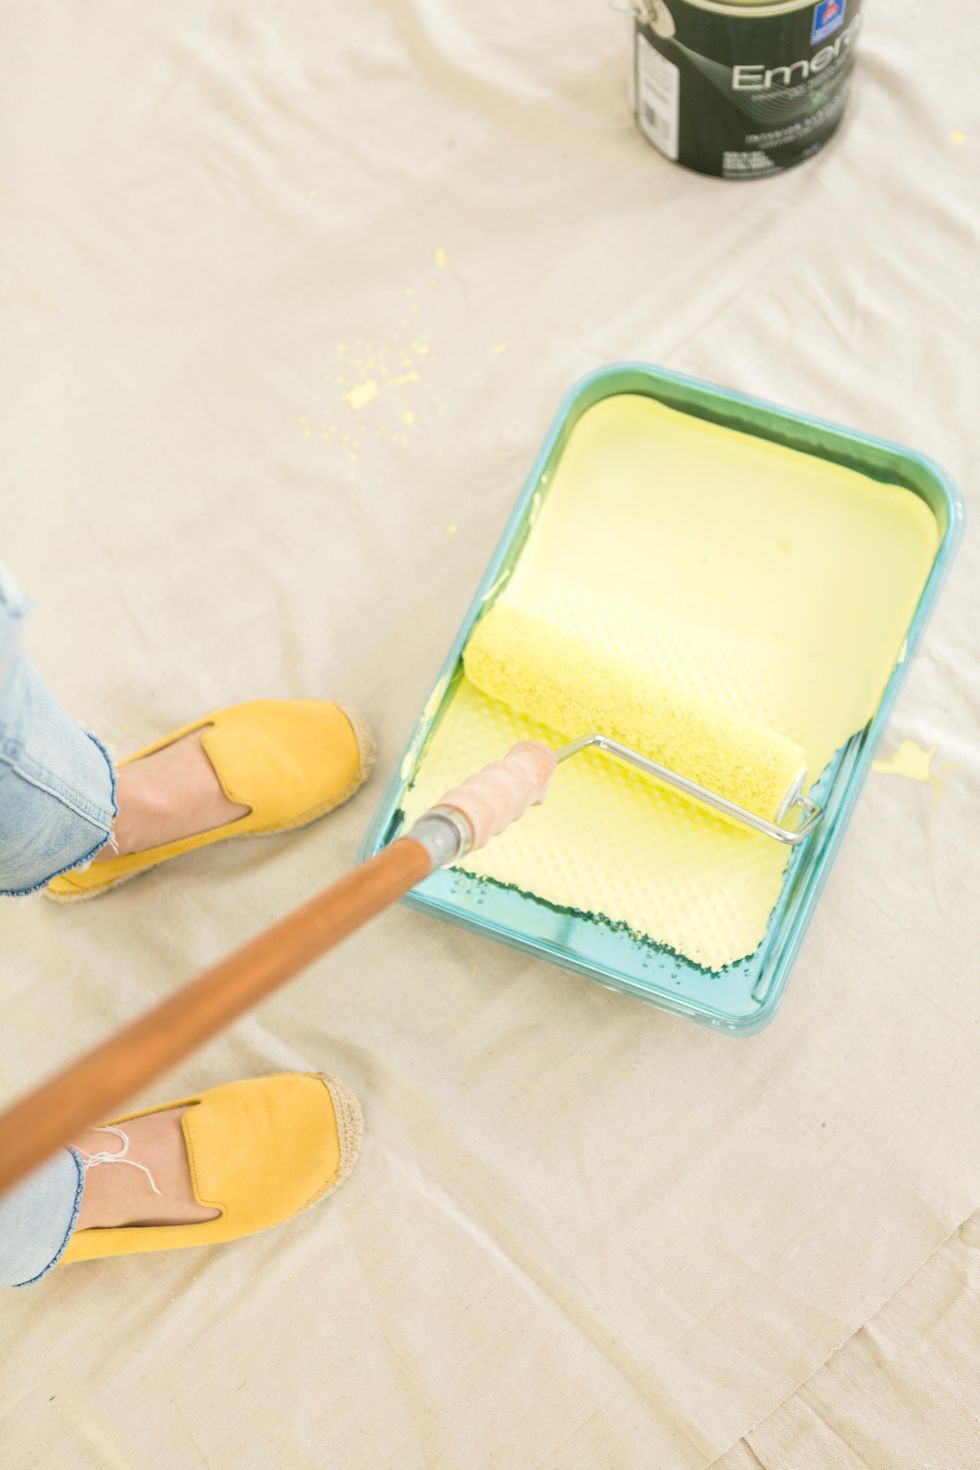
7. Use a 9" roller and paint to cover the wall and ceiling.
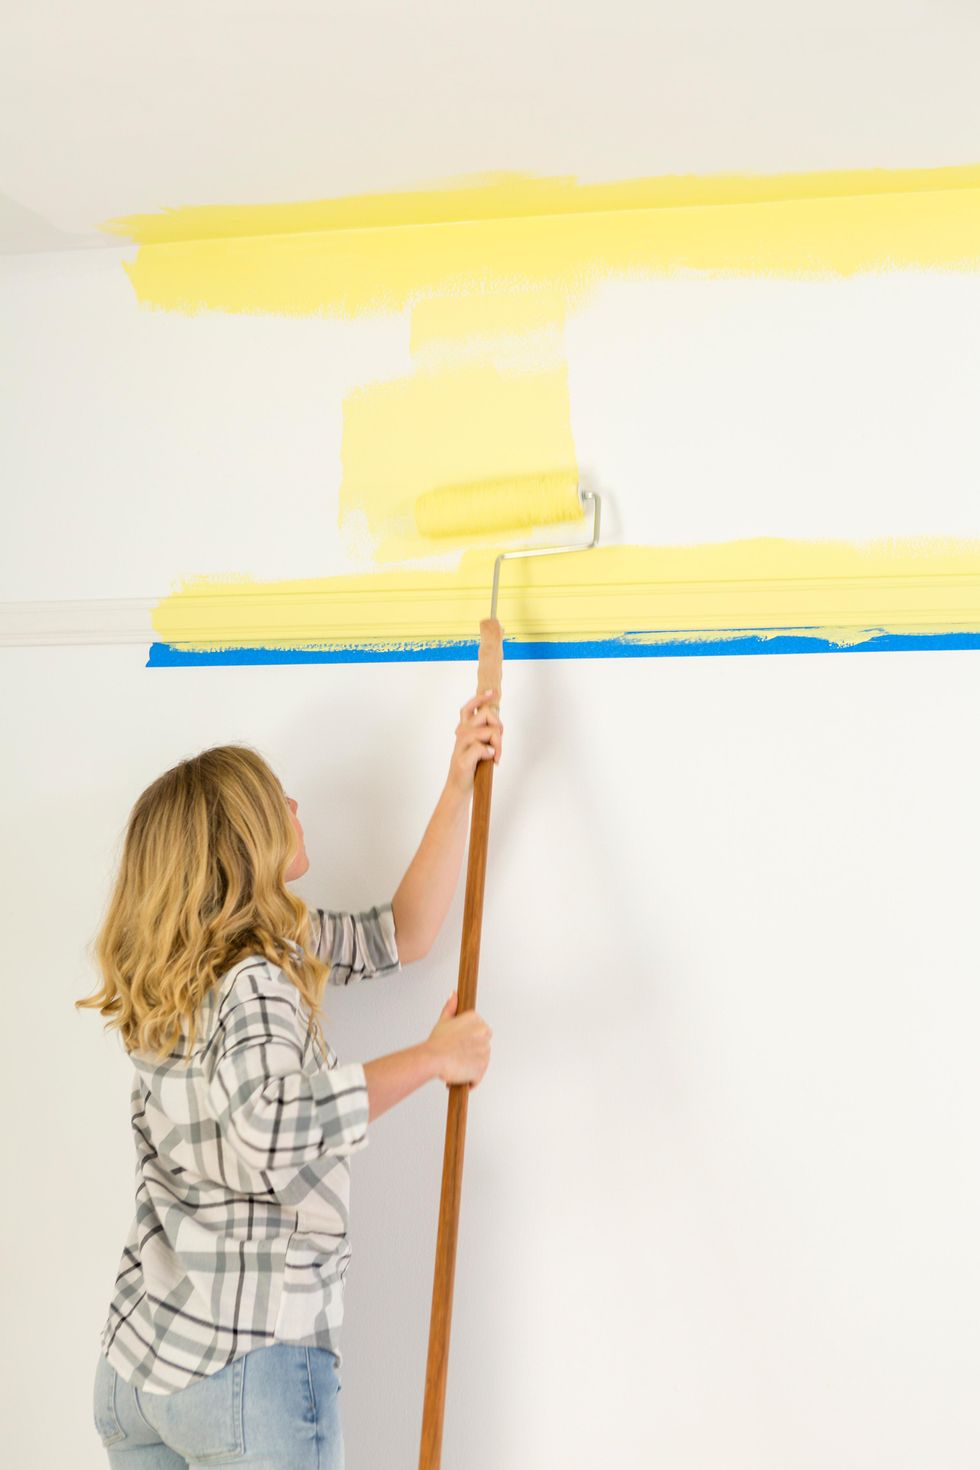
8. Paint in both directions in a W pattern.
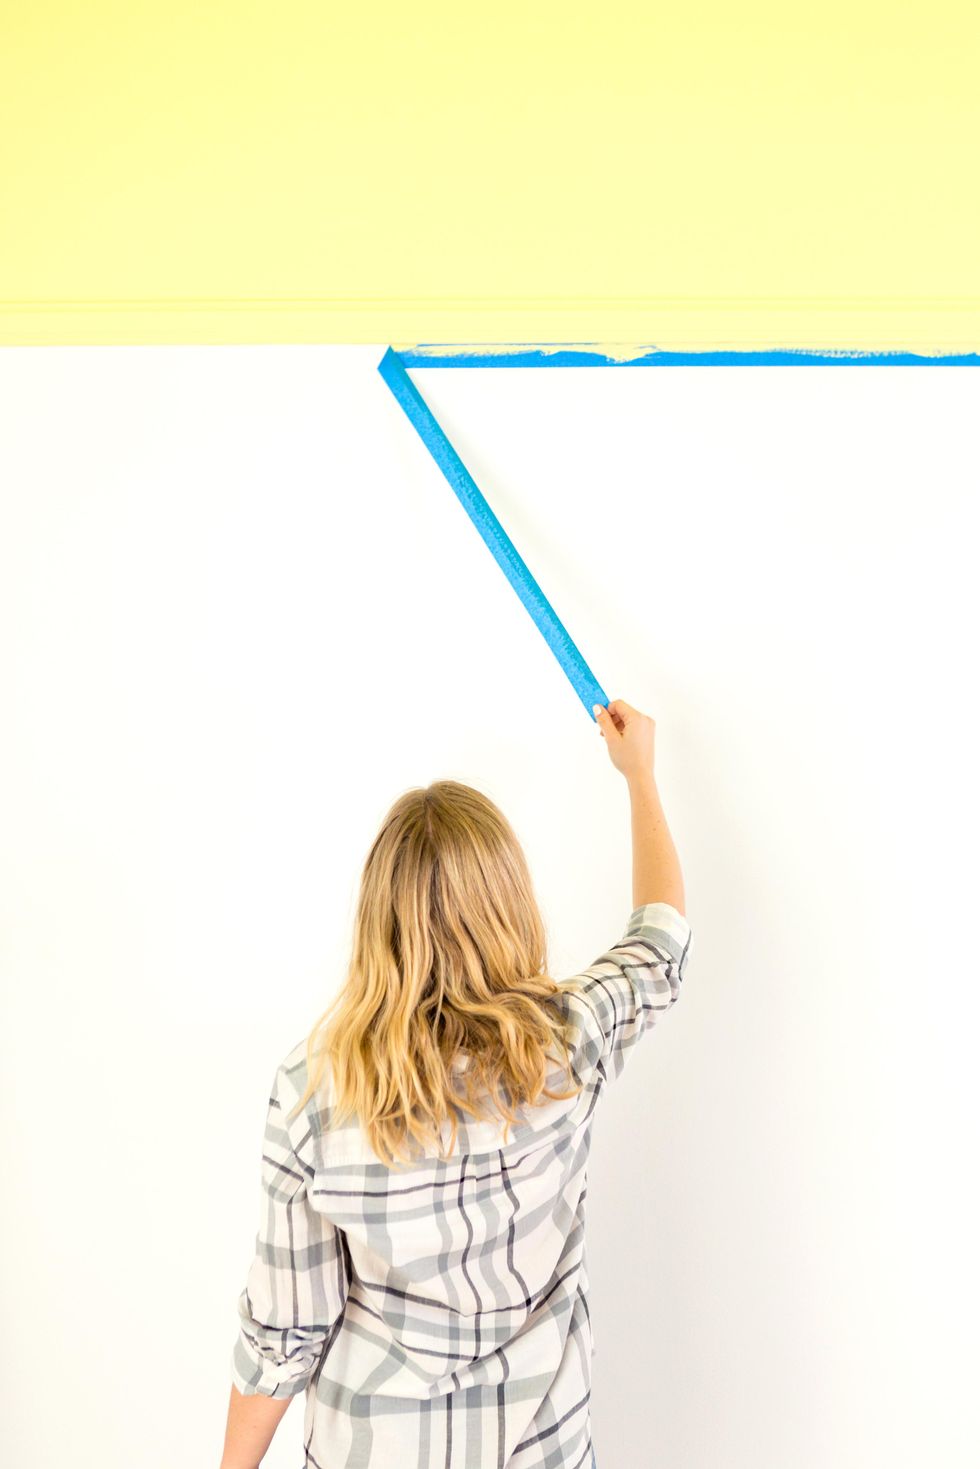
9. Let dry and remove tape.
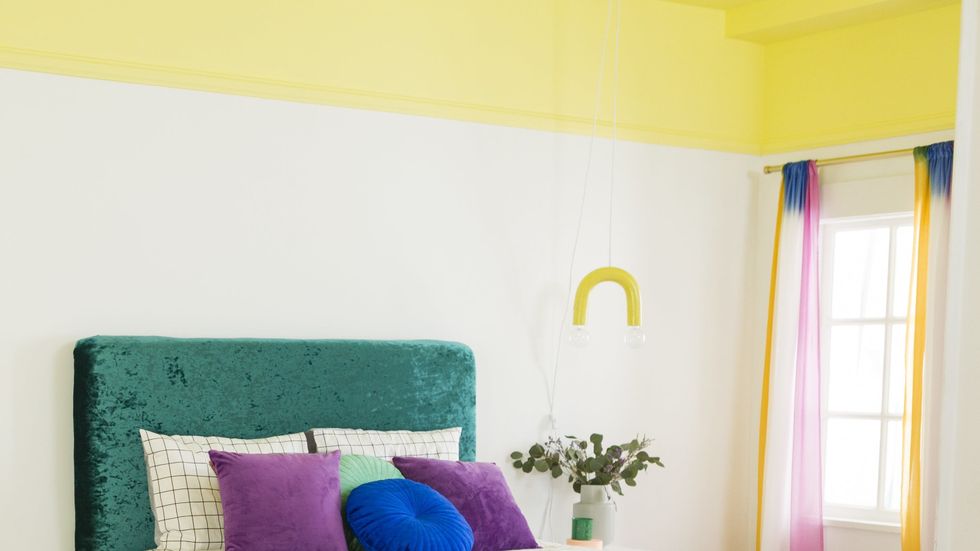
A pop of sunshine!
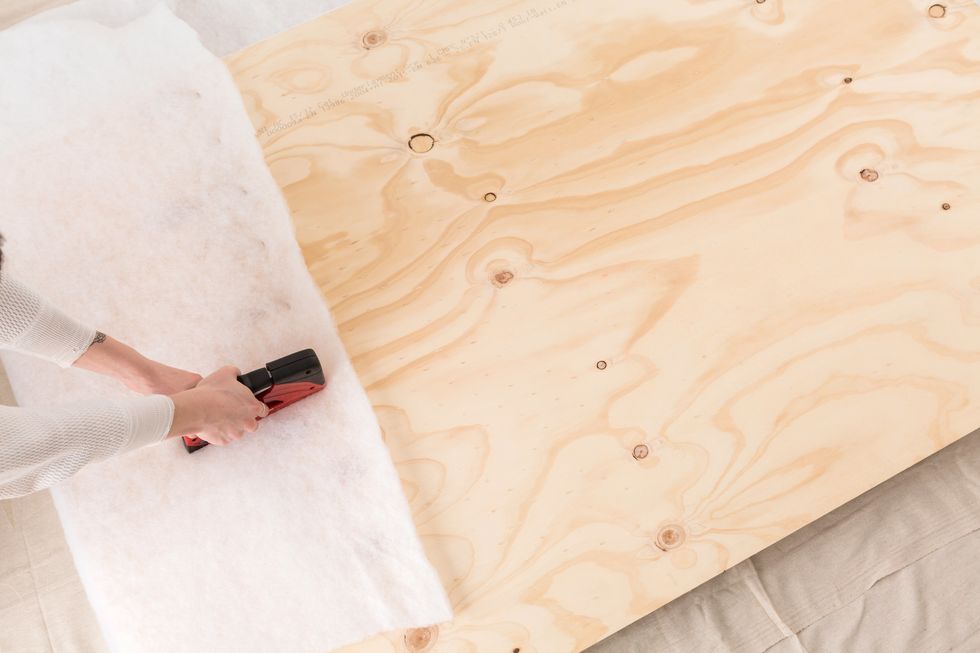
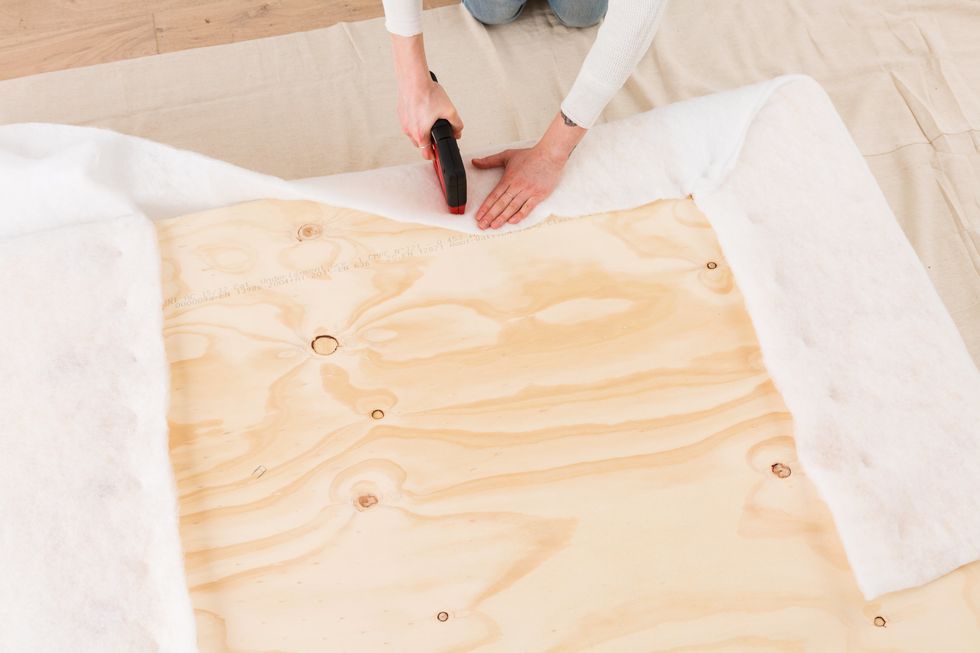
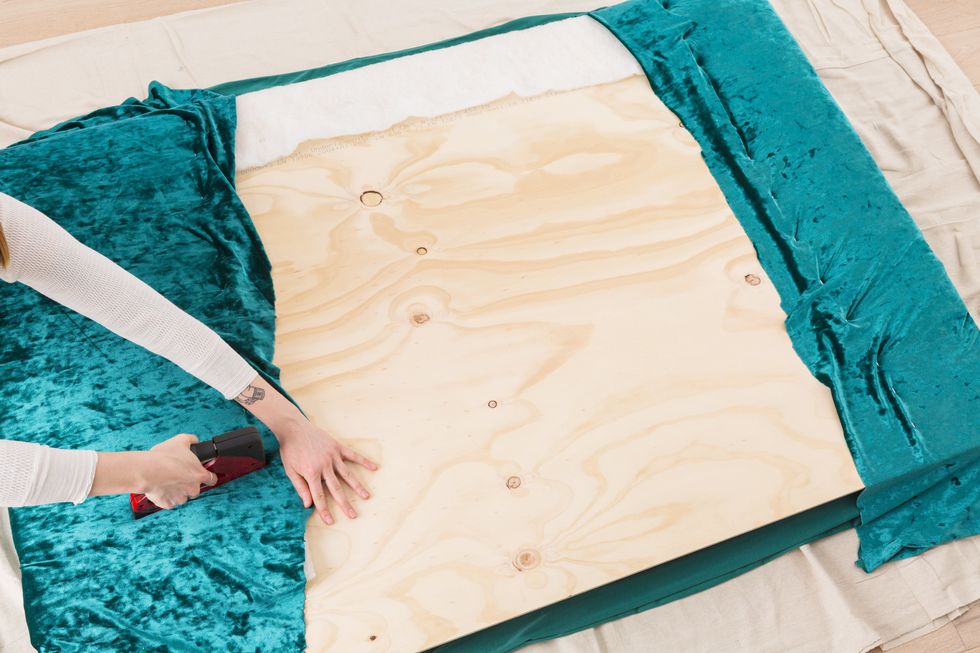
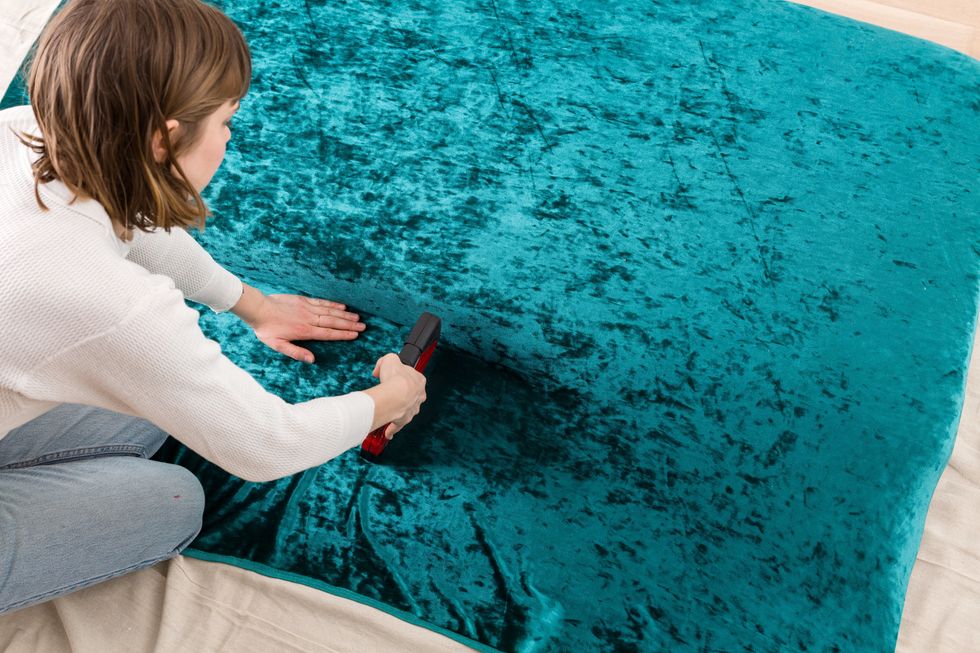
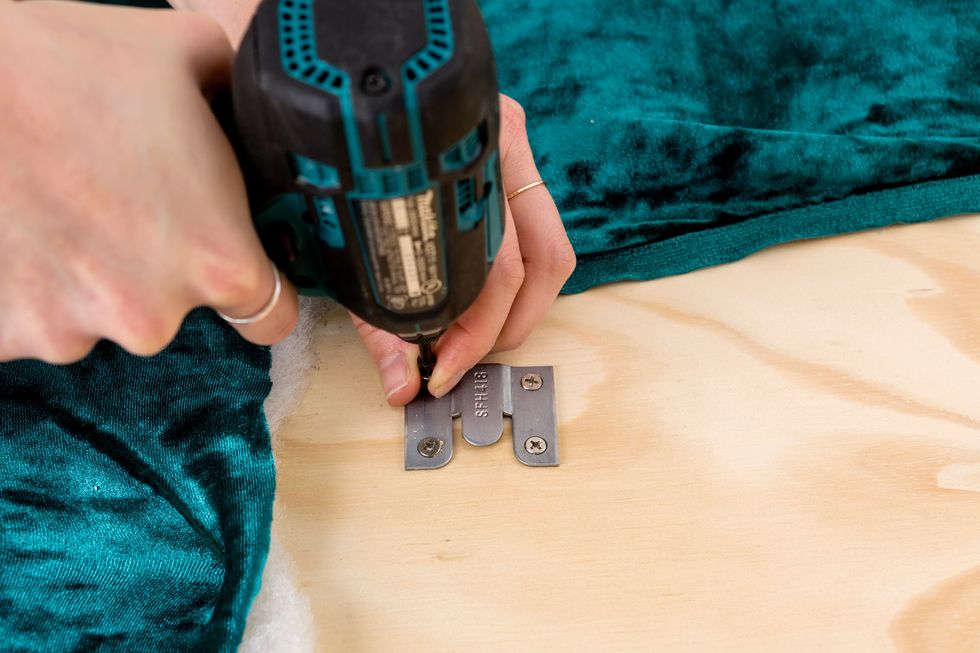
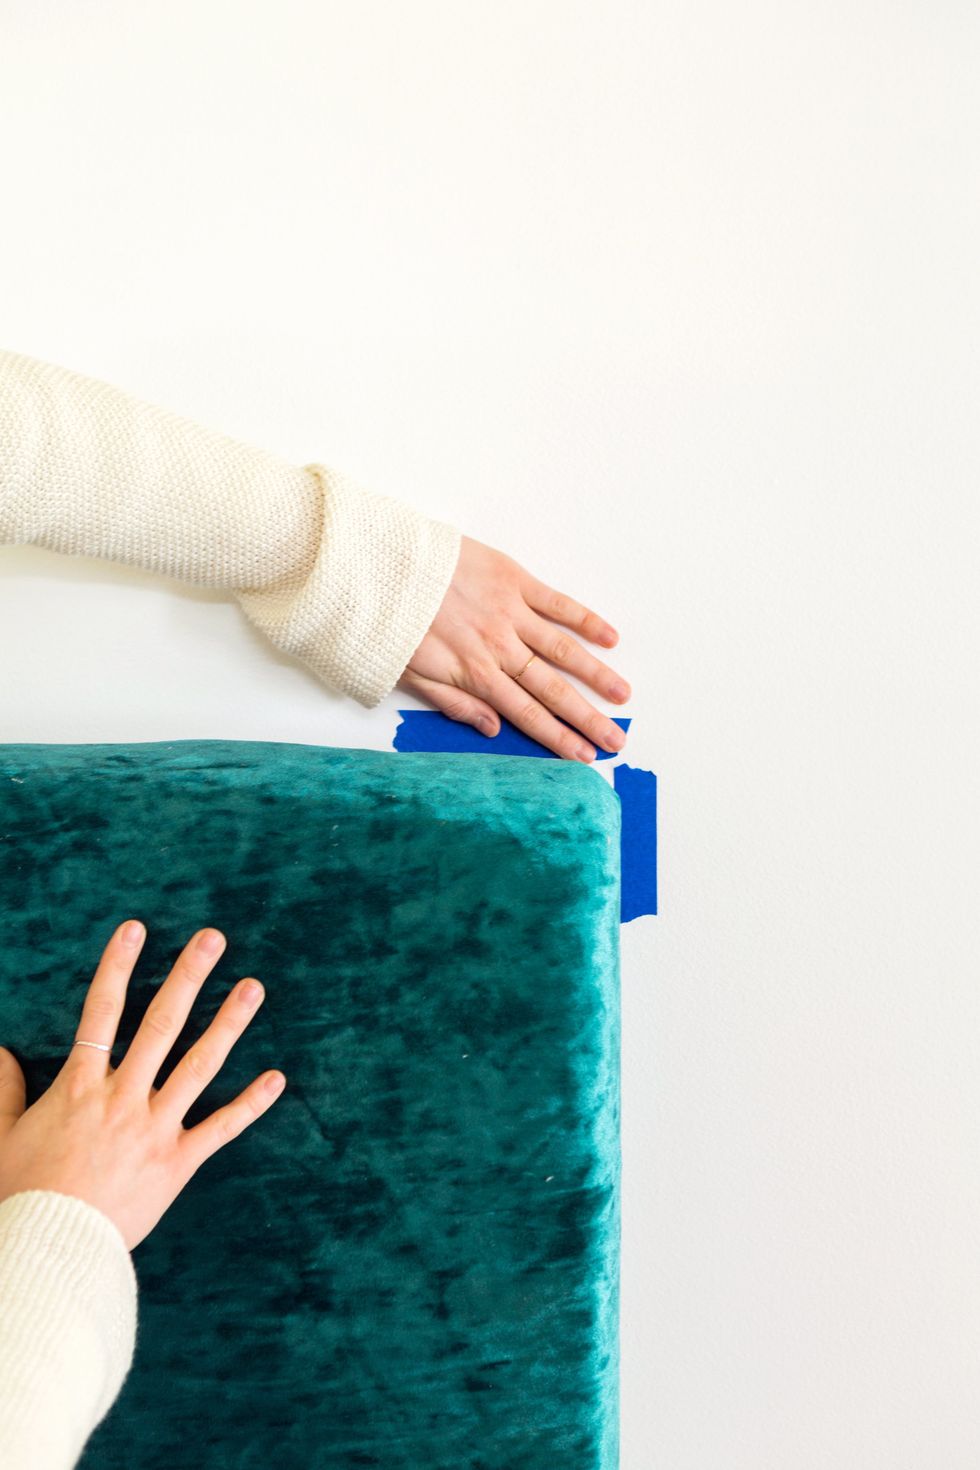
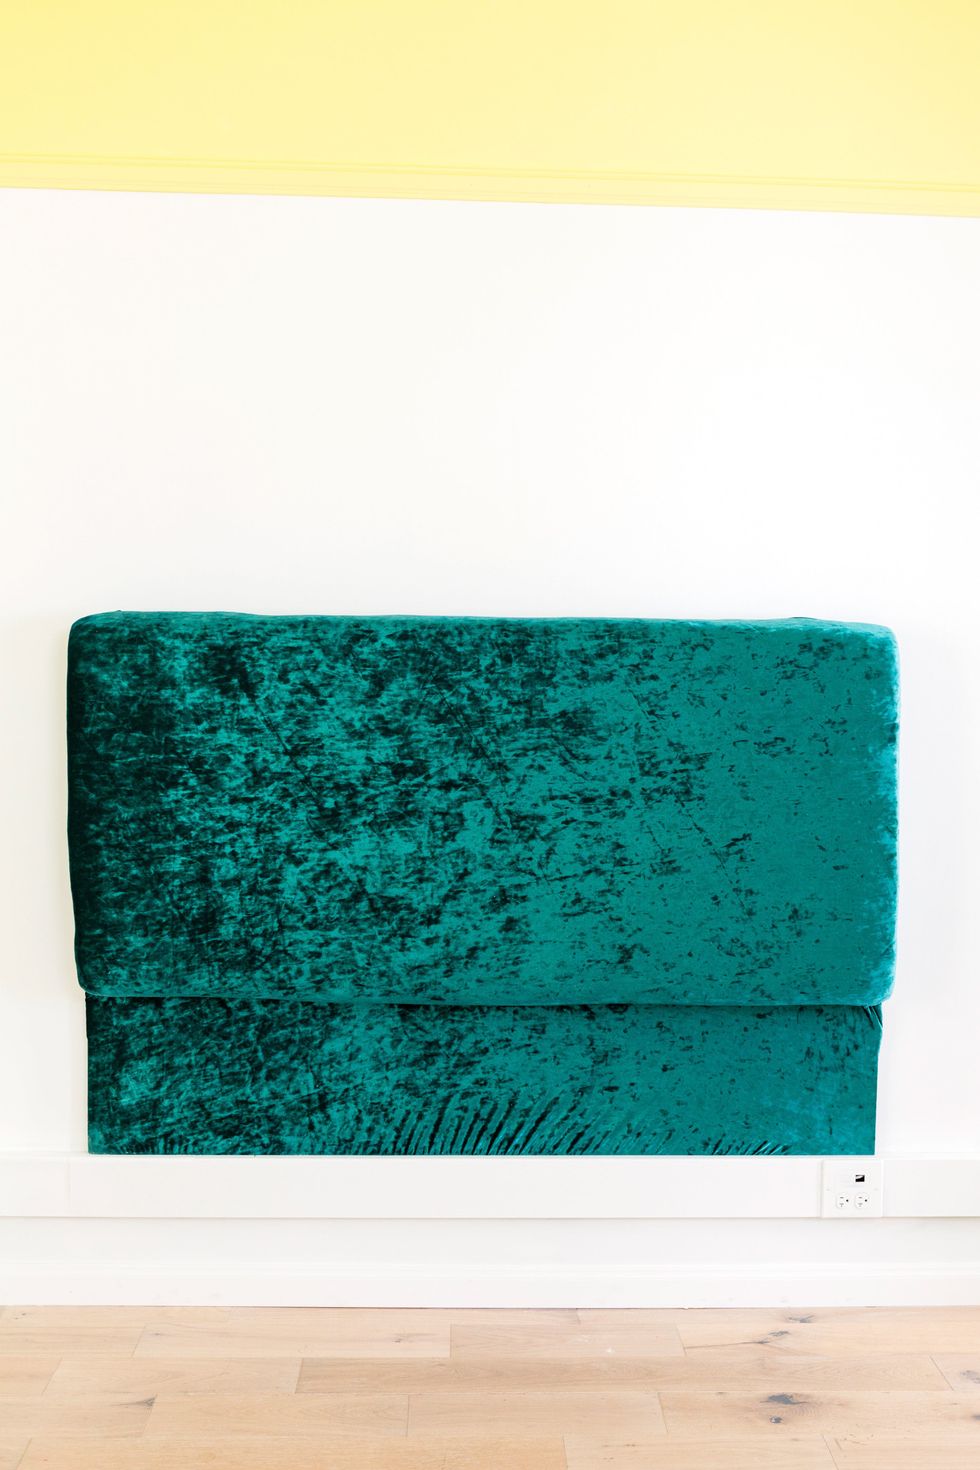
Bedroom: Create an Upholstered Headboard
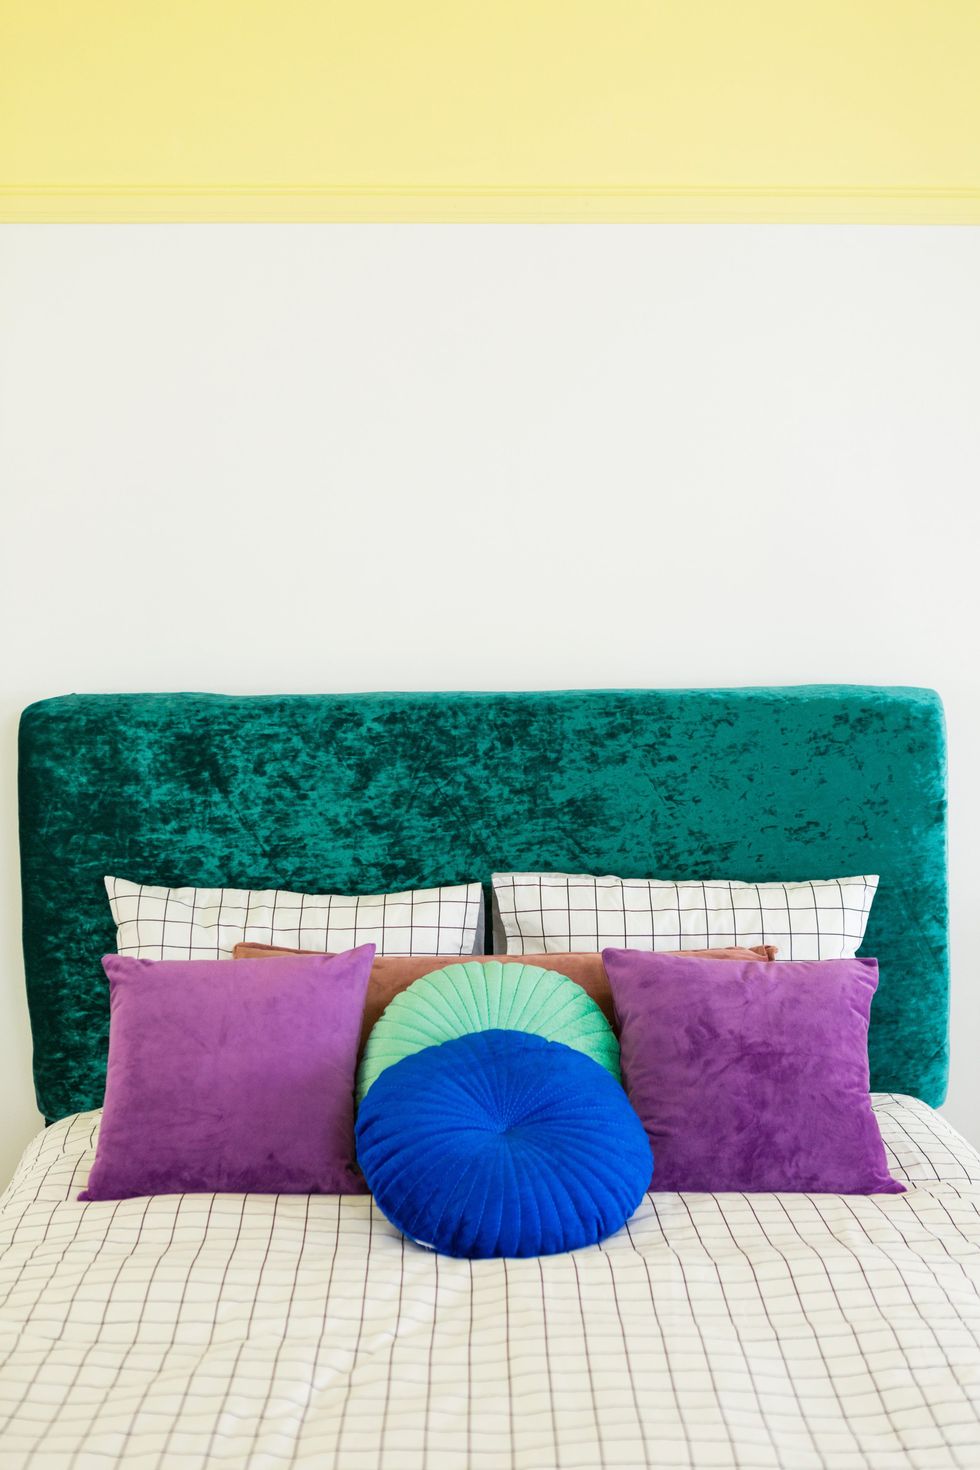
Upholstering your headboard with an oh-so-you fabric will revive your entire sleeping environment. Toss in a few jewel-toned pillows and you've got a dazzling space where you can dream away.
Follow our visual guide to complete your project!


Bedroom: Hang Colorful Curtains
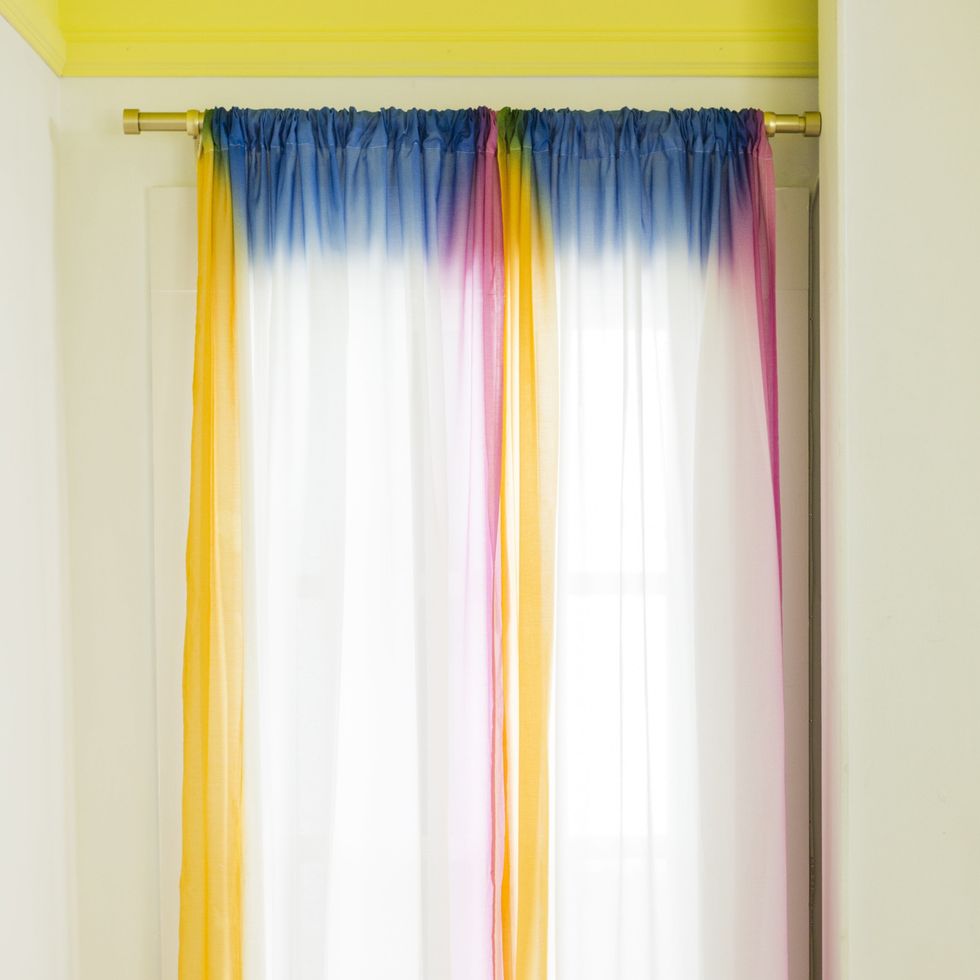
Your windows can make an eye-catching statement dressed up with playful curtains, so don't let the task of putting up rods keep you from that look. Paired with some natural light, these colorful ones deliver the dose of cheer your room *desperately* needs.
Follow our visual guide to complete your project!


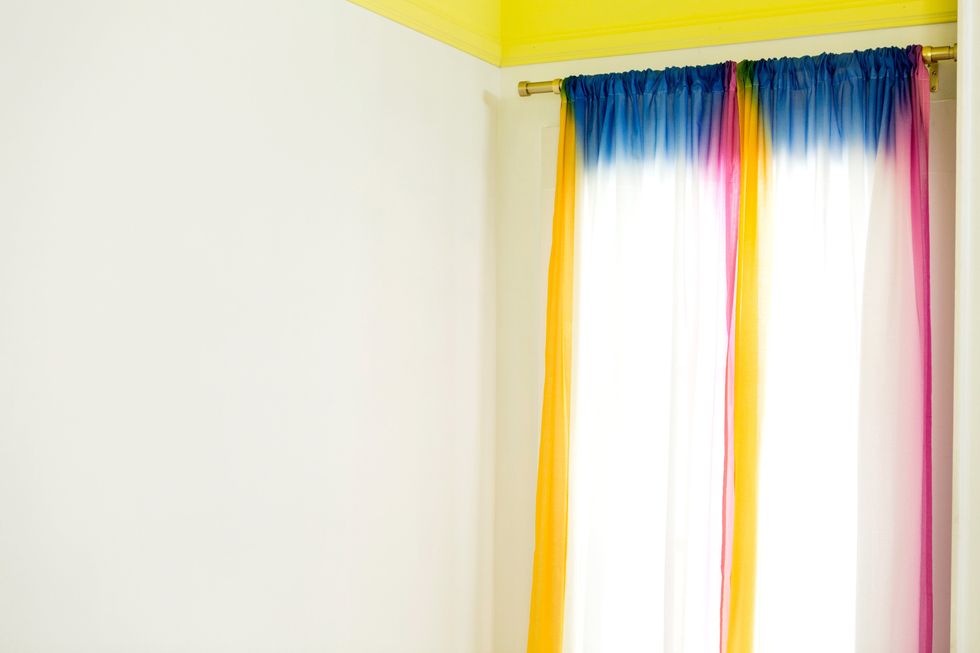
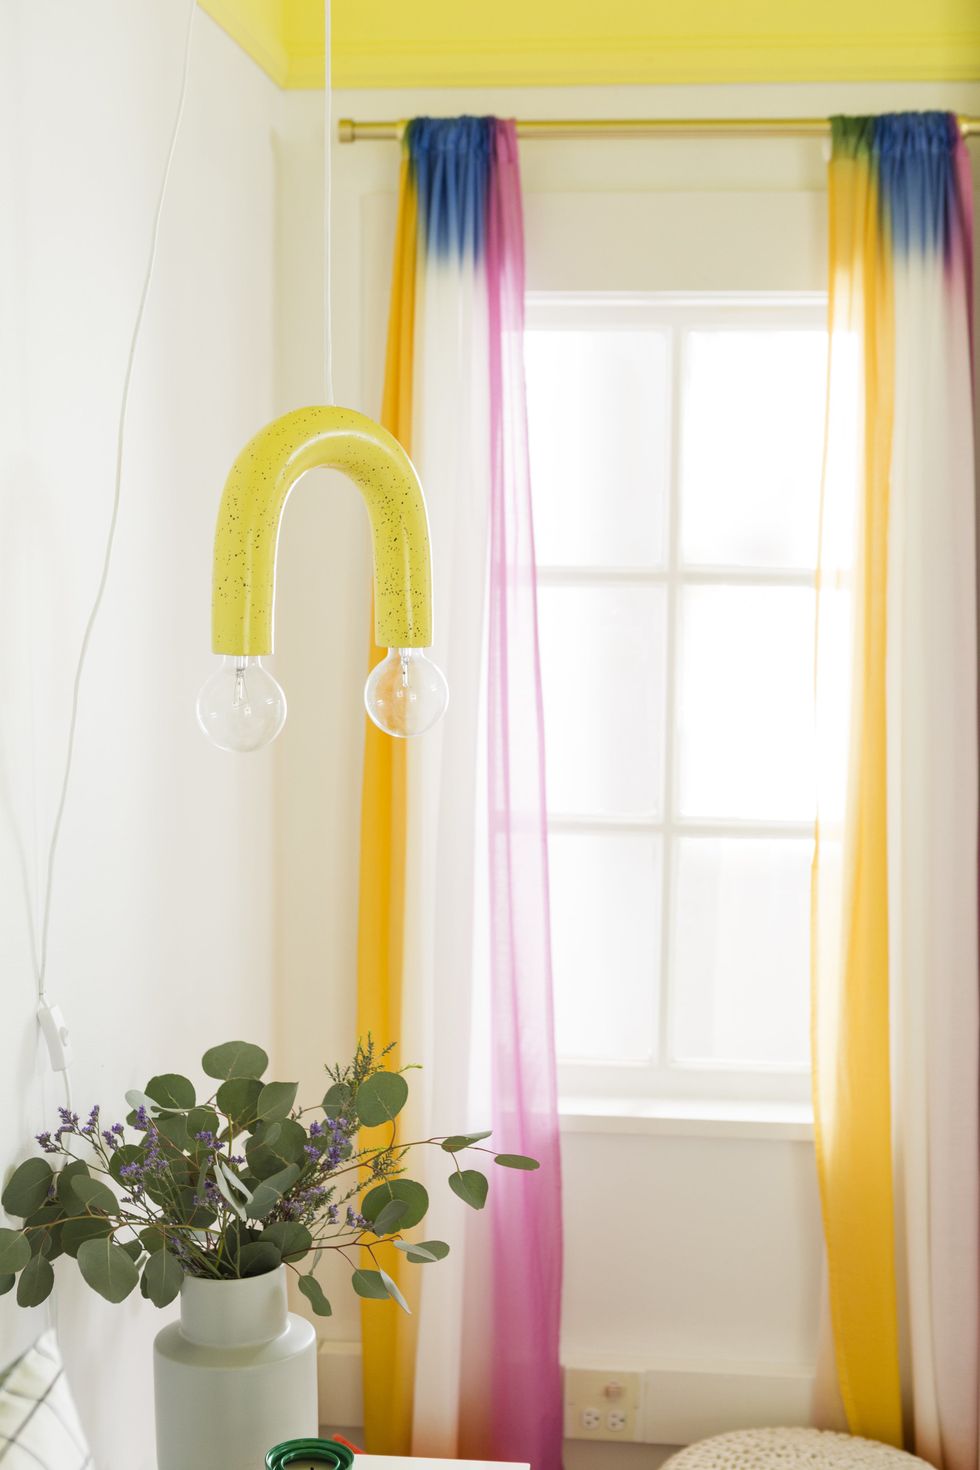
Curtains make a big impact in any room.
Get The Look of Our Bedroom: VClife Checkered Duvet Cover, UO Shelly Round Velvet Pillow, IKEA Sanela Cushion Cover, UO Modern Berber Rug, Purple Couch Pillow Covers, Cost Plus World Market French Yellow Taryn Chair
And now, it's time to step up your bathroom game.
Bathroom
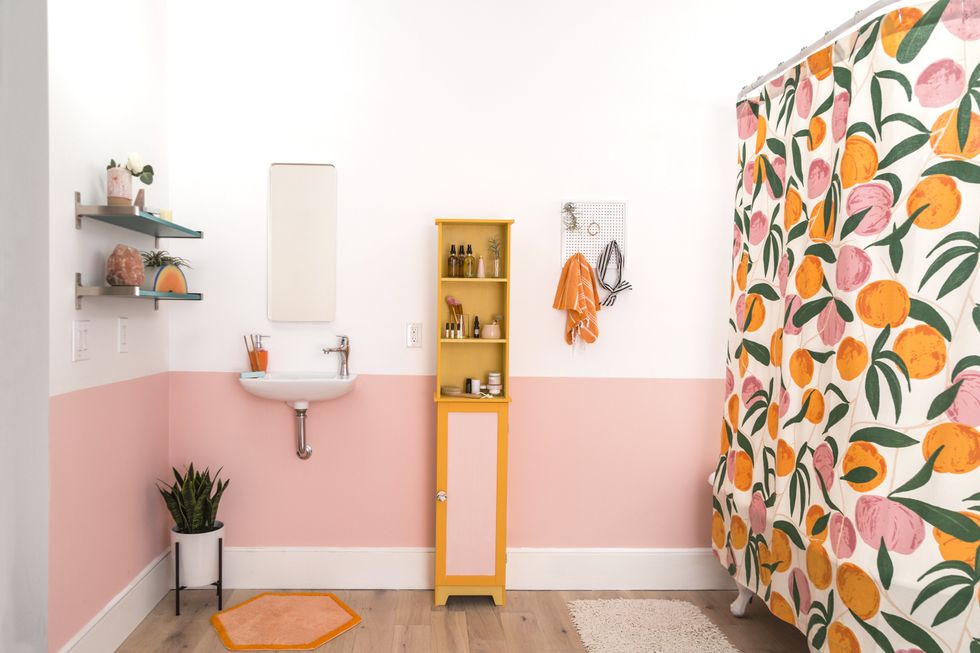
A girl's bathroom is all about morning routines, quick afternoon zhushes, and evening relaxation. Give it a sparkling makeover by installing decorative wall shelves, replacing your showerhead, and revamping an outdated apothecary cabinet.
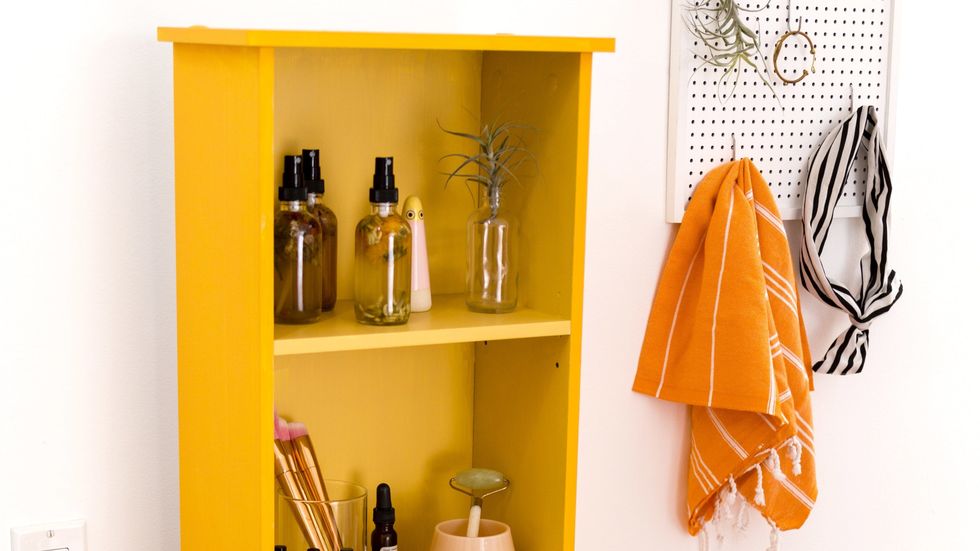
Bathroom: Refinish an Apothecary Cabinet

Your useful yet unremarkable apothecary cabinet deserves a dazzling new look. Add a vivacious pop of color and a decorative knob for a complete DIY transformation.

Now it's time for you to take that drab cabinet to the next level. Follow along with our step-by-step gallery and add a ton of color to your ho-hum bathroom.

What you need:
- Paint: We used Sherwin-Williams® Emerald® Interior Paint in Osage Orange (SW 6890), Oleander (SW 6603), and Daffodil (SW 6901)
- Sandpaper
- Drop cloths/paper
- Rags
- Painter's tape
- Stir sticks
- Paint rollers
- Paint tray
- Paint brushes, for cutting in or touch-ups
- Screwdriver
- New hardware

How to:
- Remove door and hardware.
2. Sand rough edges and clean up dust.
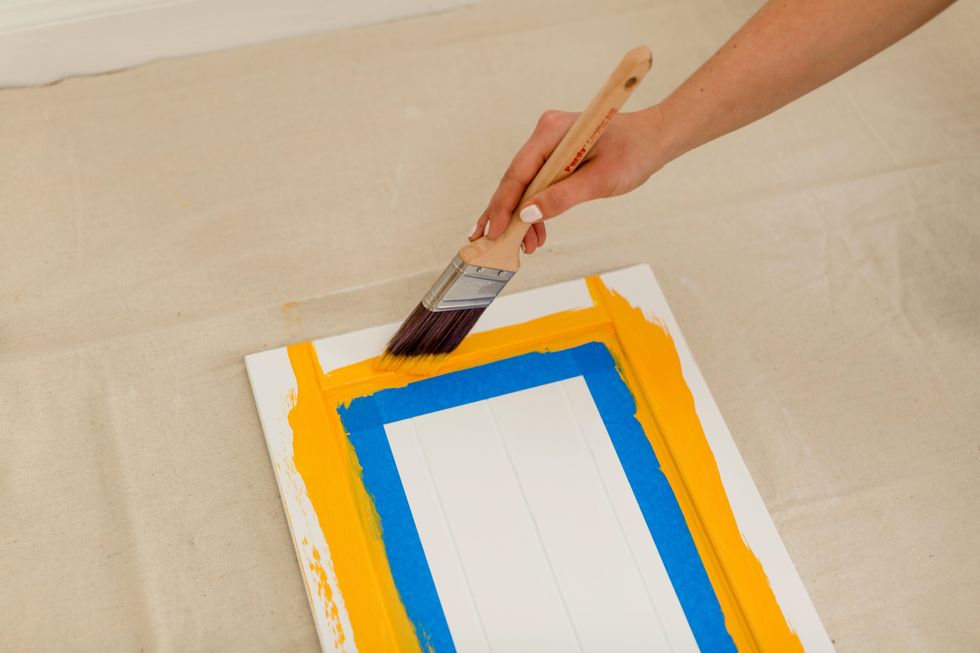
3. Paint base and let dry.
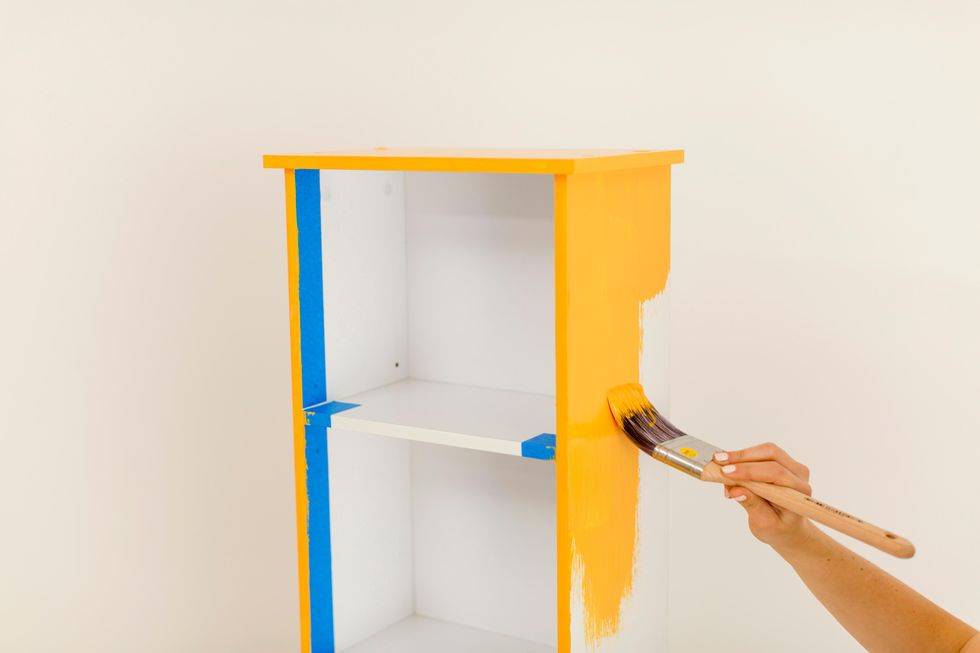
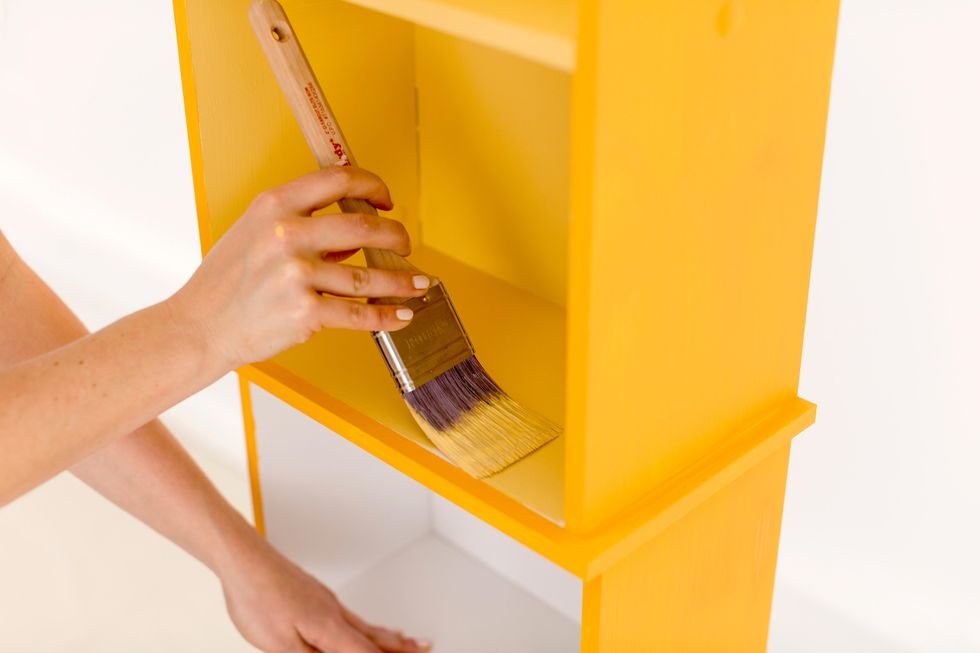
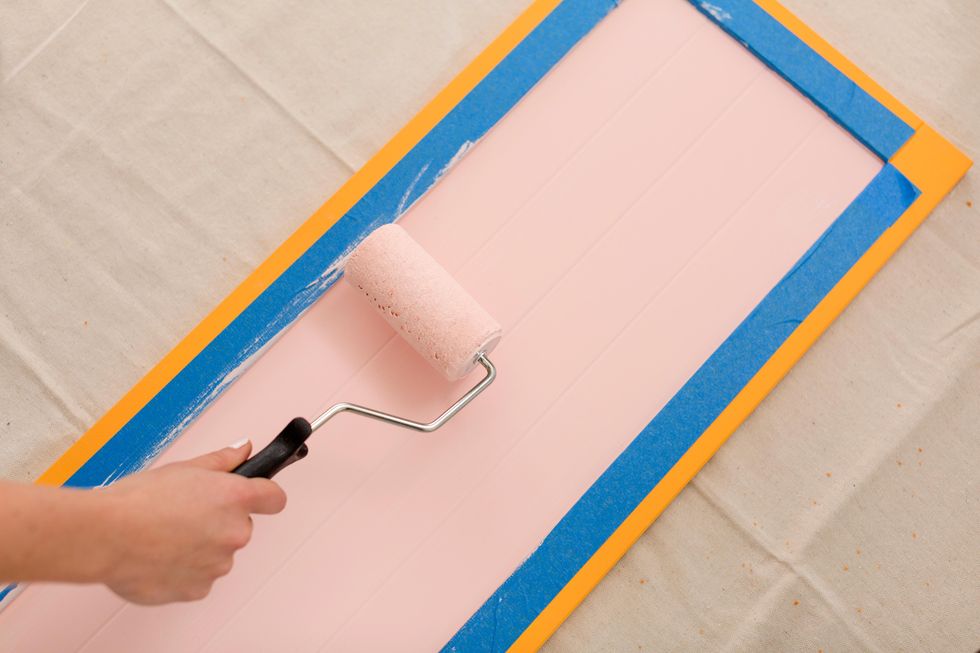
4. Add a pop of color!
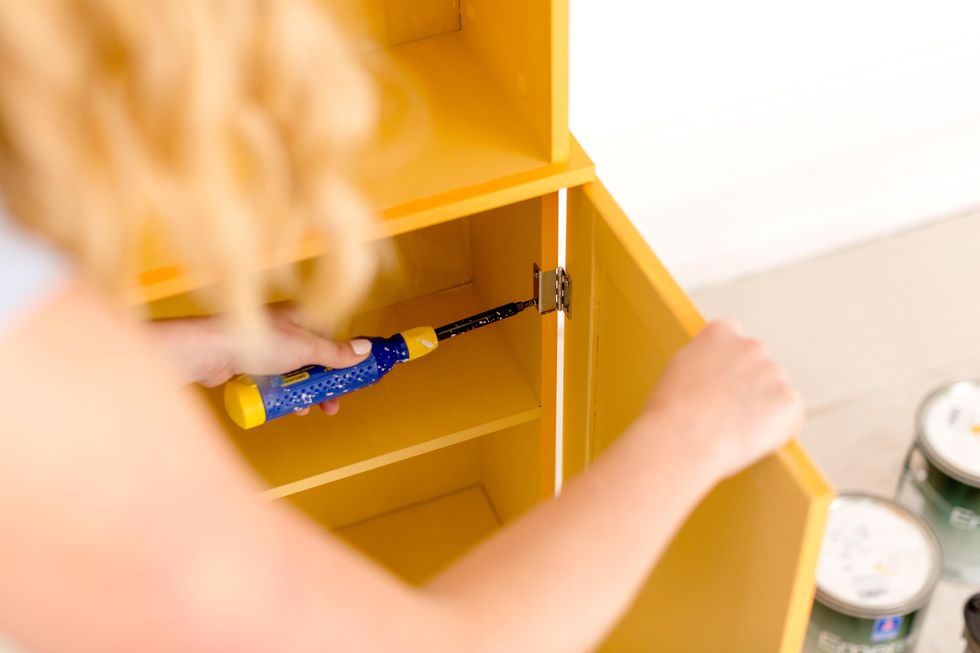
5. Screw door back in.

6. Add new hardware.
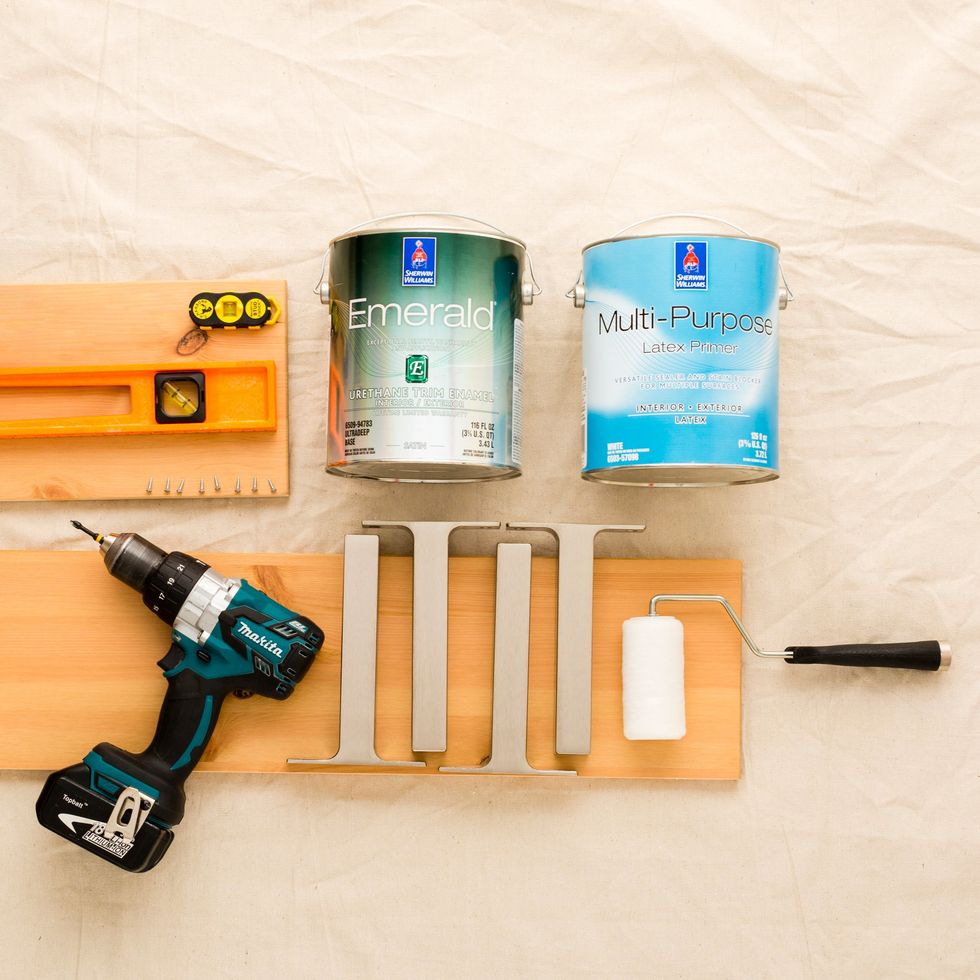
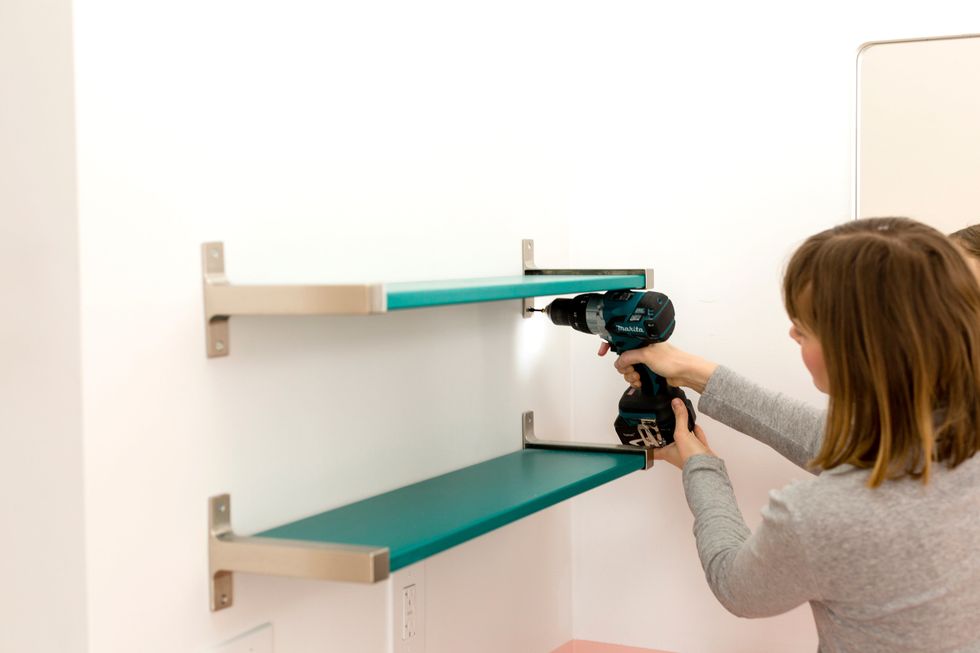
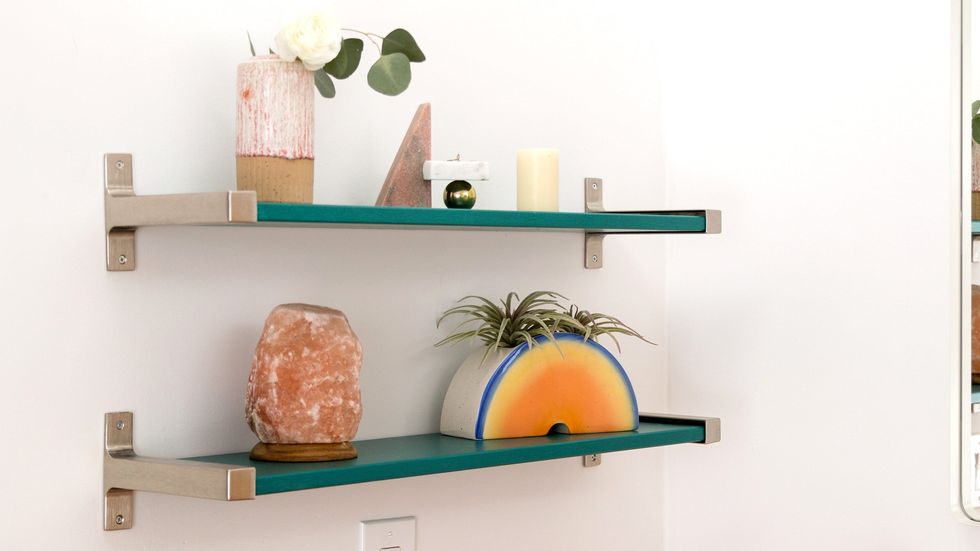
Bathroom: Install Floating Shelves
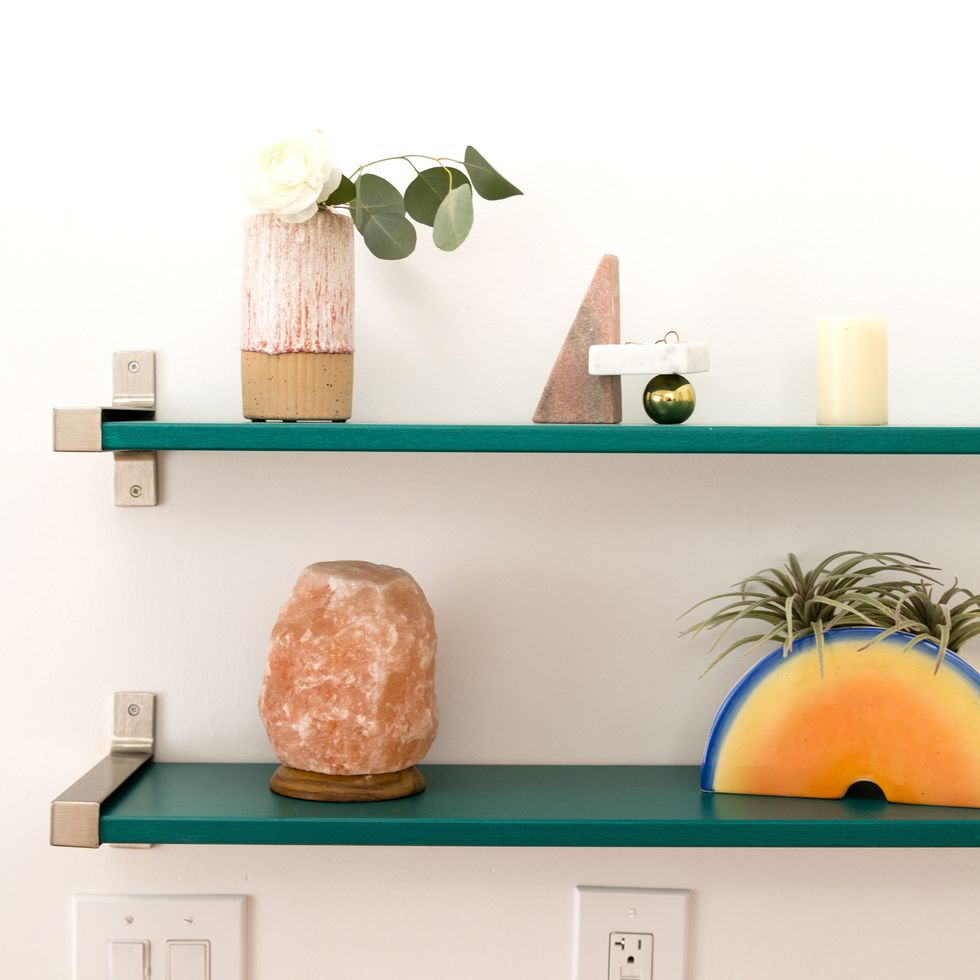
Give your bathroom serious character (and free up much-needed counter space) by installing minimalist, floating wall shelves. Add a personalized touch and deck out with sculptures, air plants, a Himalayan salt lamp, and everything else you love.
Follow our visual guide to complete your project!


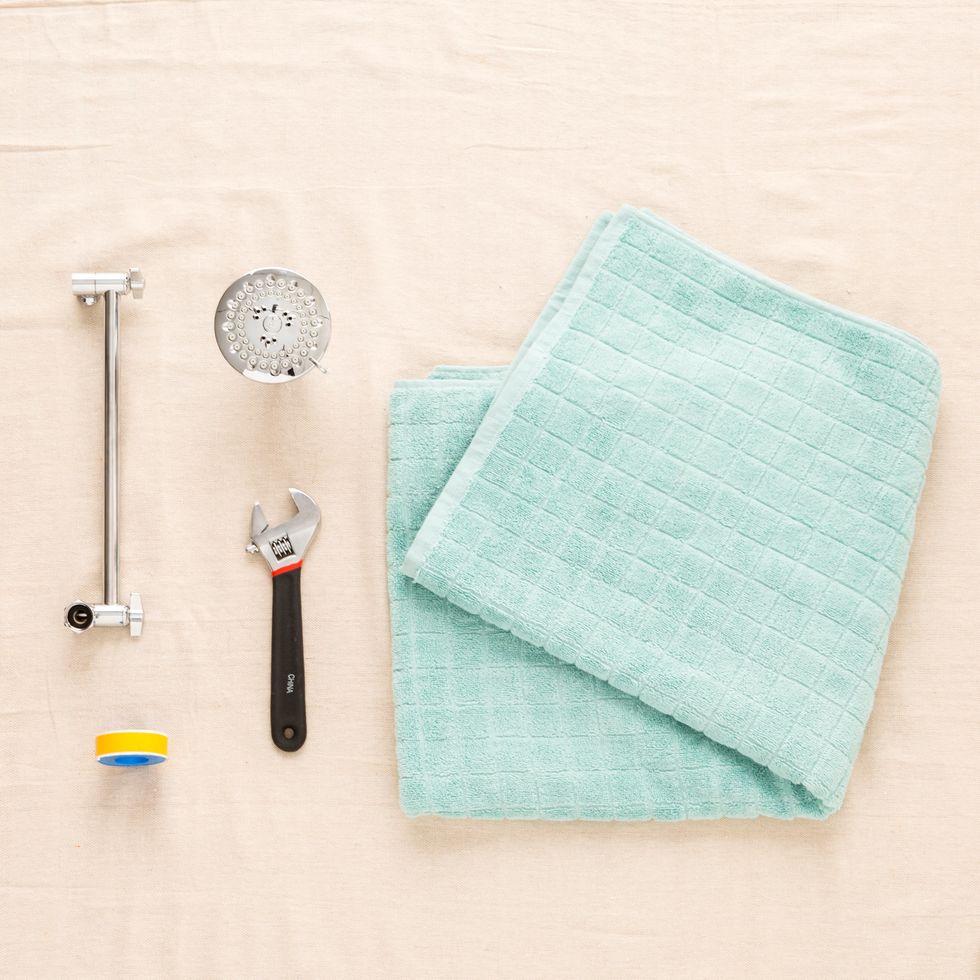
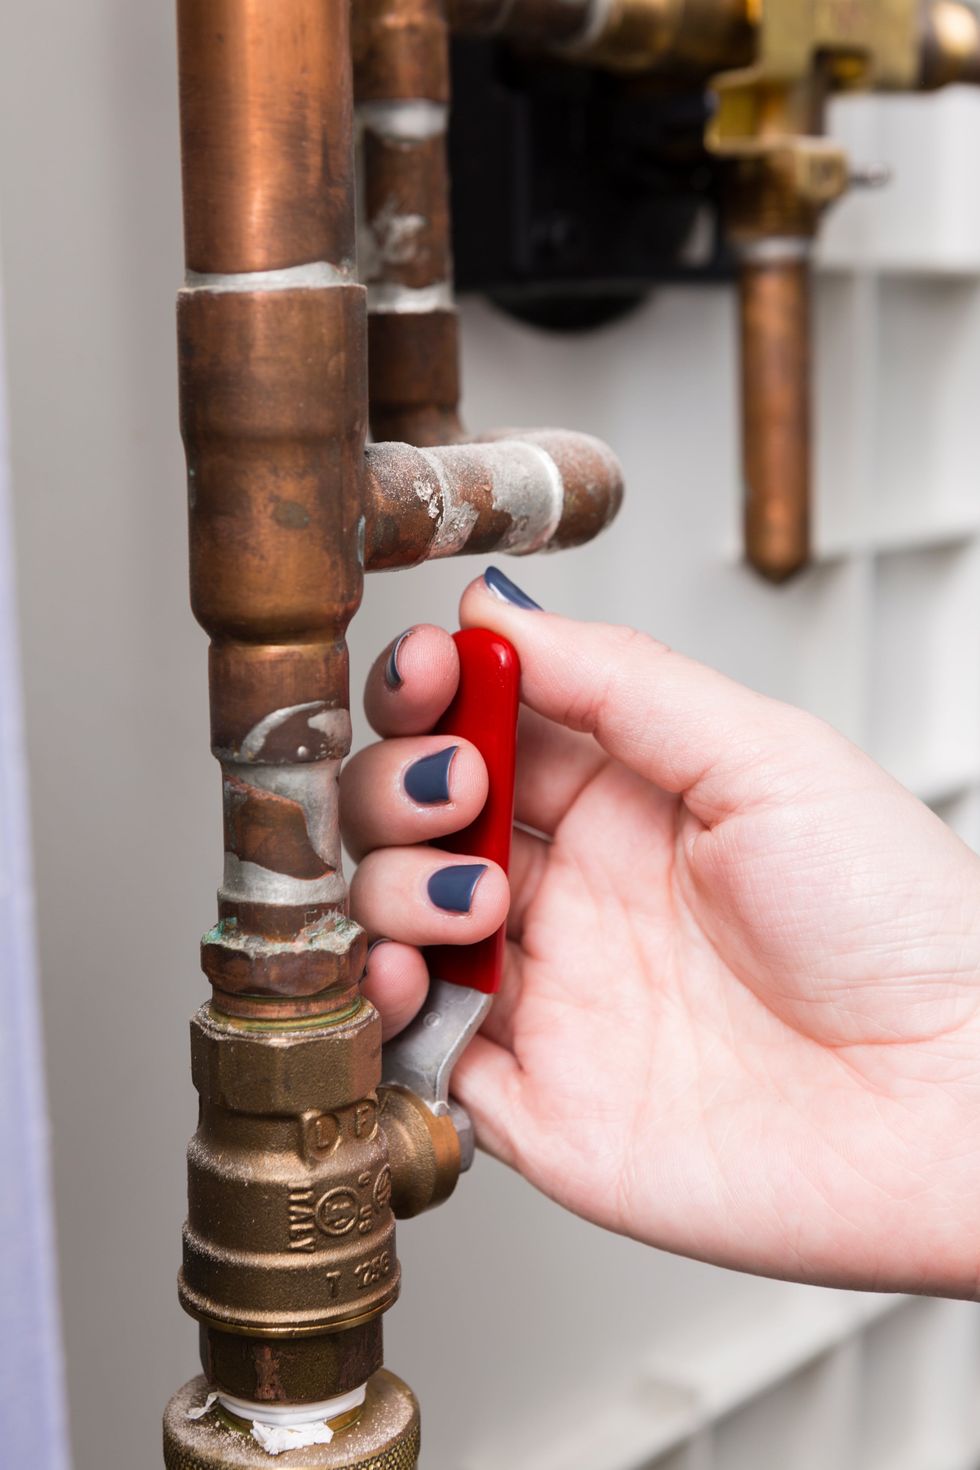
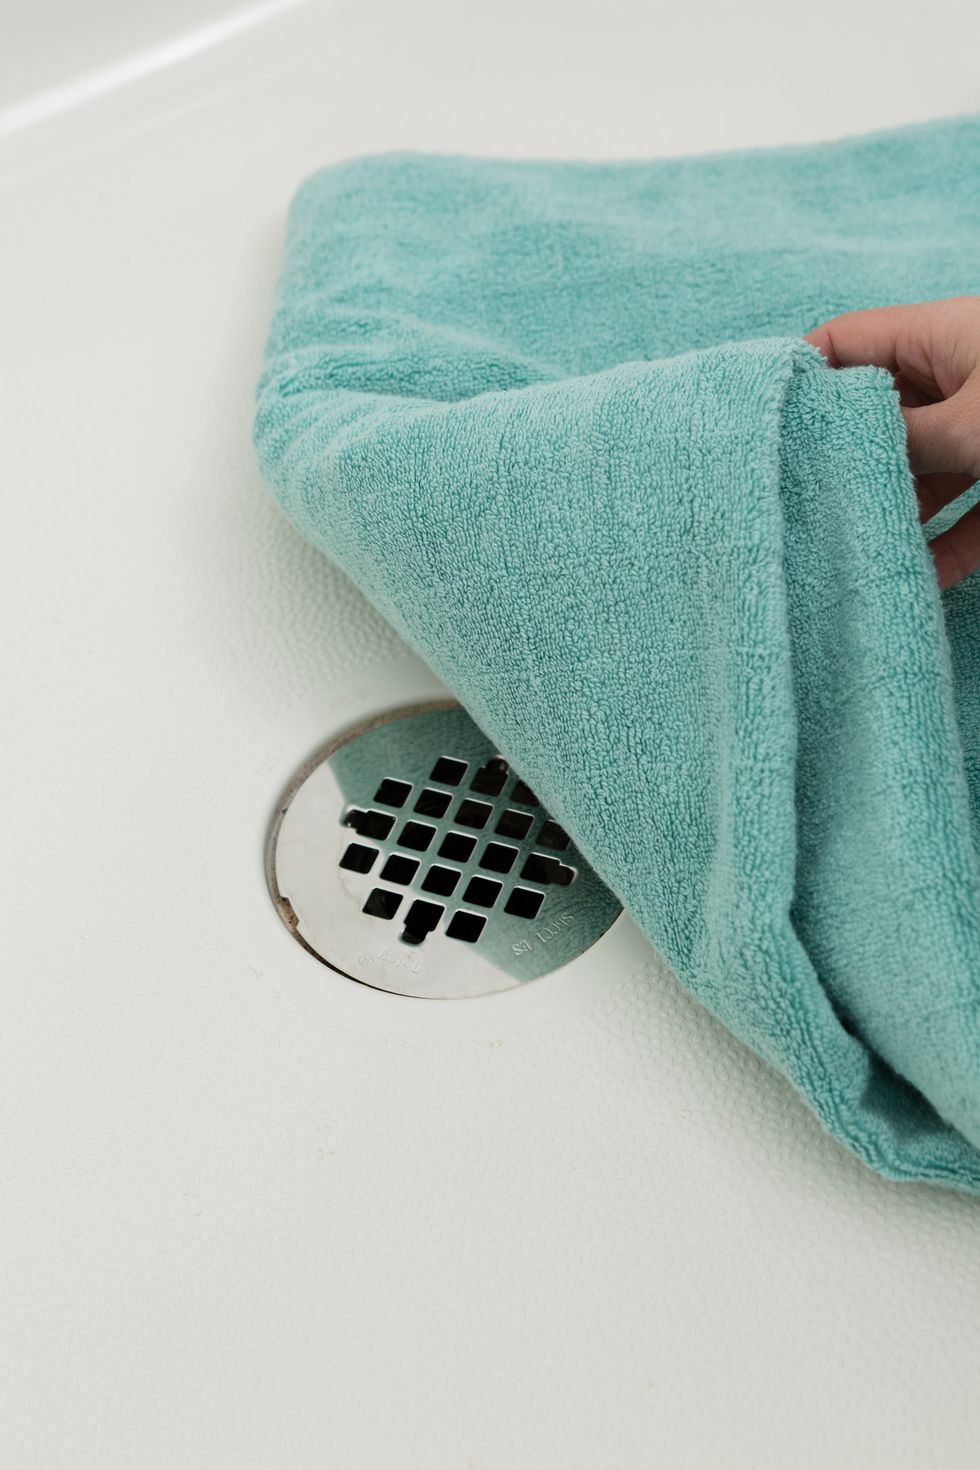
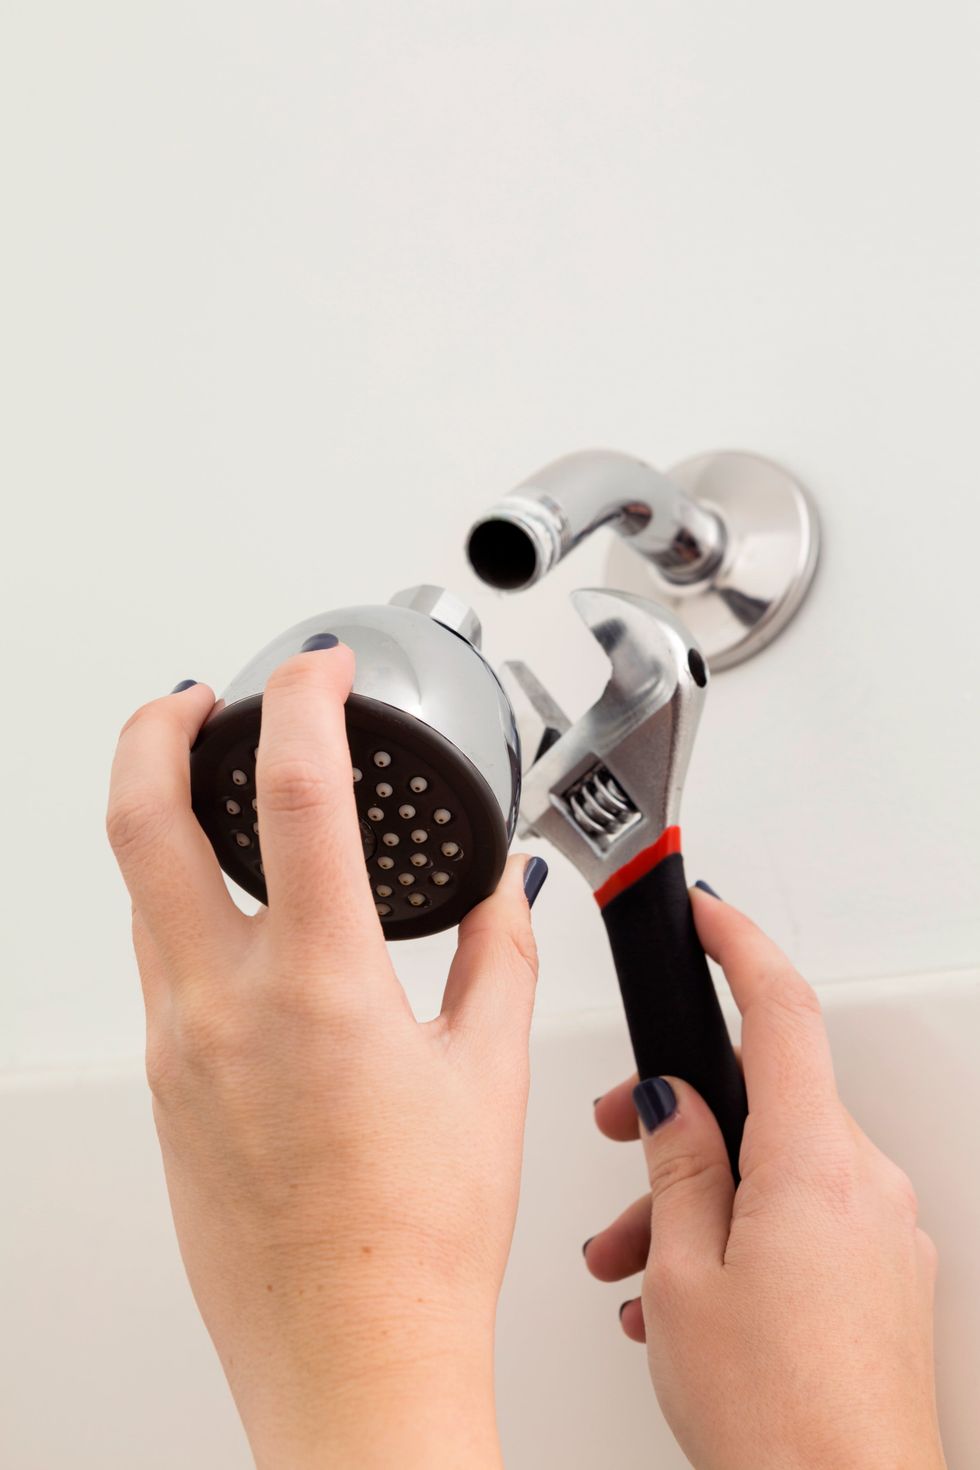
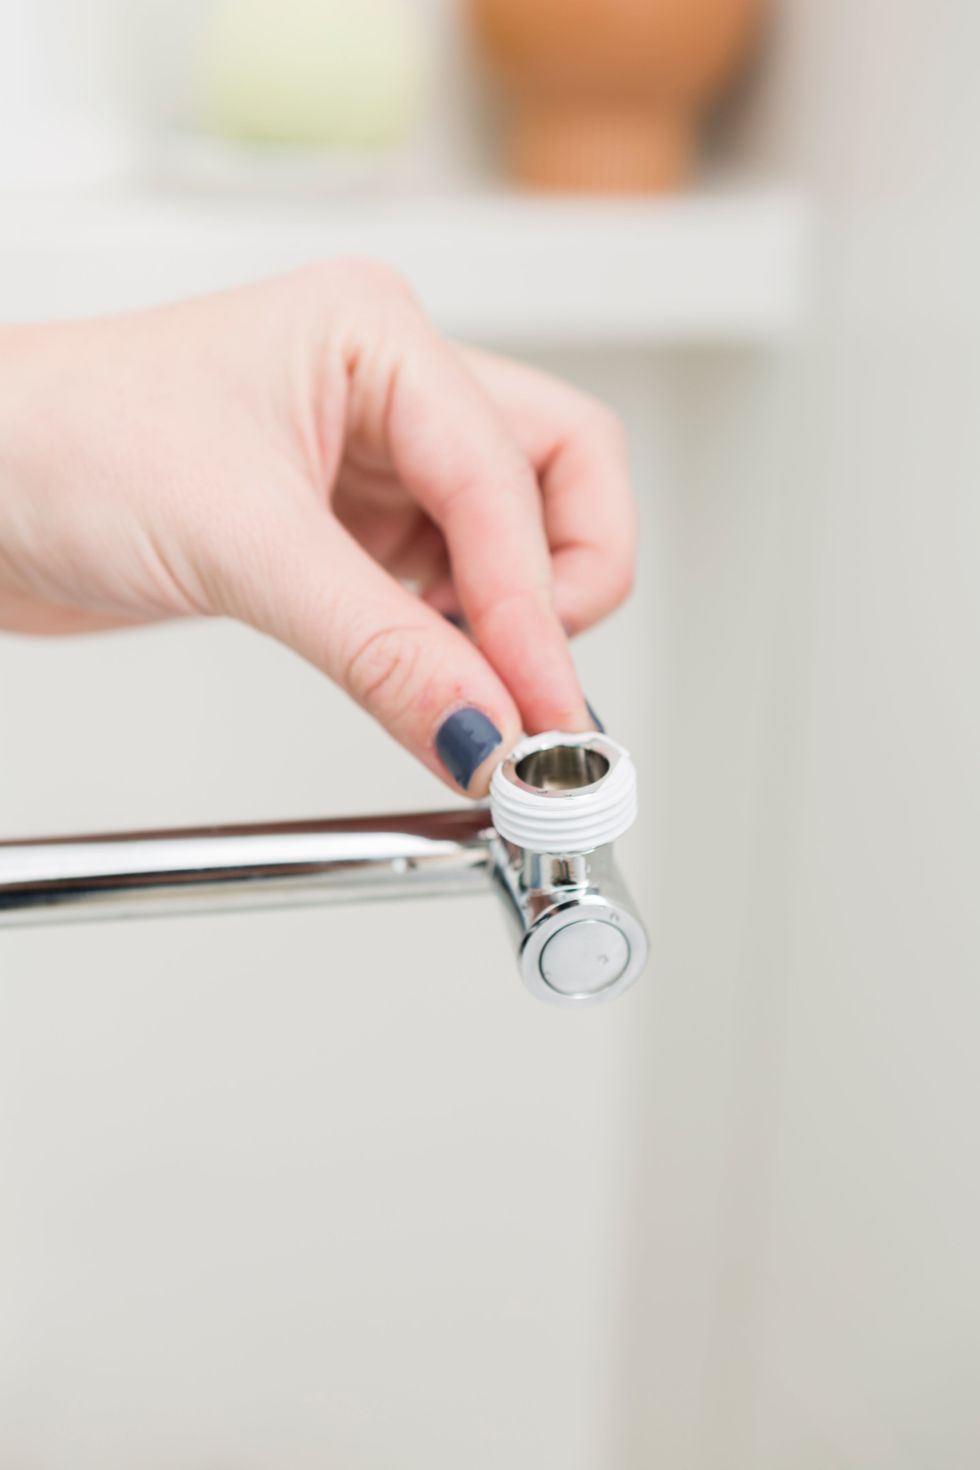
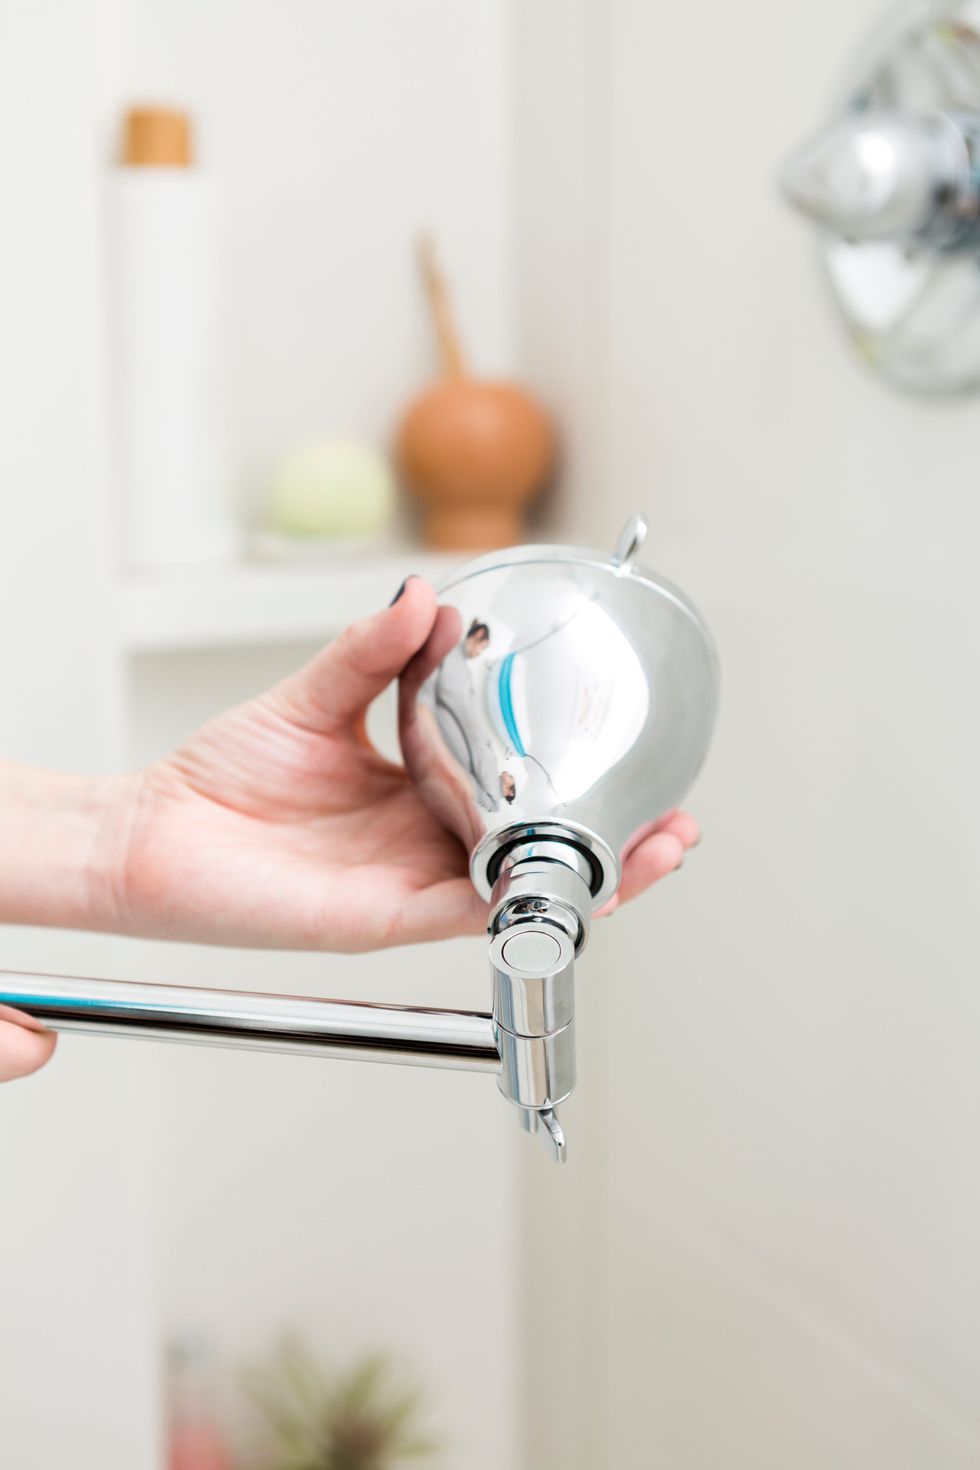
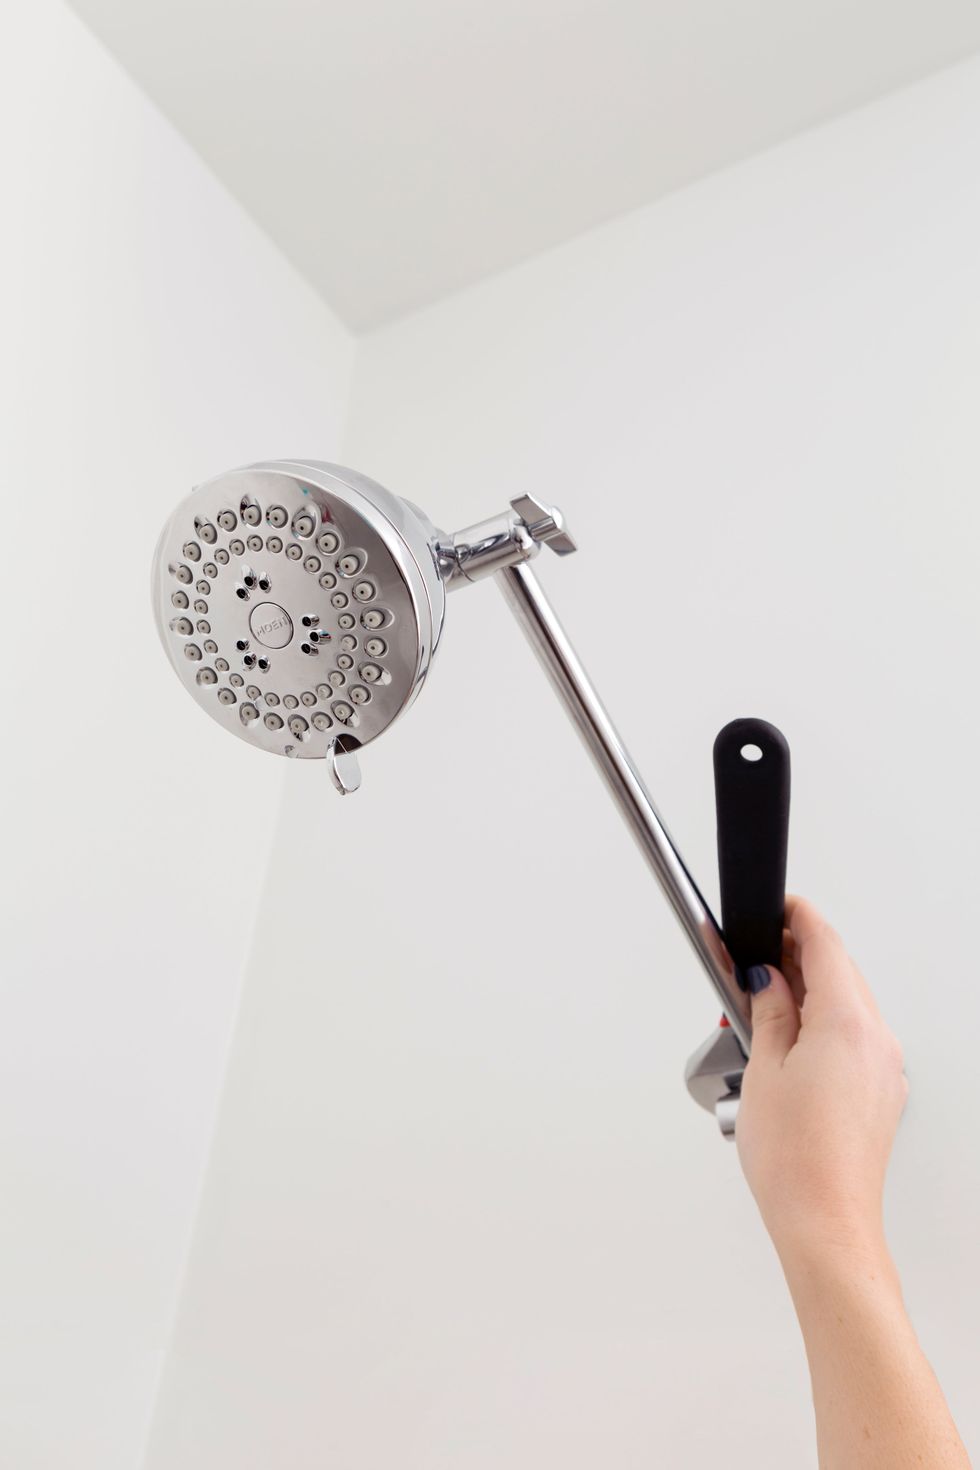
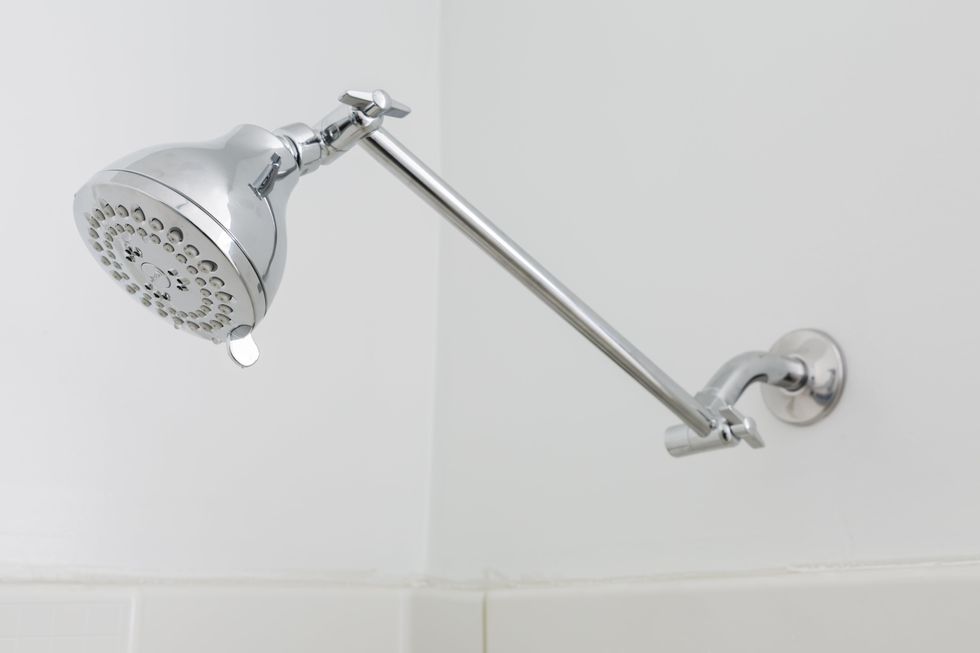
Bathroom: Replace and Extend a Shower Head

Why settle for weak water pressure or a low-hanging nozzle? You'll be singing in the shower when you replace and extend your showerhead in just a few simple steps.
Follow our visual guide to complete your project!

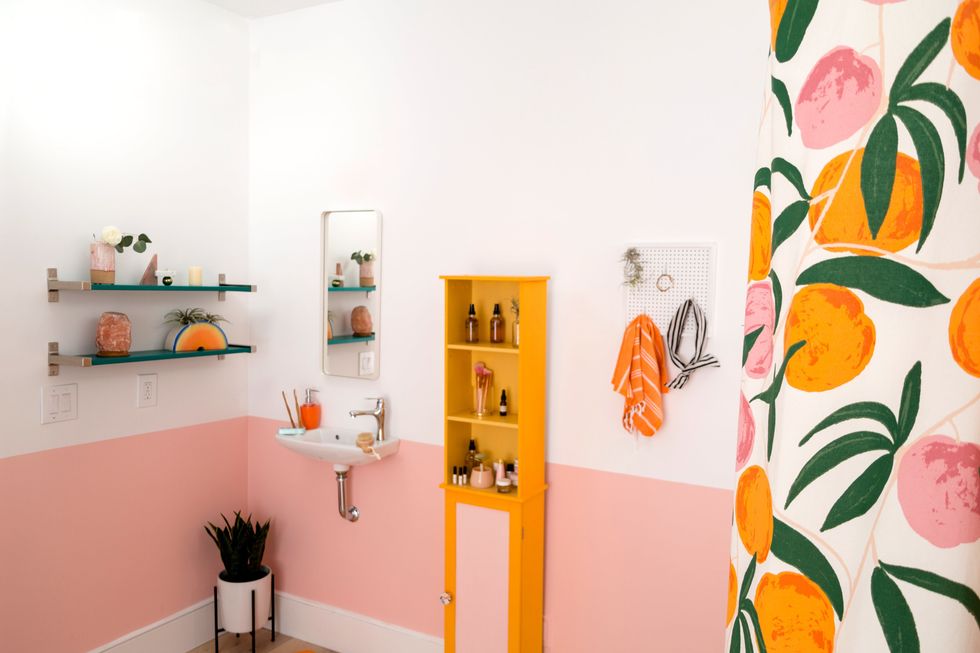
Get The Look of Our Bathroom: August Grove Linen Cabinet, Hotel Spa Chrome Extension Arm, Moen Adler Chrome Four-Function Spray Head Standard, UO Peaches Shower Curtain.
Expert panel: Matt Fraser, Carpenter at Wine Country Builders, Holly Huntley, Contractor at Environs, Chip Wade, HGTV Home Expert and Liberty Mutual Insurance Consultant, and Jason Pickens, DIY Expert for HGTV.com.
Production + Styling: Cassidy Miller, Alonna Morrison, and Kayla Haykin
Authors: Lindsey Graham-Jones and Sarah Koller
Video: Michael Sullivan, Ryan Shelley, and Trevor Tillman
Photography: Brittany Griffin + Chris Andre
Design: Torii Burnett
* Please note: WARNING! Removal of old paint by sanding, scraping or other means may generate dust or fumes that contain lead. Exposure to lead dust or fumes may cause brain damage or other adverse health effects, especially in children or pregnant women. Controlling exposure to lead or other hazardous substances requires the use of proper protective equipment, such as a properly fitted respirator (NIOSH approved) and proper containment and cleanup. For more information, call the National Lead Information Center at 1-800-424-LEAD (in US) or contact your local health authority.
This post was empowered by Sherwin-Williams®.


0 Commentaires