
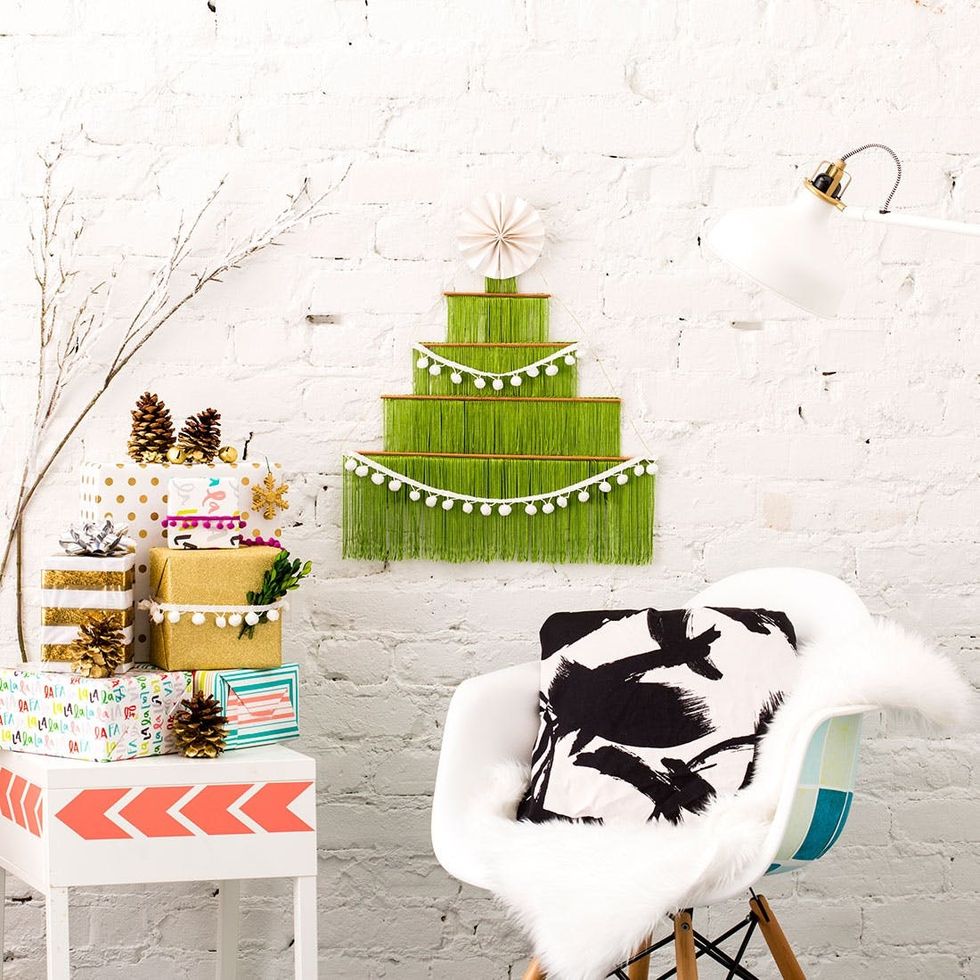
B+C lovers! We are back at it again with another great Christmas tree alternative for all of you that live in a small space. This fringe tree was actually inspired by my uncle’s epic wall fringe tree. Every year my family travels up to Binghamton, New York to visit him the day after Christmas, and I’ve always been amazed by his trees — in one room he decorates with the tallest Charlie Brown tree he can find and in the other room he sets up his five-foot fringe tree. I love that this tree can easily be stored away then reappear during the holiday season year after year. I decided to give it a B+C spin and created my own fringe tree that can live with me across the country in California.

It's colorful! It's cute! It doesn't take up any floor space!
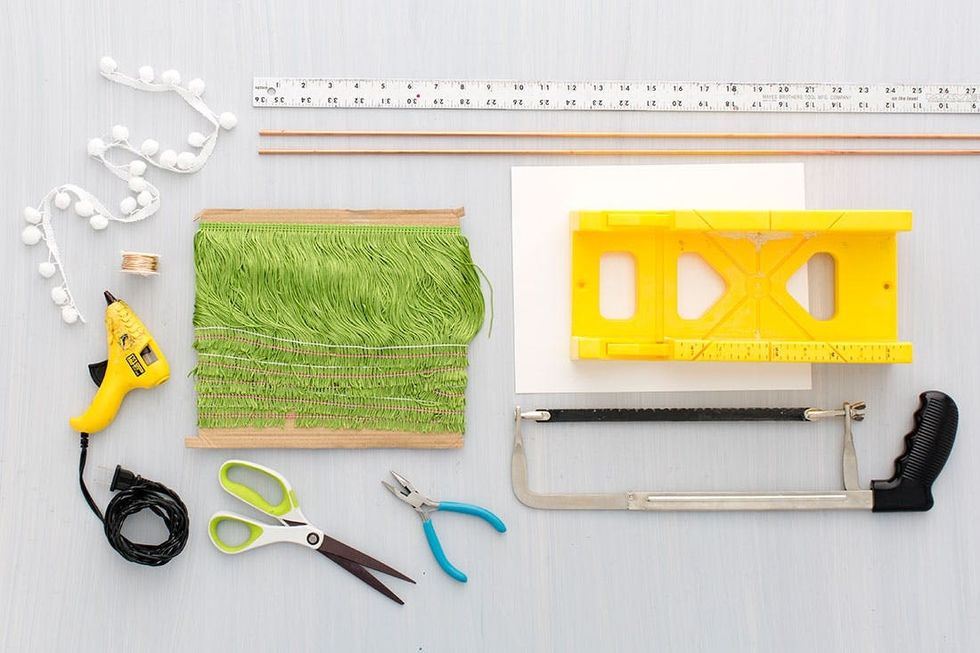
Materials:
- Copper pipes
- Spool of 6-inch green fringe
- Pom-poms
- Silver cardstock
- Jewelry wire
Tools:
- Hack saw (with a fine blade)
- Miter box
- Ruler
- Jewelry pliers
- Scissors
- Hot glue gun

Instructions:
- Cut five pieces of fringe that measure the following lengths: 18 inches, 14 inches, 10 inches, six inches and two inches. Then cut five pieces of copper pipe using the same measurements as the fringe.
- Attach the fringe to the back side of the copper pipe using hot glue.
- Cut a long piece of wire and string it through the copper pipe that measures 18 inches. Make sure the wire is even on both sides of the copper pipe. Feed the two ends into the 14-inch copper pipe (they will come across in the pipe and come out on opposite sides). Continue this until you’ve strung all the copper pipe pieces on top of one another and they form a tiered triangle.
- Hot glue the pom-poms to the front of your Christmas tree, draping them as garland.
- Create a small rosette out of card stock and attach it to the top of the tree by gluing it to the smallest copper pipe. Also glue two additional tabs of paper to the back of the rosette to secure it to the copper pipe. Finally, add a hook made out of jewelry wire so that you can hang it on your wall.
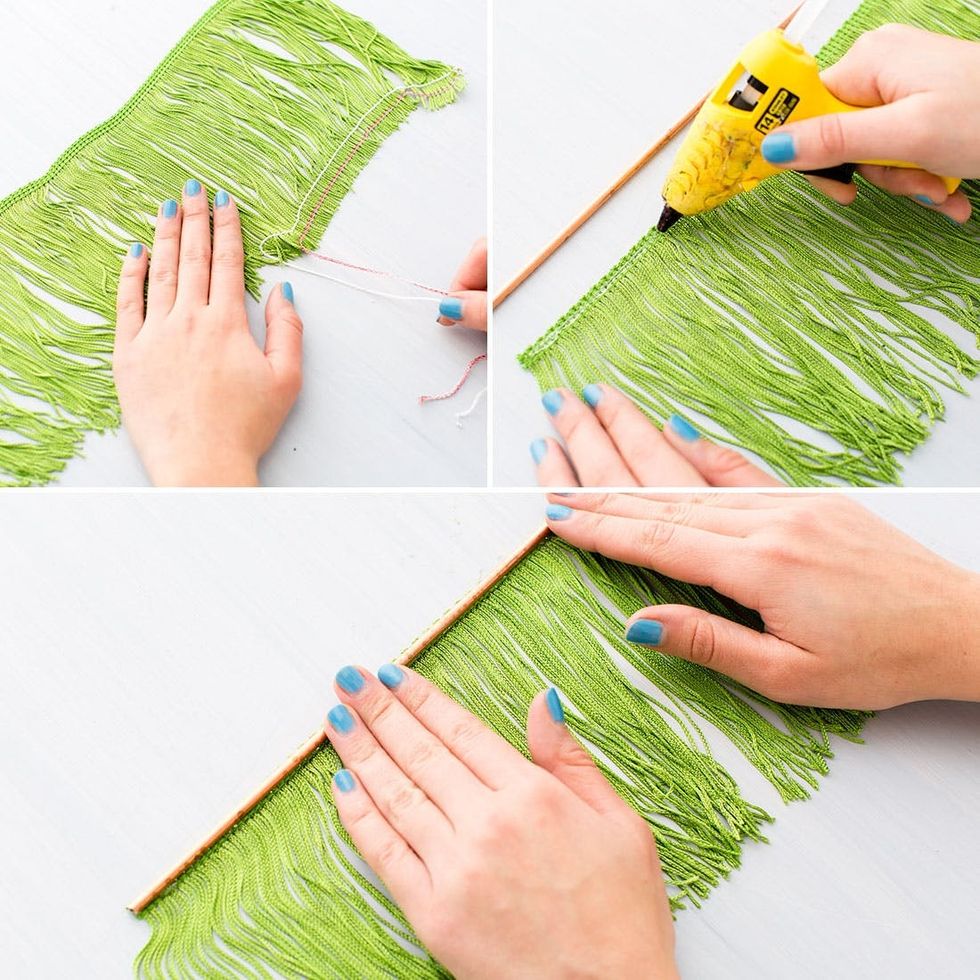
Remove the strings that hold the fringe together, then glue the fringe onto the back of the appropriate copper pipe (18-inch fringe goes with 18-inch copper pipe).

Cut a long piece of wire and string it through the 18-inch copper pipe. Make sure the pipe is siting in the middle of the piece of wire (the wire coming out of each end should be even). Then string the ends through the 14-inch copper pipe. The piece of wire coming out of the left side will go into the left side of the next pipe but will come out on the right (wire on the right goes in the right and comes out on the left) and the wires will cross in the pipe.
Keep stringing your copper pipe pieces on top of one another until they form a stacked triangle. We didn’t have a long enough piece of wire to connect them all, so we connected the bottom two and top three with separate pieces of wire, and then connected them by wrapping the wire together and hiding the ends in the pipe.

Once you’ve built your tree, grab your hot glue gun and start decorating. We added a pom-pom garland on every other tier of our tree.
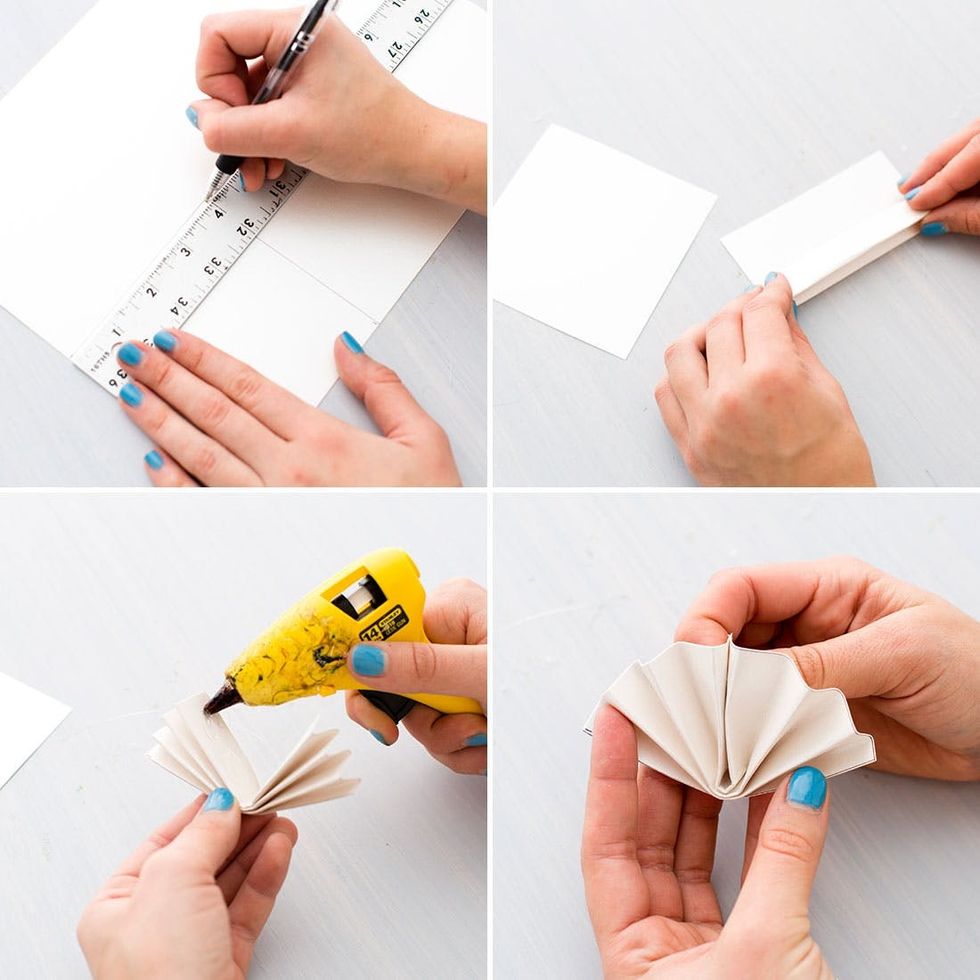
A Christmas tree isn’t complete without a star! Create a rosette out of paper by cutting out two four-inch squares and accordion folding. Then glue the top edges together to form a semi-circle.

Finish off your rosette by gluing the two semi-circles together to form a beautiful silver star.

Attach the rosette to the top of the tree using hot glue. We used extra strips of paper to really hold the star in place. Finish it off with a wire hook to hang on your wall.
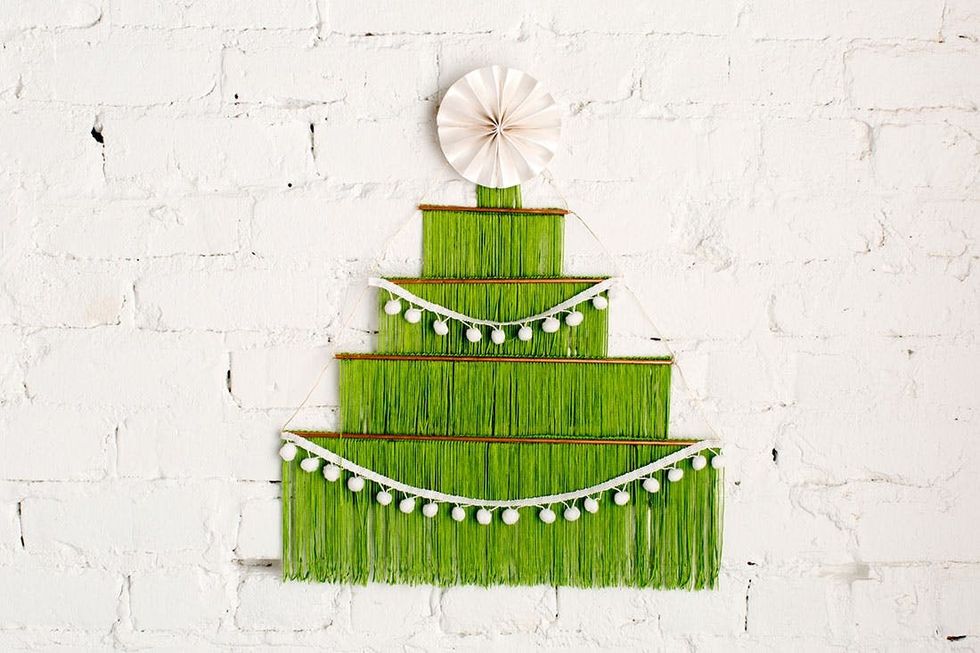
A Christmas tree fir for any and all apartments.
Stack up your presents and Santa’s cookies on a side table near your small space fringe tree. We are sure that Santa will be impressed :)

Are there any holiday decor pieces that your family decorates with every year? Share your stories with us on Twitter and check out our Pinterest for more DIY content.
This post has been updated.


0 Commentaires