
Channel your 90’s techno dance party selves with a bunch of glow-in-the-dark pumpkins. While we’ve been working on our Halloween costumes, staying up too late making jungle bass mix tapes, and watching the hit 1995 film Hackers starring Angelina Jolie, we also came up with some great projects and were sure to stock our store with everything you need to make your halloween stuff glow.

Materials + Tools:
- pumpkins
- blue painter’s tape
- marker/pen
- printable templates
- cutting mat
- xacto knife
- glue stick
- glow-in-the-dark spray paint
Instructions:
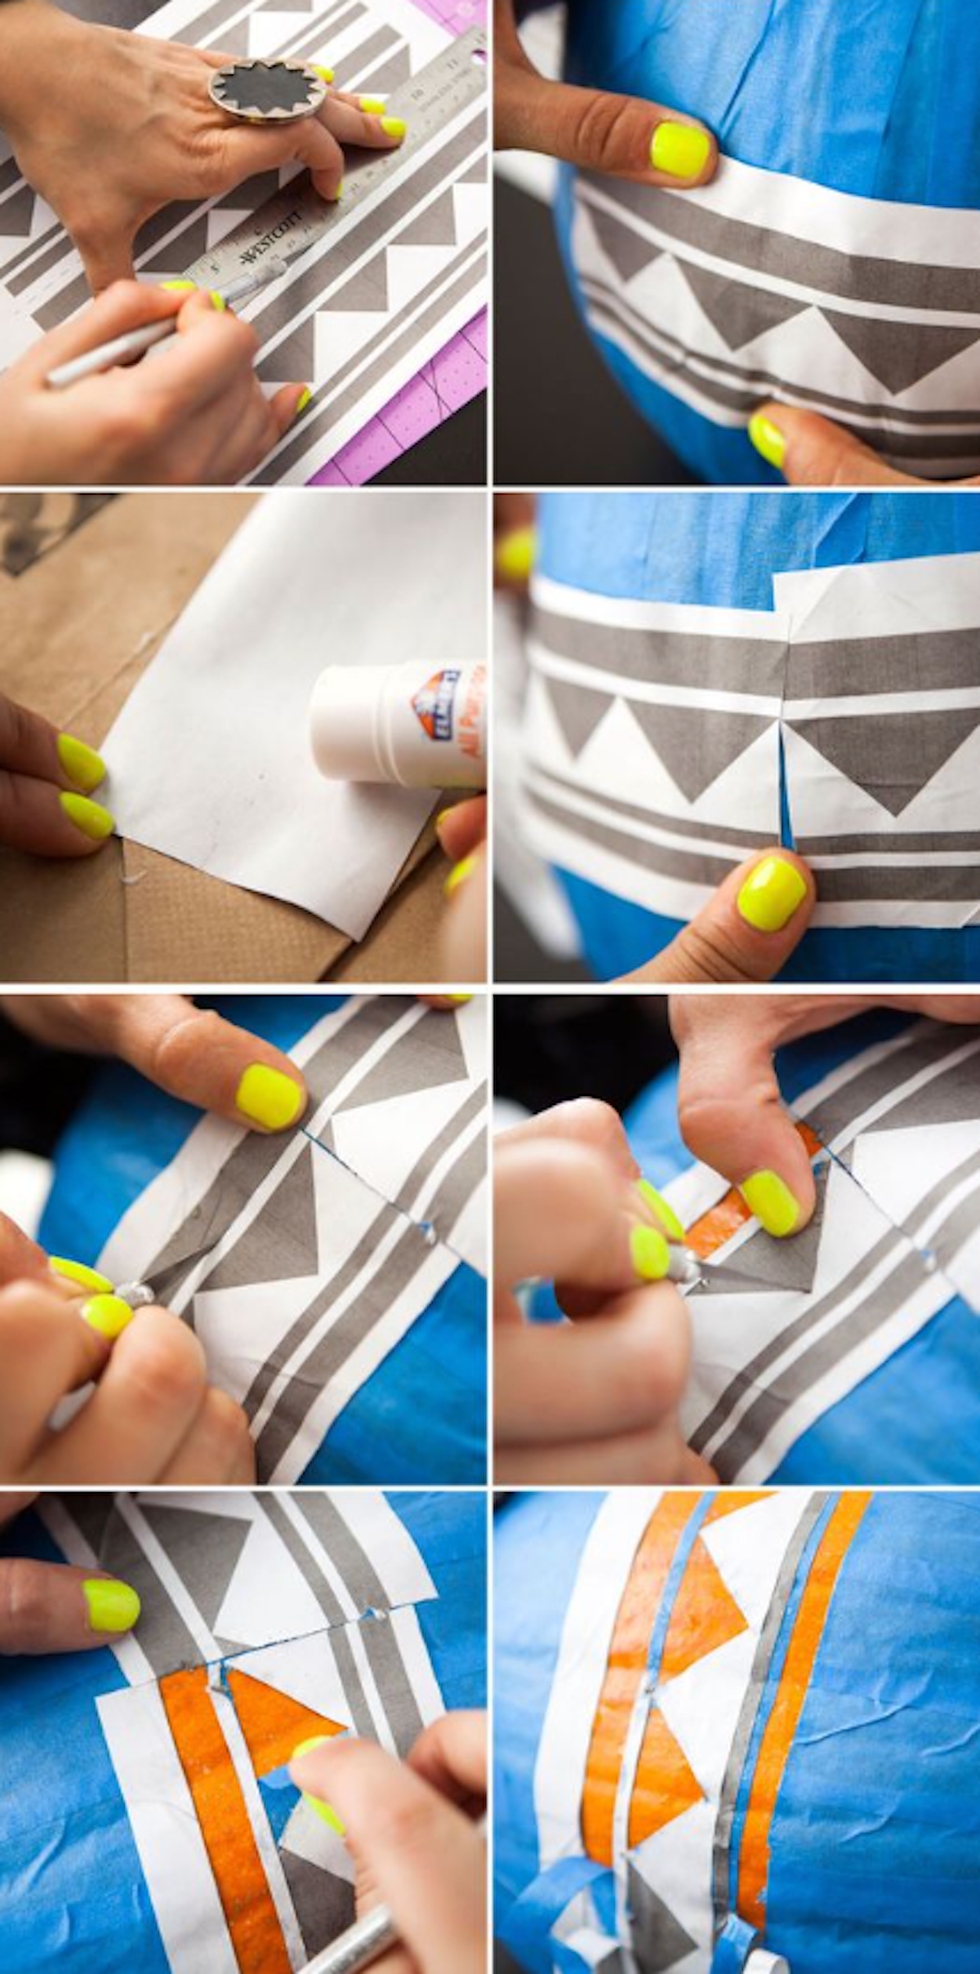
Starting with the Tribal Belly Band Pumpkin:
- First cover your pumpkin in blue painter’s tape. It’s easiest to cover it in strips from top to bottom. Press the tape down so you get a nice seal.
- Cut out the geometric template down the dotted lines and cut off the white ends on each one.
- Cover the back of the strips in glue and place around the center of the pumpkin. You won’t get the paper to lie perfectly flat so don’t even try. Just try to keep the whole template moving around the center of the pumpkin. It took 4 strips for us to get around our pumpkin, so may need to print out more than one template.
- Cut out the gray parts of the design. Don’t worry about slicing into the pumpkin a bit.
- Remove the gray parts of the stencil along with the tape beneath it.
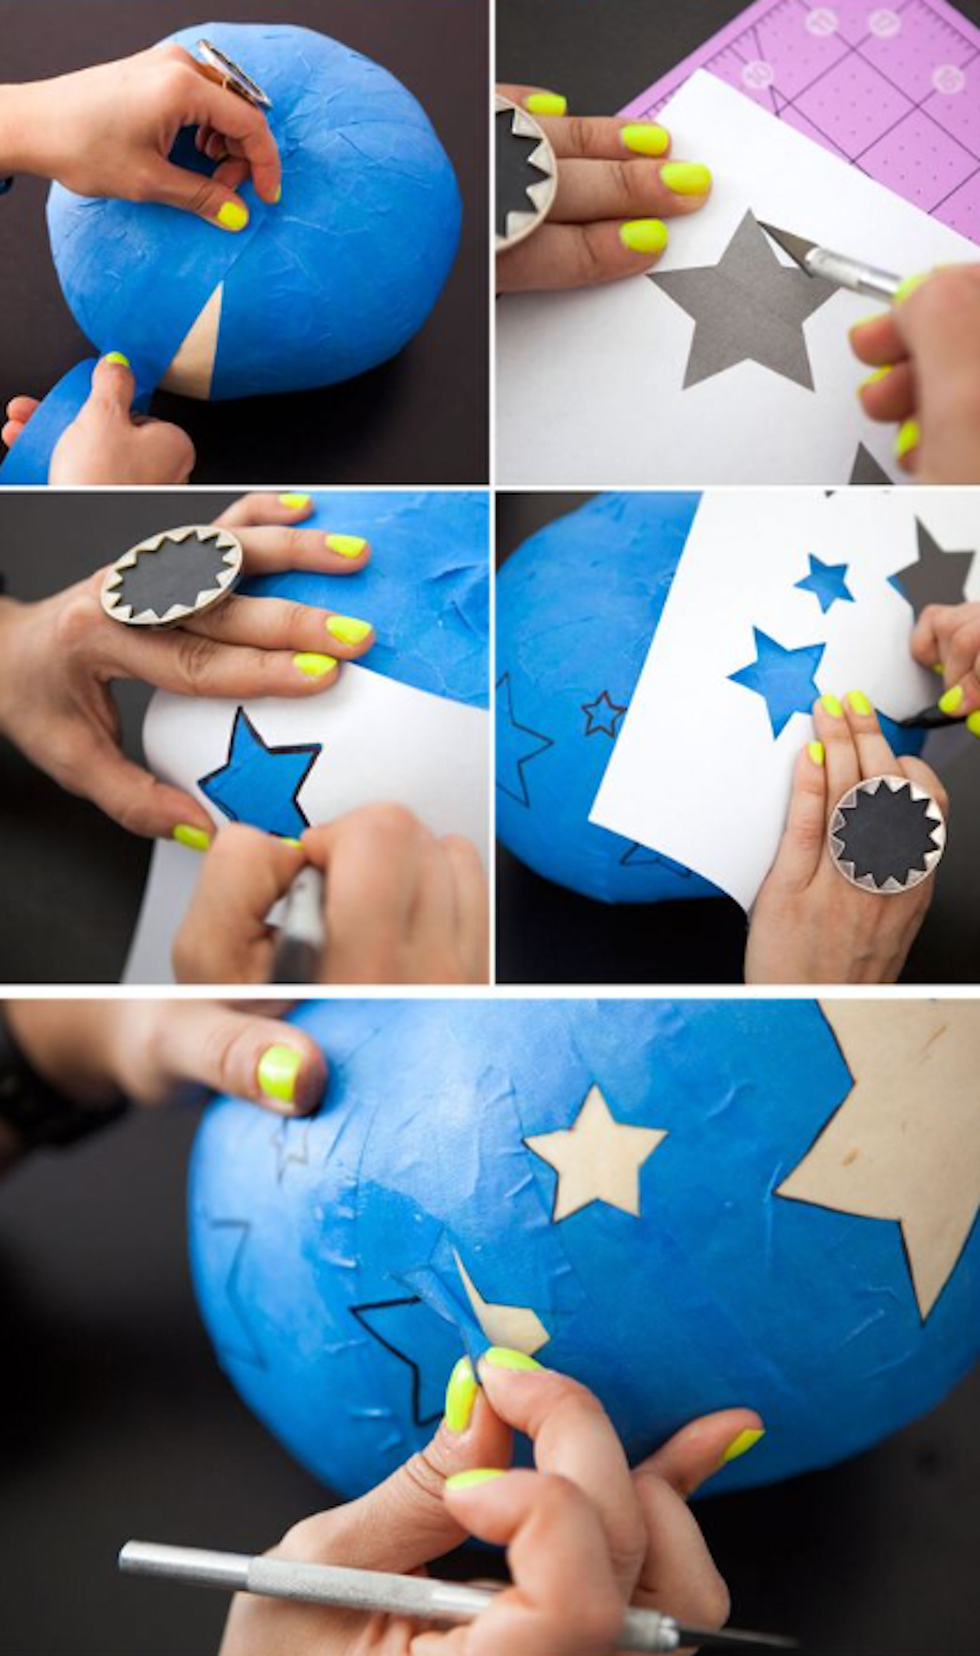
And onto the Star Struck Pumpkin:
- Cover the pumpkin you will use with tape again like you did for the last one.
- Cut out the gray parts of the star stencil.
- Use the stencil to draw stars onto the tape in an arrangement that you find pleasing.
- Cut out the stars with your xacto and remove the tape.
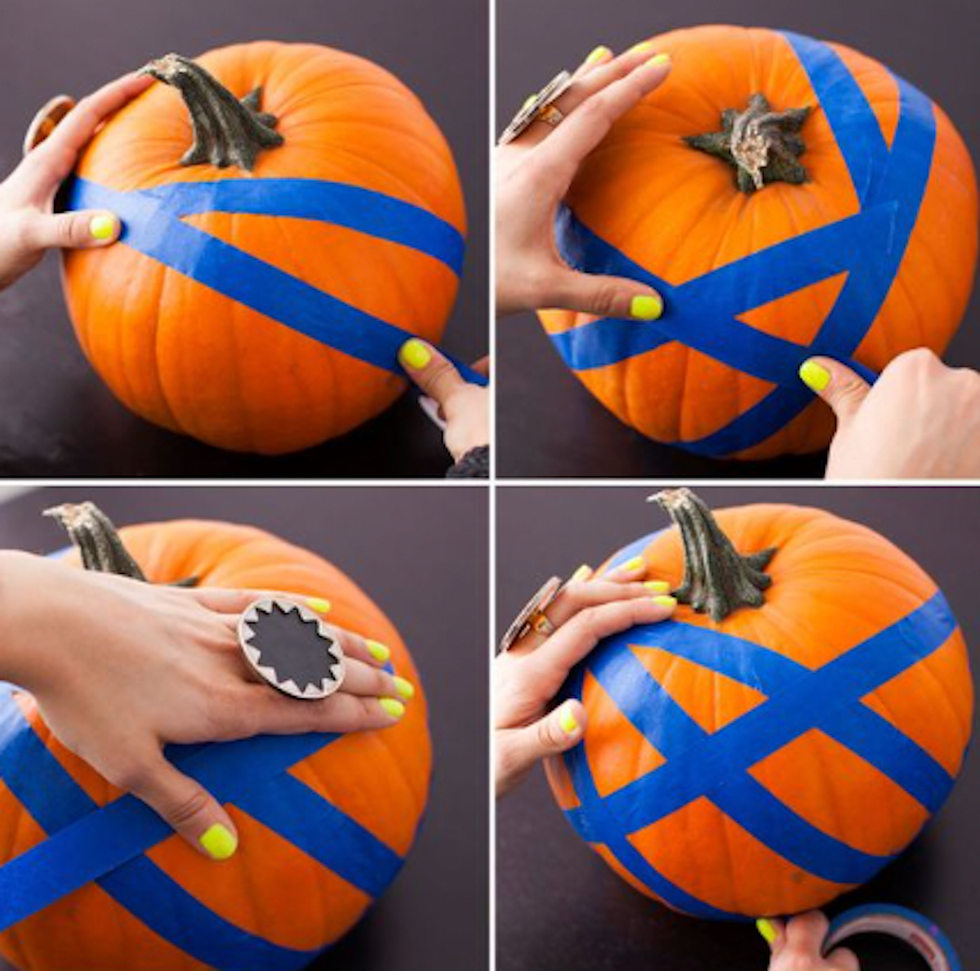
Now, finally the Geometric Mosaic Pumpkin:
- Use painter’s tape (we recommend 1/2”) to create geometric shapes on your pumpkin.
- Now we are ready to spray all three pumpkins with glow-in-the-dark spray paint.
- Spray a coat or two on each, then peel off painter’s tape and let ’em glow!
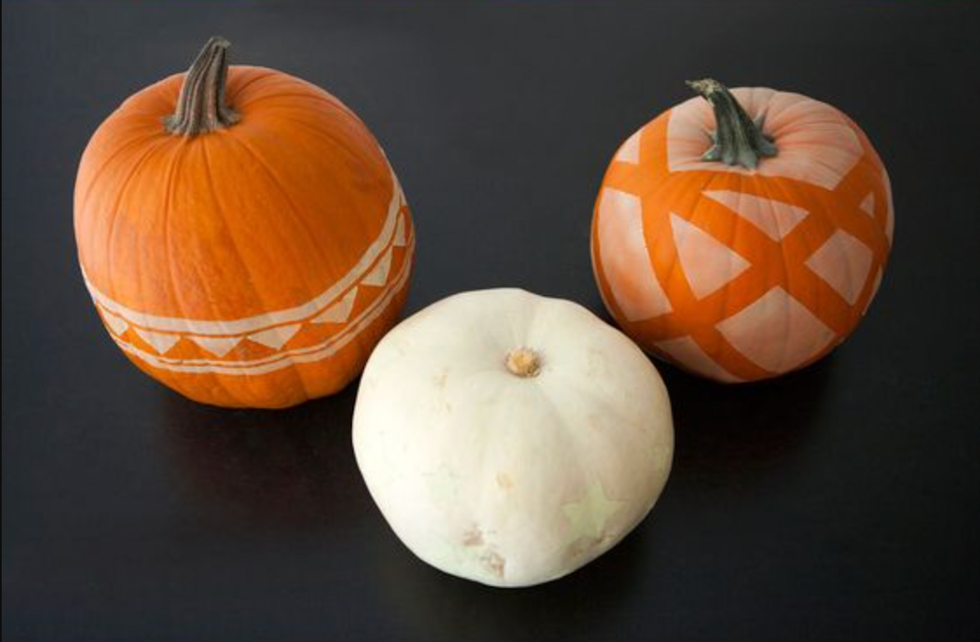
As far as pumpkins go, we went with two orange and one ghost white.

They look pretty glowing even in daylight, don’t you think? Now… let’s turn the lights off…
Wahoo! How dope do those rave-ready punkins look?
Which design is your favorite? What are your favorite glow-in-the-dark pumpkin looks? Talk to us in the comments below.
This post has been updated.


0 Commentaires